This Mod Podge tissue paper frame is ideal for crafting quickly and adding vibrancy to your space. It’s so straightforward that novice crafters will find this project enjoyable.
Required Skills: Beginner. This is a fantastic concept for individuals who have never utilized Mod Podge before! The shapes cut from tissue paper are small and simple for decoupage tasks. This wood project would even be entertaining and effortless for children.
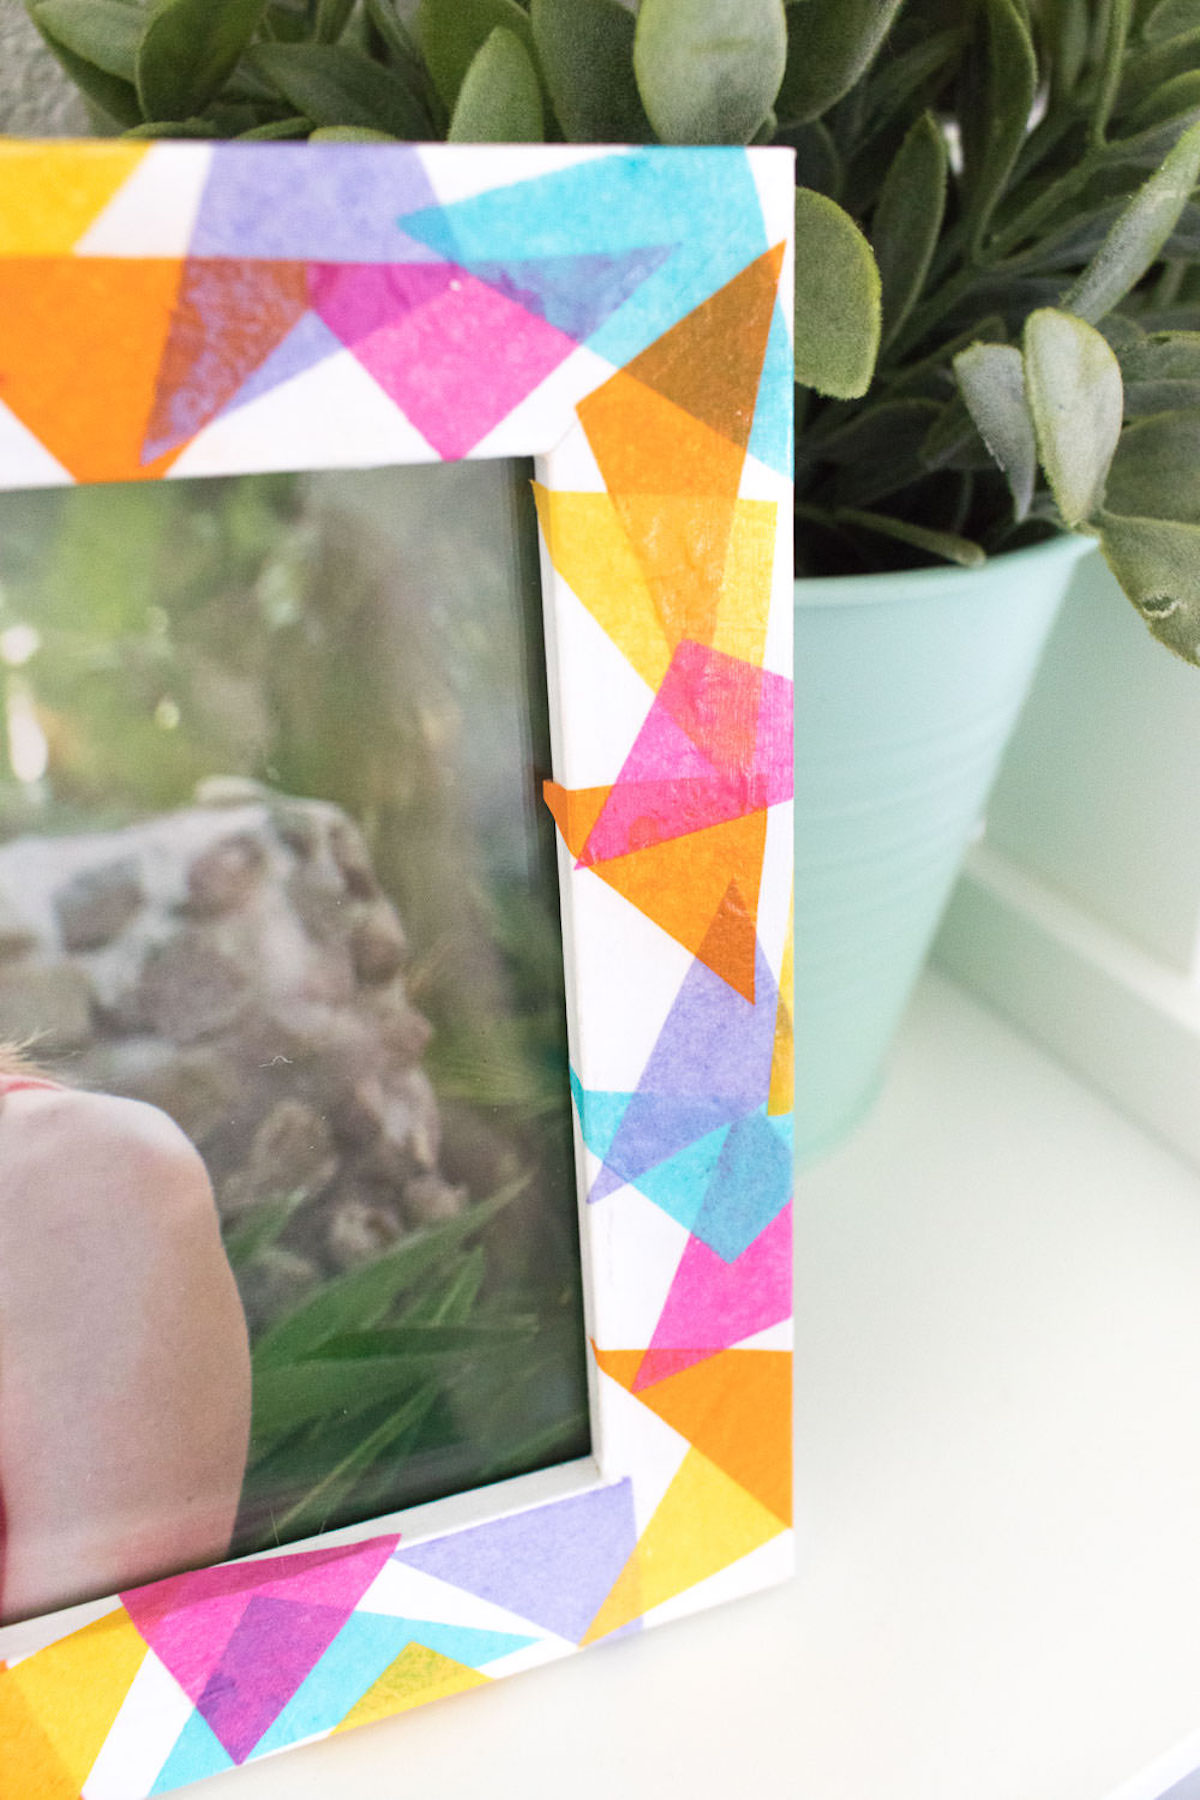
Hello! This is Holly from Club Crafted once more, presenting a straightforward decoupage DIY for creating a geometric tissue paper frame. It’s a delightful craft – you layer pieces of triangle-shaped tissue paper, similar to a collage, to assemble your final creation.
(find more picture frame ideas here!)
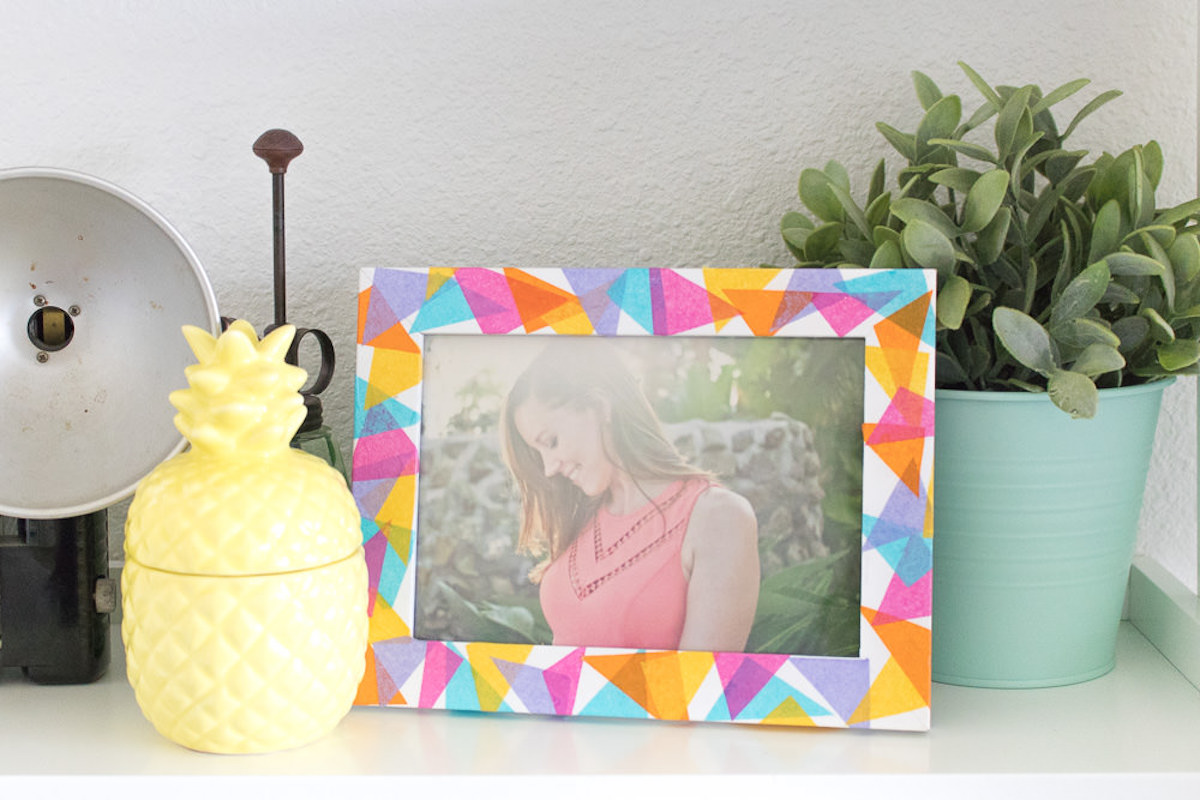
This is such a straightforward endeavor, and it brings a splash of color into your space. By utilizing classic Mod Podge along with a selection of colored tissue paper, I transformed a very budget-friendly frame to appear brand new and special.
Now, this photo frame attracts attention on our shelf, and I adore the burst of color it contributes to our neutral-toned office.
Tissue Paper Picture Frame
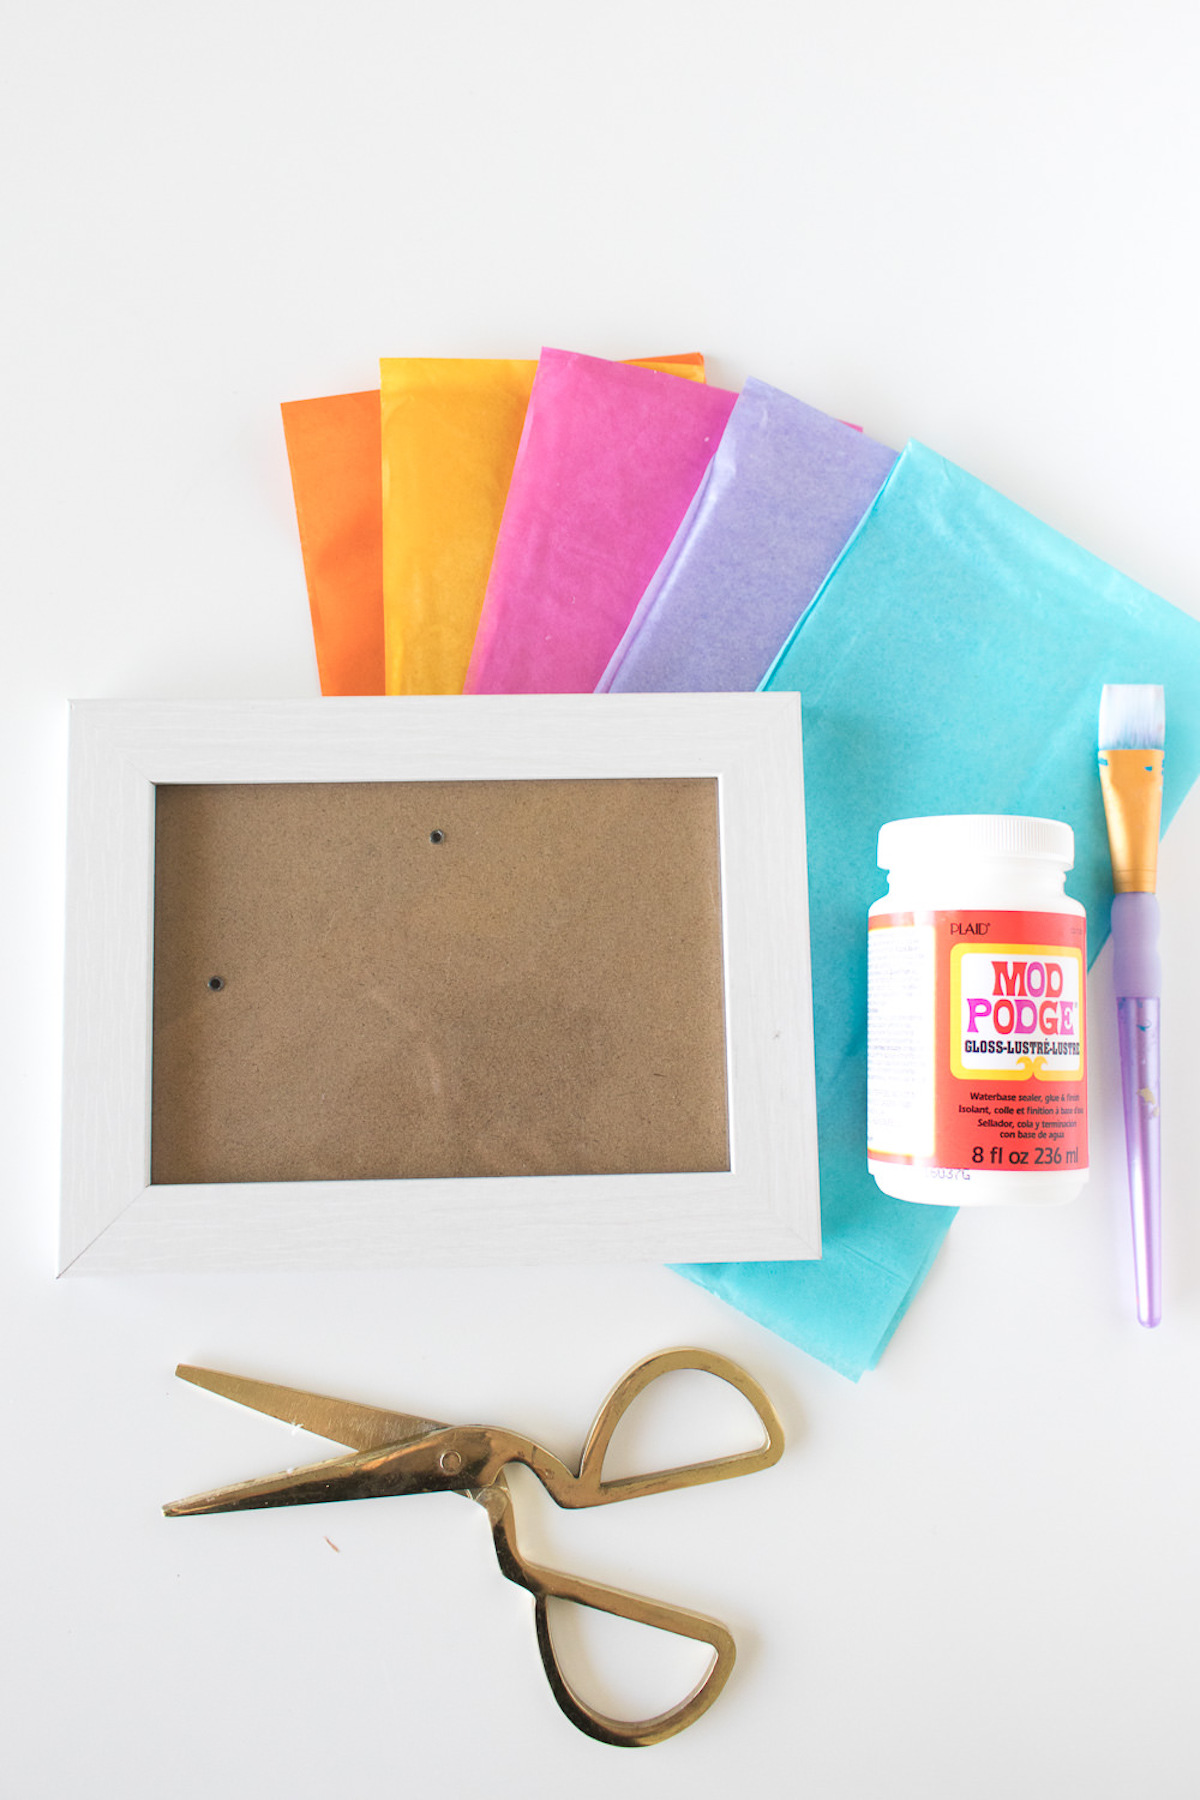
Gather These Materials
Detach the Backing
Step 1: Remove the backing and glass of the frame to retain only the wood (or plastic or metal) segment.
Slice the Tissue Paper
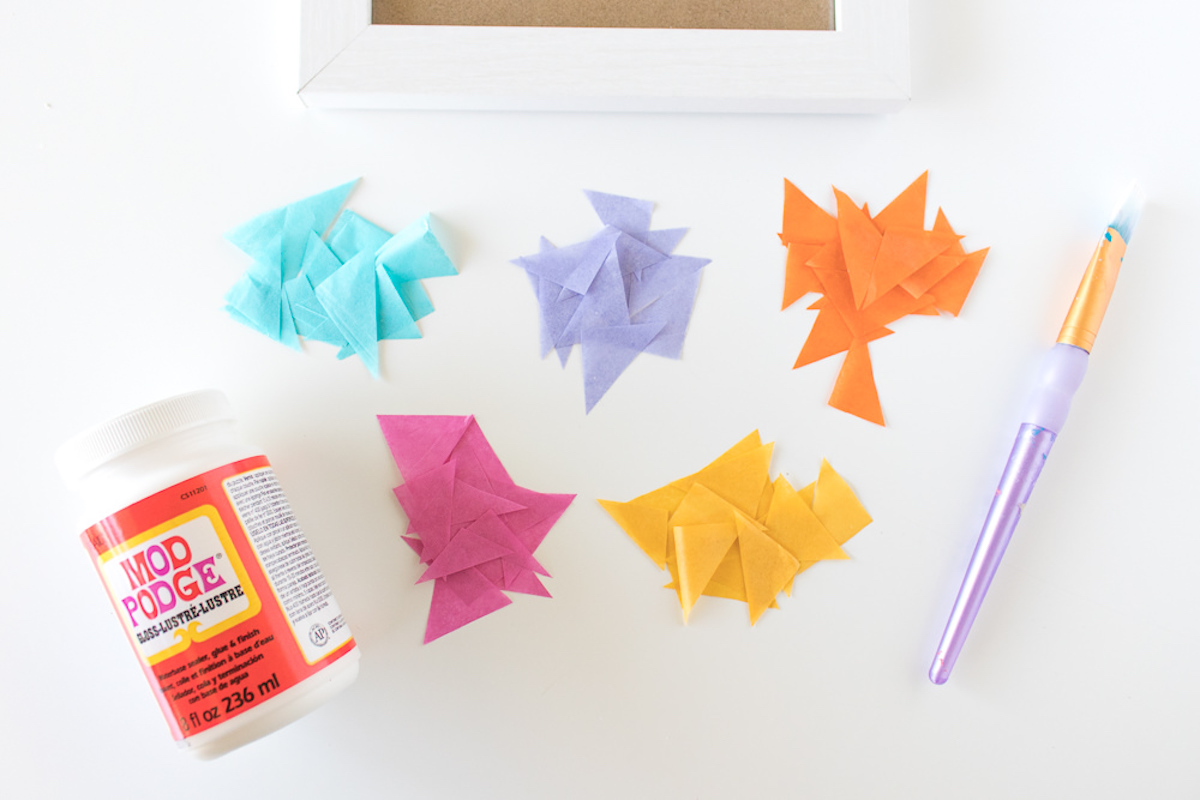
Step 2: Trim the colored tissue paper into small triangles. I discovered that the quickest method is to cut strips of tissue paper roughly 1.5 inches wide and then cut multiple triangles from them, ensuring they all look to have slightly varied proportions but are still the same size. Perfection isn’t necessary!
Apply Mod Podge and Add Tissue
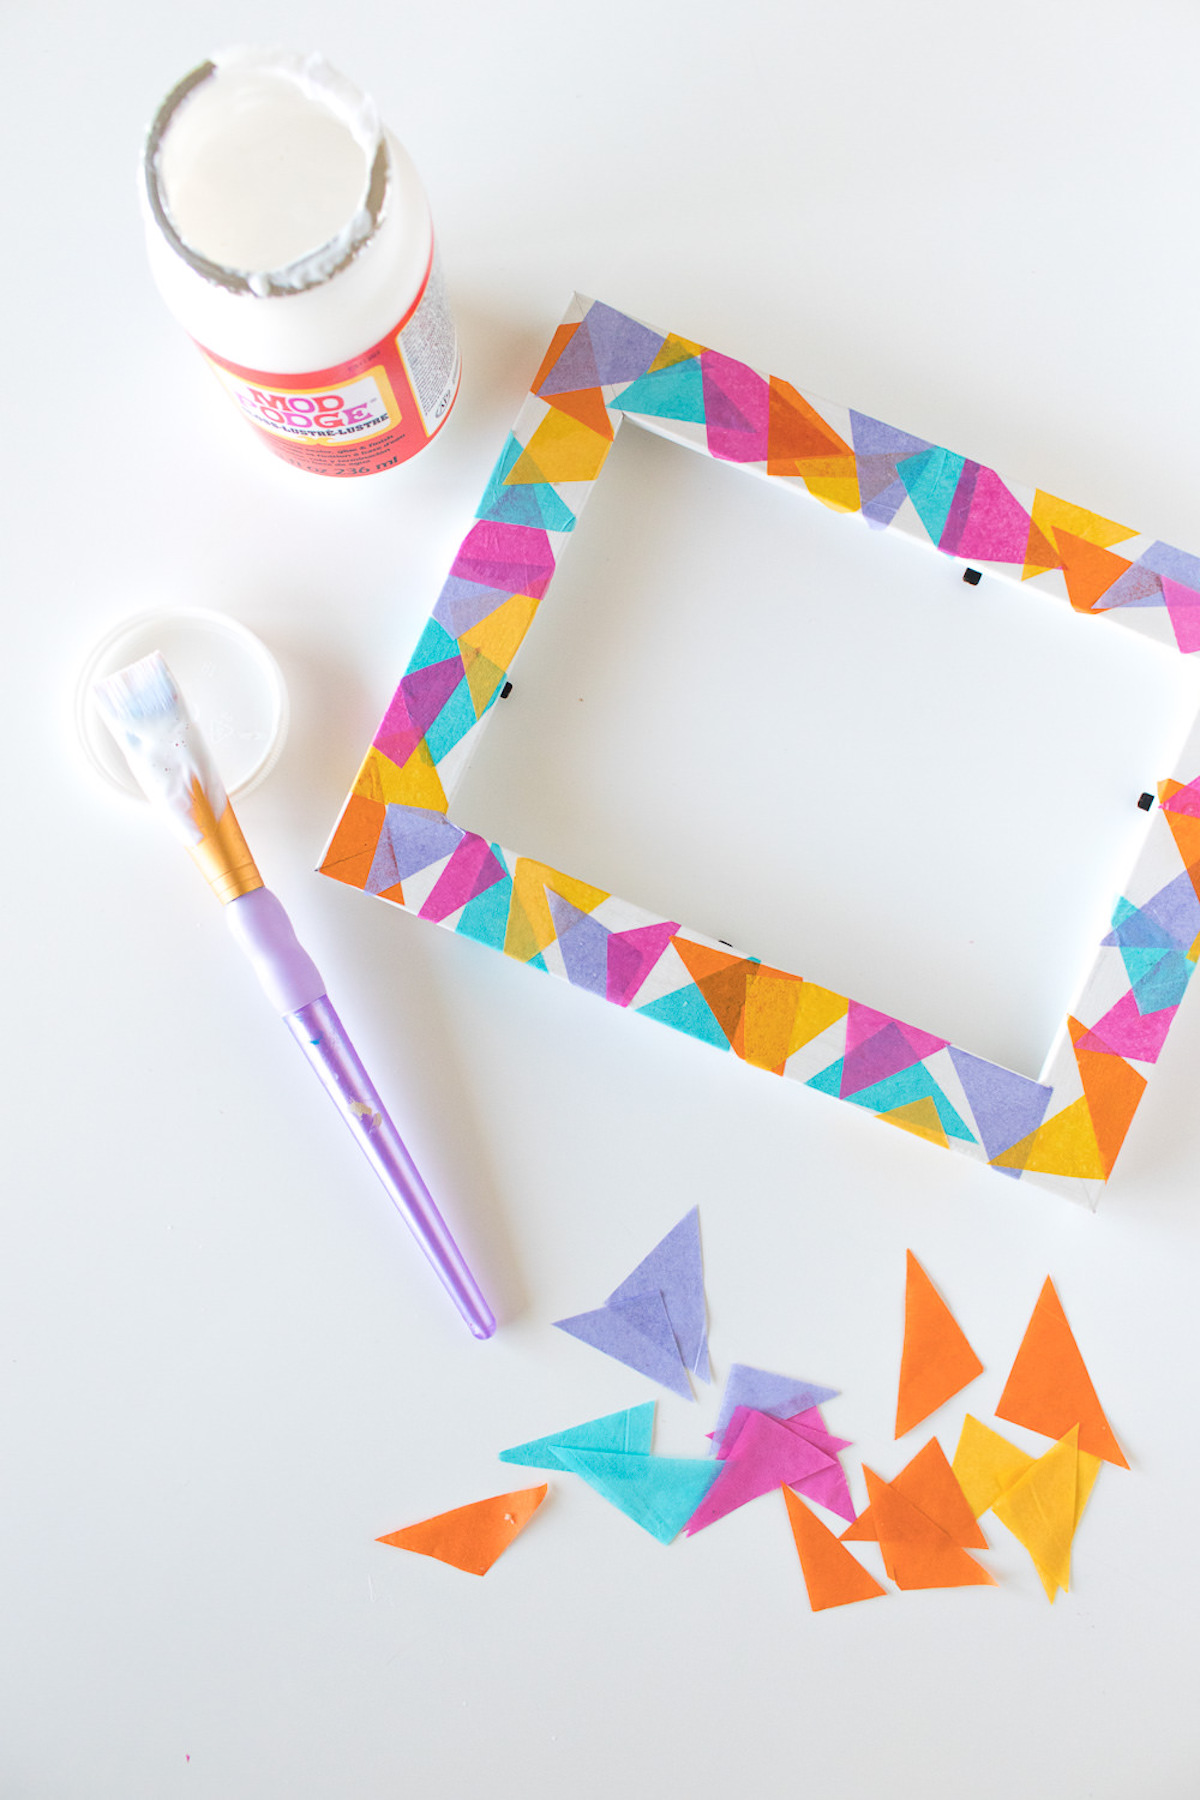
Step 3: Brush a layer of Mod Podge Gloss onto one area of the frame, starting from a corner. Position a cut piece of tissue paper over it and press it into place.
Continue with additional pieces, layering them slightly on top of one another and covering edges as well as the front of the frame. It’s fine to have a lot of the original frame visible or to completely cover it – the choice is yours!
Step 4: Repeat this procedure all around the frame, applying Mod Podge in one section at a time to prevent the glue from drying before you finish.
Seal the Frame
Step 5: After completing the pattern, paint a layer of Mod Podge over the entire frame to seal the tissue paper and allow it to dry.
After it has dried, you can place the glass, a photograph, and the backing back in and showcase it in your residence. This would also serve as an adorable gift if you wish to present someone with a picture inside a handmade frame!
Are you curious about what more you can accomplish with decorating photo frames? We have numerous suggestions for you!
This is also a component of our summer crafting for children series, our projects for teenagers, crafts for girls, and our straightforward crafting ideas for kids. Given that it’s quite simple!