Sure! Here’s the revised text with synonyms and restructured sentences, keeping the HTML format intact:
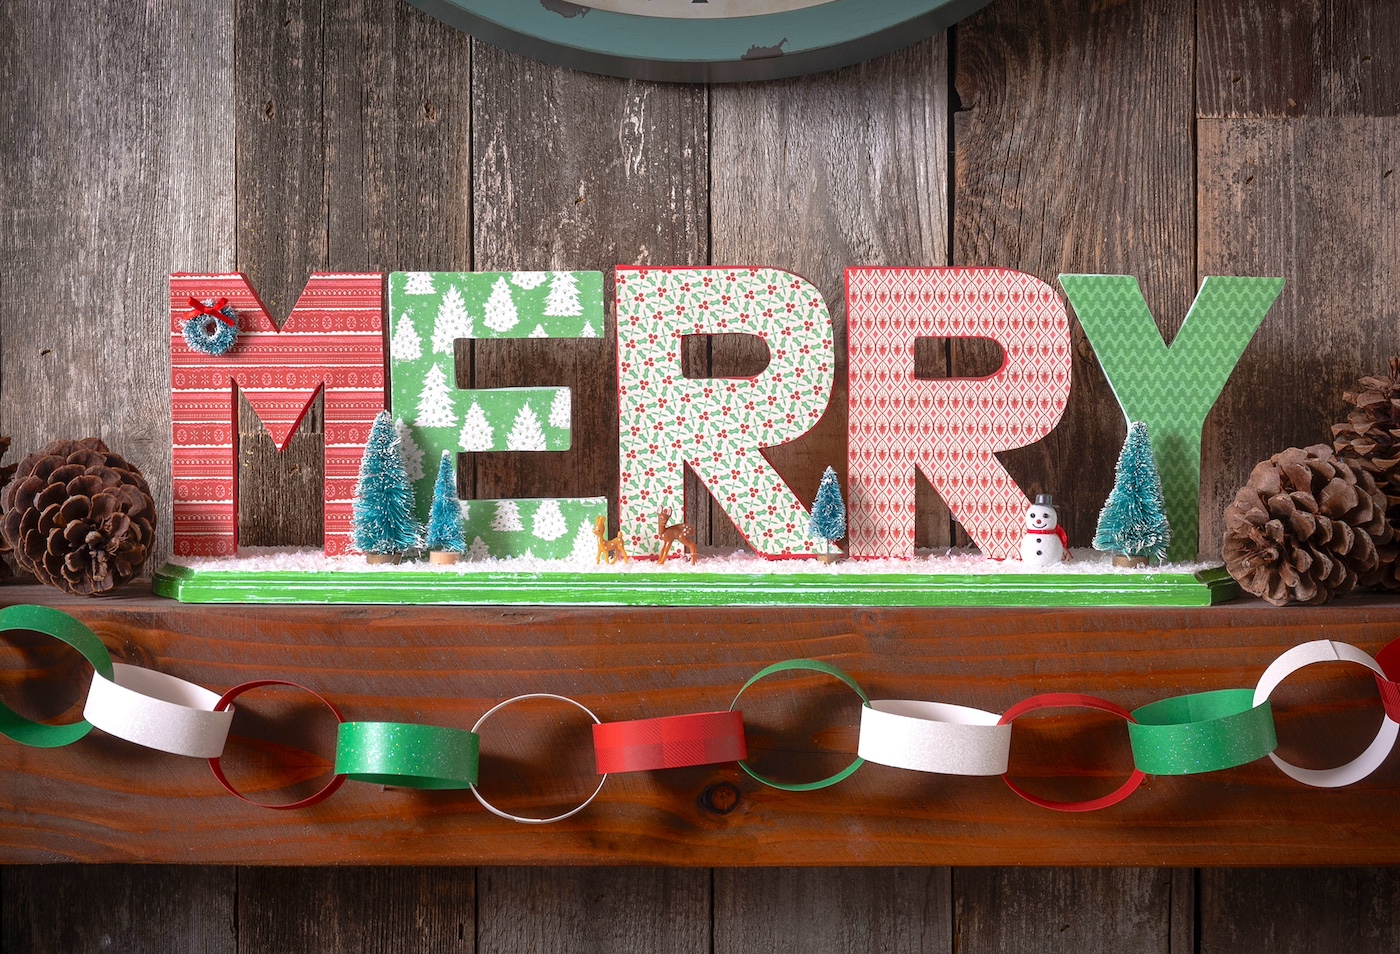
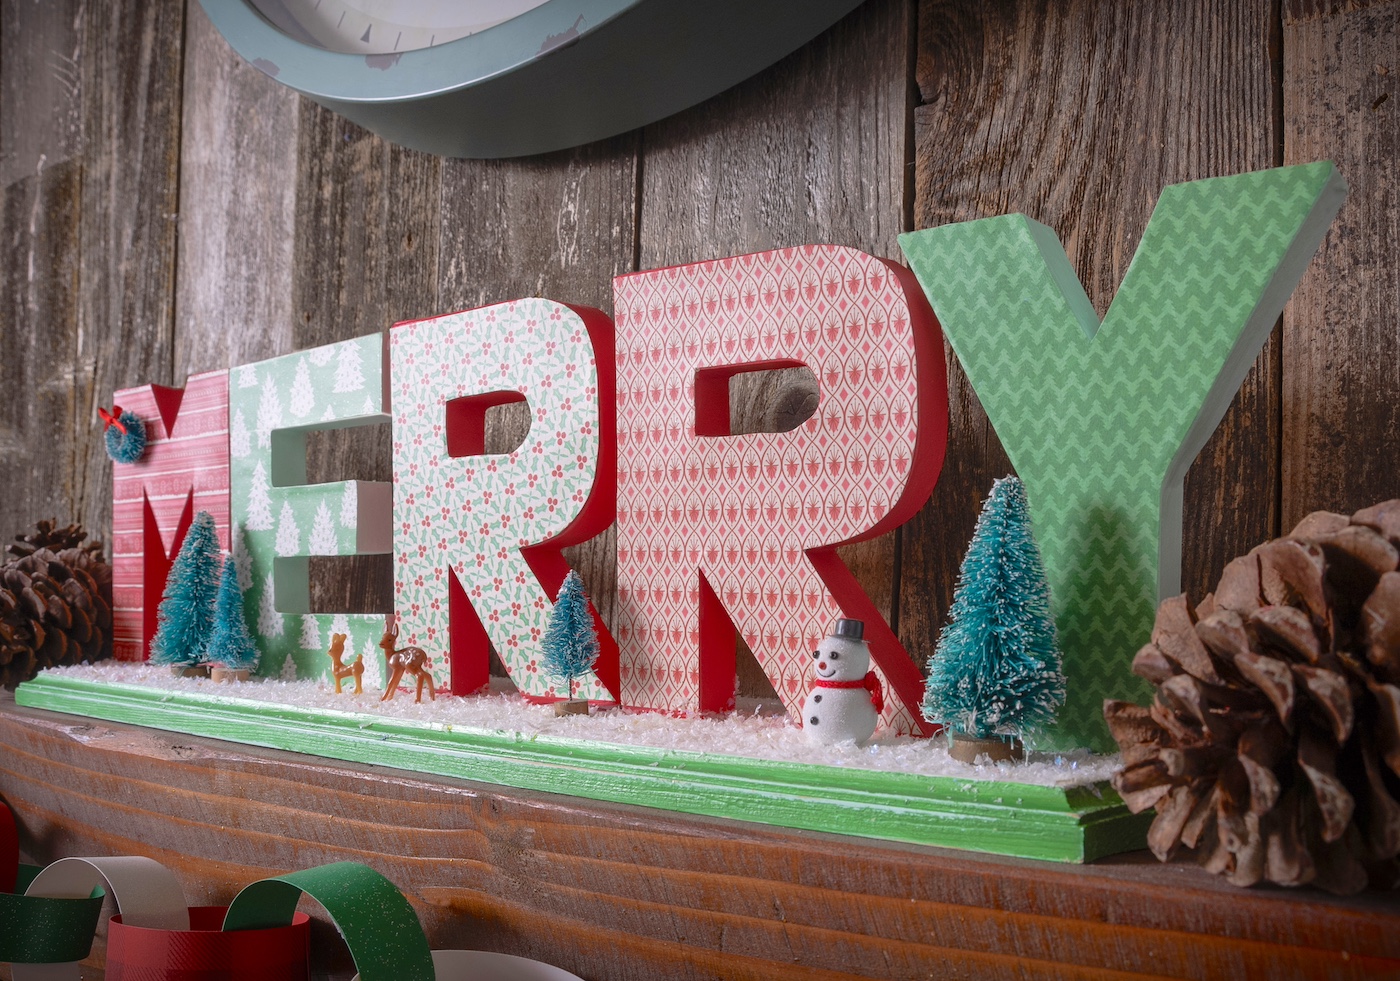
Discover how to create this “Merry” Christmas decoration using paper mache characters, a timber sign, and various delightful holiday materials! Such an adorable concept.
Skills Needed: Beginner. You’ll be applying paint, trimming paper, Mod Podging it to the letters, and adhering. This is fairly uncomplicated if you proceed slowly and adhere to the instructions.
As we jingle into the joyous season, it’s the moment to incorporate a sprinkle of handcrafted charm to your Christmas decorations.
If your mantel appears to be yearning for a splash of holiday spirit (and let’s face it, who isn’t during this time of year?), I have the perfect crafty fix for you – DIY Merry Christmas decor that’s as enjoyable to craft as it is to showcase!
I assure you this venture is more “ho-ho-ho” than “no-no-no.” We will transform a simple wooden plaque into a festive work of art with some paper mache characters.
To begin, let’s discuss materials. We will commence with a lengthy, unrefined wood plaque – your canvas for the Christmas enchantment.
Next, we’ll attach some paper mache letters forming “MERRY.” These characters will undergo a stunning refresh with festive scrapbook paper.
Subsequently, we infuse some color. A bit of paint to set the atmosphere. Once our letters are all spruced up and our plaque is painted, we will unite them in a beautiful, crafty harmony.
And just when you believed it couldn’t get any more festive, we’ll sprinkle on some faux snow. It’s reminiscent of a White Christmas, minus the need to clear your driveway.
The outcome? A ‘Merry’ sign that’s as joyous as a Christmas carol and as warm as a cup of hot cocoa.
Now, I realize you’re enthusiastic to begin spreading that Christmas joy, and I share your excitement to guide you through it. Scroll down to discover the comprehensive tutorial on crafting this DIY ‘Merry’ decor.
It’s the ideal project for a chilly afternoon, a mug of your preferred holiday beverage in hand, and perhaps a Christmas tune or two playing softly in the background.
Let’s create something that not only brightens your mantel but also brings joy to everyone who sees it.
Because that’s what Christmas crafts embody – sharing happiness, one decoupaged letter at a time. So, gather your glue and let’s start crafting!
Craft paint – hues to match your papers plus white
Scrapbook paper – five sheets
Faux snow – got mine from Dollar Tree
Mod Podge Satin
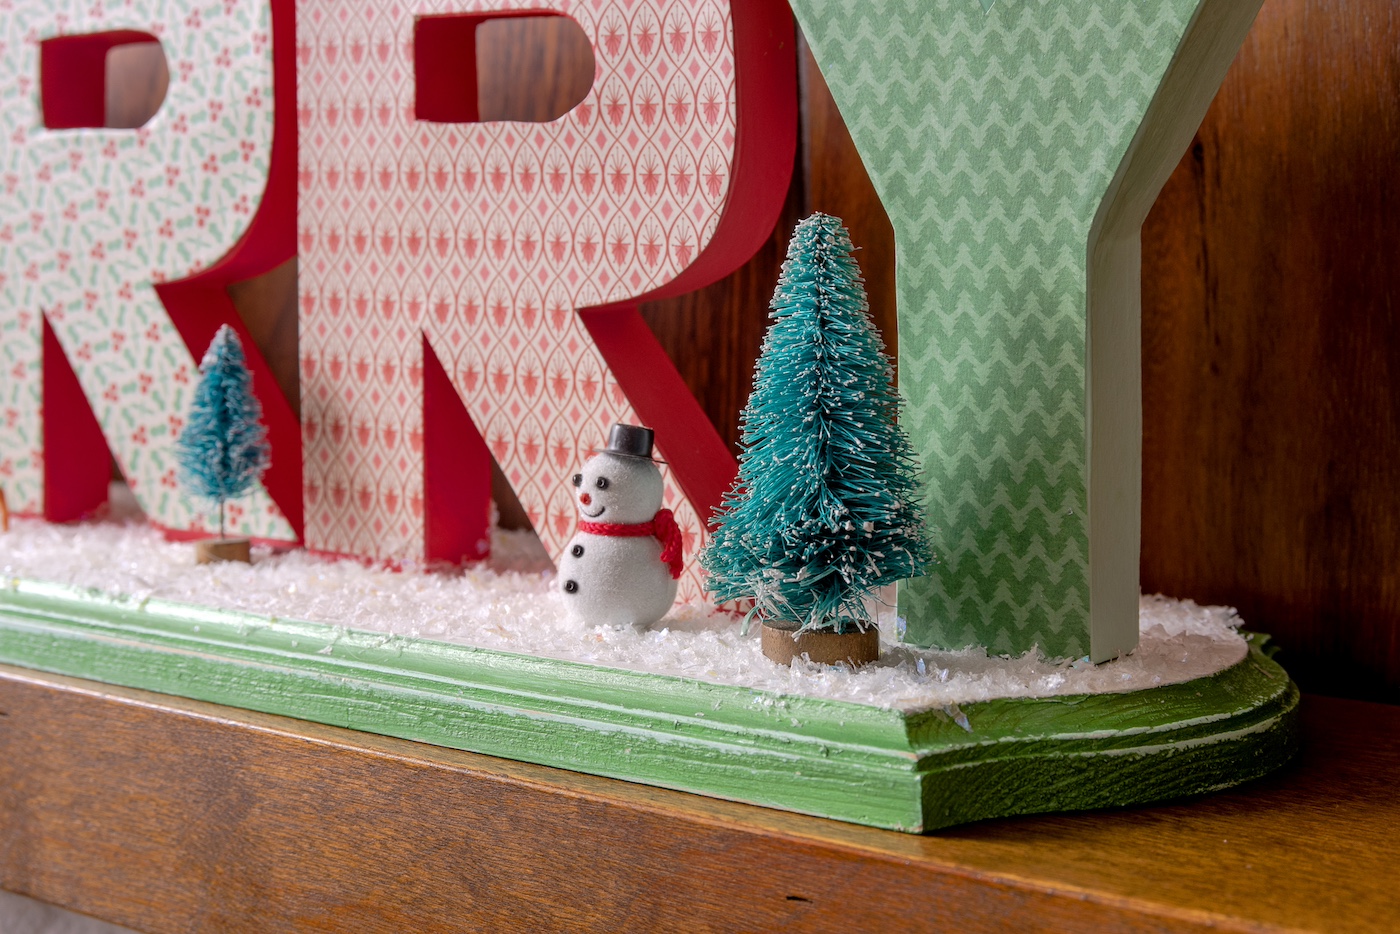
Bottlebrush trees and other Christmas ornaments (deer, snowmen, wreath, etc)
Paintbrushes
Pencil or pen
Hot glue gun and glue sticks (or craft adhesive)
Craft knife and mat
Scissors
Sandpaper
Wax candle
Suggestions and Reflections for This Project
You don’t need to distress the base of the plaque but I adore how it turned out. The distressing of metallic paint with standard paint may be difficult to capture in the images, but it looks fantastic in person!
If you opt for craft glue for this endeavor instead of hot glue, adhere any embellishments to the letters prior to attaching them to the plaque (allowing you to keep them flat while drying).
If you notice any vacant spaces after applying the faux snow, you can return to apply more Mod Podge and additional snow to fill in.
DIY Merry Christmas Decor
Learn how to create this distinctive Merry sign with a timber plaque,
papier mâché letters, along with other basic materials. It’s perfect for showcasing on a festive mantel!
Preparation Time30 minutesmins
Active Duration3 hourshrs30 minutesmins
Drying Time2 hourshrs
Overall Duration6 hourshrs
Yield: 1sign
Expense: $23
1Wood plaque(s)23.2″ x 5.4″ – mine’s sourced from JoAnn’s
Bottlebrush trees and additional Christmas decorationsdeer, snowmen, wreath, etc
Select the papers to cover your letters. Arrange the papers and choose your paint colors for each letter.
Outline the letters on the reverse side of the scrapbook paper using a pencil or pen.
Cut out the letters with your scissors. For difficult areas like the insides of certain letters, it’s better to employ a craft knife.
Paint the top of the wood plaque with white craft paint. Paint the edges of the plaque with a different color (I used light green) and a smaller brush. This is also the time to paint the sides and back of the letters with your selected colors. Allow to dry.
Rub the edges of the plaque with a white candle. Do this gently all around the plaque.
Paint around the edge of the plaque with green metallic paint, or your preferred color. Allow to dry.
Use sandpaper to gently remove some of the metallic paint. Wherever the wax is, you’ll uncover the paint below. Sand until you achieve the desired effect.
Apply a moderate layer of Mod Podge to the letters, one at a time.
Press the paper onto the surface of the first letter, using a brayer or your hands. Remove any excess Mod Podge that seeps out from the edges. Let dry. Repeat with the remaining letters.
Once all the letters have the paper applied and are dry, coat them all with a layer of Mod Podge. Allow to dry.
Arrange the letters on the plaque in the preferred format. Once you find a placement you like, tilt the letters back in position and apply some hot glue to fasten. Tilt the letters forward to adhere to the plaque.
After the letters are secured, add a layer of Mod Podge to the top of the plaque. Sprinkle on the faux snow and remove the excess.
Determine the location for the embellishments. Hot glue them directly onto the plaque and let set before showcasing.
If you liked this DIY Merry Christmas decoration, let me know your thoughts in the comments! I’d also appreciate it if you checked out the following projects:
Card Directions Now let’s convert those virtual papers into a completed card. Separate the four printed rectangles. Slice a sheet of 8.5 x 11 white ca [...]
Discover the finest articles of 2025 featuring the most sought-after DIY craft guides from The Crafty Blog Stalker. The year 2025 has been an incredib [...]
Craft DIY eerie candle holders using secondhand jars, Mod Podge, and antique photographs. Rapid, simple, and ideal for festive decorations or your Hal [...]
Discover how to convert standard mason jars into luminous imitation sea glass lanterns using straightforward glass paint, spouncers, and cost-effectiv [...]
Print this simple spring word search for a swift, screen-free endeavor that's ideal for dreary days, road trips, or quiet periods in classrooms. Sprin [...]
Published: Feb 3, 2021 · Modified: Nov 5, 2025 by Shelly · This article may feature affiliate links · 1 Comment Baking with children doesn’t need to b [...]
We use cookies on our website to give you the most relevant experience by remembering your preferences and repeat visits. By clicking “Accept”, you consent to the use of ALL the cookies.
This website uses cookies to improve your experience while you navigate through the website. Out of these, the cookies that are categorized as necessary are stored on your browser as they are essential for the working of basic functionalities of the website. We also use third-party cookies that help us analyze and understand how you use this website. These cookies will be stored in your browser only with your consent. You also have the option to opt-out of these cookies. But opting out of some of these cookies may affect your browsing experience.
Necessary cookies are absolutely essential for the website to function properly. These cookies ensure basic functionalities and security features of the website, anonymously.
Cookie
Duration
Description
cookielawinfo-checbox-analytics
11 months
This cookie is set by GDPR Cookie Consent plugin. The cookie is used to store the user consent for the cookies in the category "Analytics".
cookielawinfo-checbox-functional
11 months
The cookie is set by GDPR cookie consent to record the user consent for the cookies in the category "Functional".
cookielawinfo-checbox-others
11 months
This cookie is set by GDPR Cookie Consent plugin. The cookie is used to store the user consent for the cookies in the category "Other.
cookielawinfo-checkbox-necessary
11 months
This cookie is set by GDPR Cookie Consent plugin. The cookies is used to store the user consent for the cookies in the category "Necessary".
cookielawinfo-checkbox-performance
11 months
This cookie is set by GDPR Cookie Consent plugin. The cookie is used to store the user consent for the cookies in the category "Performance".
viewed_cookie_policy
11 months
The cookie is set by the GDPR Cookie Consent plugin and is used to store whether or not user has consented to the use of cookies. It does not store any personal data.
Functional cookies help to perform certain functionalities like sharing the content of the website on social media platforms, collect feedbacks, and other third-party features.
Performance cookies are used to understand and analyze the key performance indexes of the website which helps in delivering a better user experience for the visitors.
Analytical cookies are used to understand how visitors interact with the website. These cookies help provide information on metrics the number of visitors, bounce rate, traffic source, etc.
Advertisement cookies are used to provide visitors with relevant ads and marketing campaigns. These cookies track visitors across websites and collect information to provide customized ads.