This DIY lazy susan is really impressive – it was fashioned from a planter dish! Utilize any visuals you prefer. This is ideal for your dining area, for a gathering, or for storage.
Skills Necessary: Beginner. You’ll be printing visuals, trimming to fit a tray, and then applying resin on top. The primary skill required for this endeavor is patience during the drying phase!
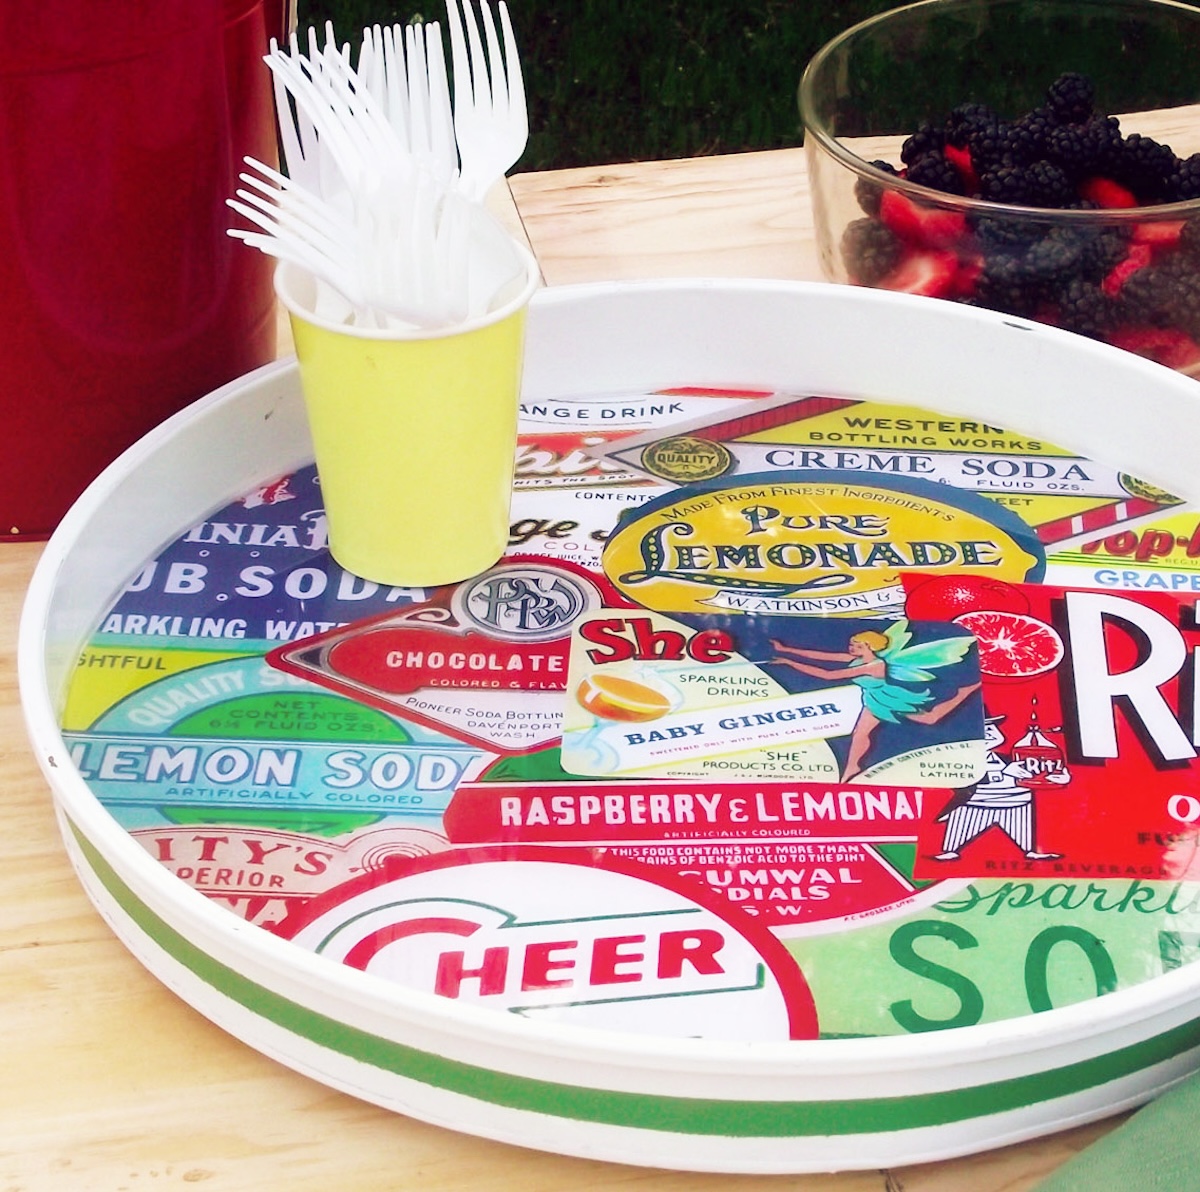
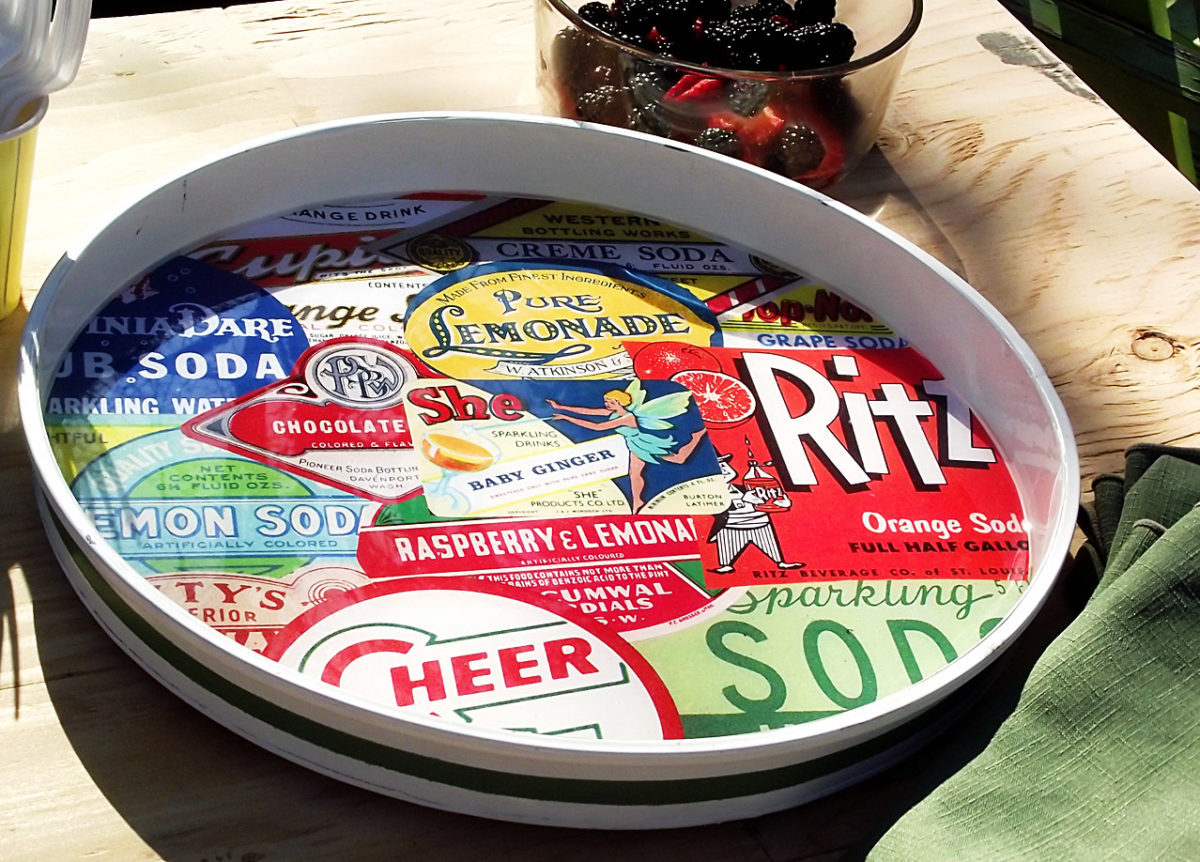
Craftsman David had a fantastic concept to convert a basic planter into a DIY lazy susan for summer celebrations. It’s such a wonderful project that I’m certain you’ll want to replicate the approach for other home embellishments. If you enjoy resin crafts, continue reading for his guide!
You’re familiar with me by now – I’m perpetually exploring Home Depot for items to transform into other creations. For this decoupage task, I considered that summer has arrived, bringing outdoor gatherings.
Upon discovering some large metal planter dishes (the kind used beneath pots to catch excess water and protect surfaces) on offer, I thought, “hmmmmmm . . . lazy susan?”
This DIY lazy susan turned out to be straightforward and truly enjoyable!
Gather These Materials
- Metal planter dish
- Mod Podge Gloss
- Laser printer copies of vintage illustrations
- Newspaper or 2 sheets of paper
- Foam brush
- Envirotex Lite (to make it waterproof and other essentials)
- Plastic straw (not depicted)
- Stirring sticks
- Plastic cup
- Lazy Susan mechanism (also from Home Depot)
- Sandpaper (not depicted)
- Adhesive – I used E-6000
- Scissors
- Pencil
- Spray paint (optional)
- Painter’s tape (optional)
For this project, you can incorporate vintage graphics or labels, your favorite photographs, motivational quotes, or anything else that satisfies your creativity. I would expect whatever you select, it will be layered if it consists of multiple images.
Get the downloadable how-to card below:
Homemade Lazy Susan
Discover how to create a lazy susan using a planter tray from Home Depot! You can utilize any visuals for customization.
Prep Time45 minutes mins
Active Time1 hour hr
Dry Time1 day d
Total Time1 day d 1 hour hr 45 minutes mins
Yield:
1 platter
Expense: $10
-
Sanitize your platter with gentle soap and water and allow to dry.
-
Employ painter’s tape to delineate a line to create a stripe (optional). Apply multiple layers of spray paint, remove tape, and let it dry.
-
Create a stencil for the interior of the platter using newspaper or paper and a pencil. Cut out with scissors and set aside.
-
Secure the lazy susan mechanism to the bottom middle of the platter with E-6000; allow it to dry.
-
Print all images you want to use on a laser printer. Cut and arrange them into a collage (tape if necessary).
-
Overlay the stencil on top and outline the circle. Cut out using scissors. Fit into the platter and trim as needed.
-
Mod Podge the images onto the platter, layering as required. Seal completely, ensuring coverage on all edges. Let dry overnight.
-
Blend the Envirotex Lite following the package guidelines. Pour into the platter. Let it fully set for about 24 hours before usage.
Step 2: My platter was LARGE (16” wide). To create a stencil for the inside, I traced the edges of the platter onto two large sheets of paper and then taped them together. You may also use newspaper.
Step 5: I utilized graphics I had available, but you could easily use scrapbook paper, wrapping paper, or anything that looks good – just ensure it holds up under the Mod Podge.
I arranged my design in MS Word, but didn’t want to cut and paste each image. Instead, I printed them in sections on 11 x 14” legal paper, then cut each section out.
If you only have an inkjet printer, I’d recommend getting laser images printed to avoid bleeding. If that’s not an option, spray the inkjet images on both sides with a clear spray sealant and let dry before using.
Step 7: Avoid letting the resin touch the images as it can alter their color. Seal the images well if they are printed at home.
Step 8: Eliminate air bubbles by blowing on the resin surface using a plastic straw (avoid contact between the straw and the surface).
If you relished this DIY lazy susan, I would greatly appreciate you exploring these additional ideas: