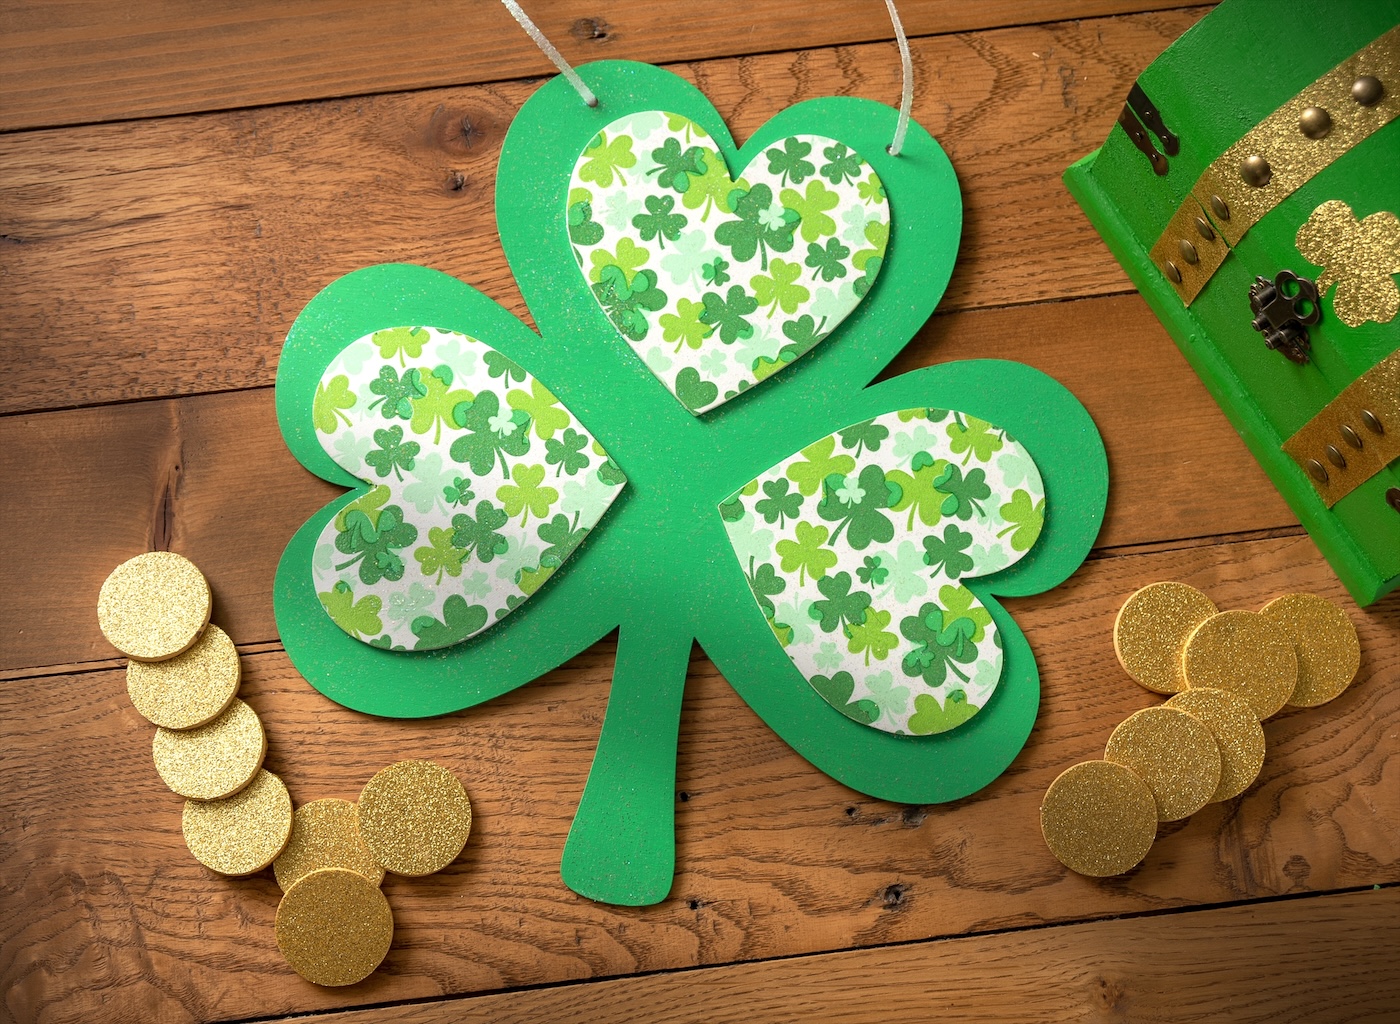
Embellish a wooden shamrock from Dollar Tree utilizing basic crafting materials and Sparkle Mod Podge! This is a cost-effective St. Patrick’s Day concept you’ll adore.
Skills Needed: Novice. You’ll implement the paper napkin decoupage method (iron-on technique) with Mod Podge, which aids in minimizing wrinkles. Painting will also be part of the process.
There’s a celebration between Valentine’s Day and Easter that we commonly overlook – let’s face it. None of us desires to acknowledge it, but I think you fully understand what I’m referencing.
This year, though, I’ve chosen to create several projects for St. Patrick’s Day, and my journey commenced at the dollar store. I’ve been truly enjoying the Sparkle Mod Podge this year and clearly wanted to incorporate that as well.
When I visited Dollar Tree, I discovered the wood shamrocks they offered, and I realized that’s what I wished to embellish. With adorable napkins, of course.
It was quite simple to detach the wooden shapes from the front using a scraper, which provides you options in terms of how you embellish with the napkins.
This shamrock decoration is genuinely straightforward to craft and has a vibrant appeal with the glitter, and I believe you’re going to truly enjoy crafting these!
Obtain the printable instructions below:
DIY Shamrock Decoration
Embellish a wooden shamrock from the dollar store using paint, Mod Podge, and napkins.
Preparation Time10 minutes mins
Active Time1 hour hr
Drying Time2 hours hrs
Total Time3 hours hrs 10 minutes mins
Yield: 1 wall hanging
Expense: $2
-
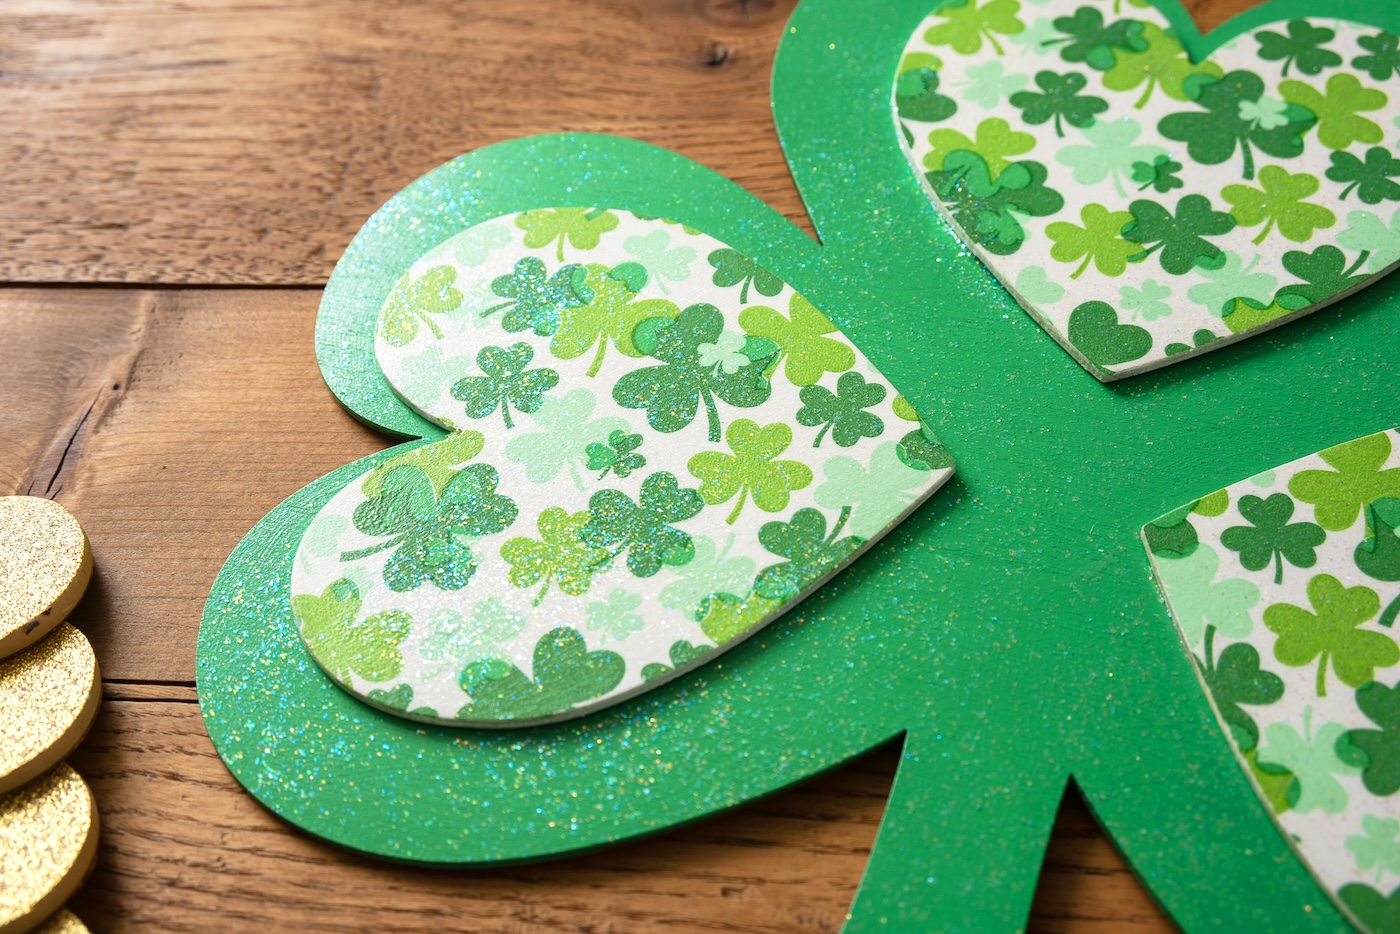
If possible, utilize a slender blade to detach any wooden figures from the front of your shamrock – mine had three wooden hearts. It was effortless to slide a scraper beneath them and gently lift off the hearts.
-
Coat the shamrock with green paint. Optionally paint the reverse side – allow to dry thoroughly.
-
Apply white paint to the wooden shapes and allow to dry.
-
Spread Mod Podge over the wooden shapes and let dry. Apply a second layer and let dry.
-
Detach the St. Patrick’s Day napkin from the delicate white layer. There might be one or two depending on your napkin.
-
Using three distinct sections of the napkin, press the napkin down onto the wooden hearts with an iron. Place a sheet of parchment paper on top of the napkin, and move the craft iron across the surface multiple times (mine was set to high temperature). While you do this, the Mod Podge is fusing beneath the napkin, causing it to stick. Continue until the napkin is entirely adhered, including the edges.
-
Once the napkins/shapes are cool, utilize an emery board to carefully remove the napkin from the edges by sanding at an angle.
-
Dab craft glue on the backs of the wooden shapes and firmly press them back onto the shamrock. Allow to dry.
-
Finish the entire shamrock with Sparkle Mod Podge, covering both the napkin and painted parts.
-
To complete, attach a ribbon to the shamrock for hanging. Tie multiple knots on both ends to ensure the wood stays secure on the ribbon.
If you liked this project, feel free to share your thoughts in the comments! I’d also appreciate it if you could explore these additional projects that feature napkins: