Mastering the art of creating Recycled Paper is effortless, enjoyable, and uncomplicated with this foolproof, step-by-step guide! No need to fret – as a devoted fiber-arts aficionado, I’ve crafted this paper countless times and have compiled all my top insights and techniques to ensure your paper turns out wonderfully each time.
Jump to:
This sustainable craft repurposes items you already possess around the home to produce homemade paper from the ground up. You might find it astonishing how effortless it can be to convert remnants into beautiful, textured, unique sheets of paper! As Judy remarked, “These are the finest guidelines I’ve encountered…perfect for both kids AND adults!”
Who created paper anyway?
During our home education years long ago, we explored paper making while conducting a unit study on China. The Chinese invented paper around 100 AD. Neat, right?
We crafted paper with some friends and then engaged in some printing and brush painting on it. I still have mine tucked away somewhere…
It was one of those imaginative projects that blended art with education, one of my most cherished methods of learning.
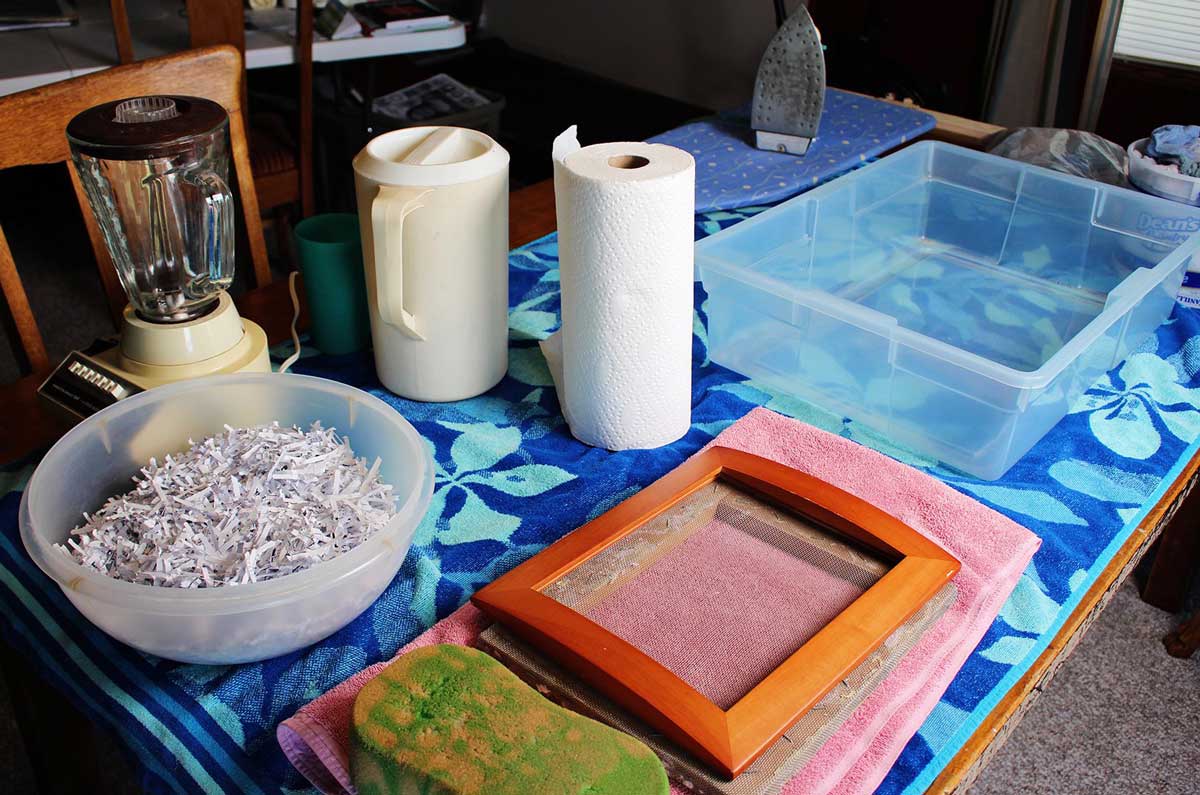
Materials Required for Crafting Recycled Paper
Collect your materials and have a surface to work on (this is also suitable outside). You need a bit of room to maneuver.
SUPPLIES FOR CREATING RECYCLED PAPER:
Frames, require two 8×10 in size (upcycled some old ones)
Window mesh
Sturdy stapler
Shredded recycled paper, if possible
Lint from the dryer, colored paper, various other papers to add some flair
Blender
Basin
Sponge
Bath towels
Paper towels
Iron & ironing board
Instructions
To Create Recycled Paper
1. Construct a mould and deckle!! 🙂
The initial step is to construct a mould and deckle. A what?! Ha! Allow me to clarify.
These are the tools you will employ to strain the paper pulp and shape it into a sheet of paper. No need for concern, it’s not a challenging task to create. You should be able to locate the necessary items at your nearby hardware shop or home improvement center, or perhaps even at a thrift store!
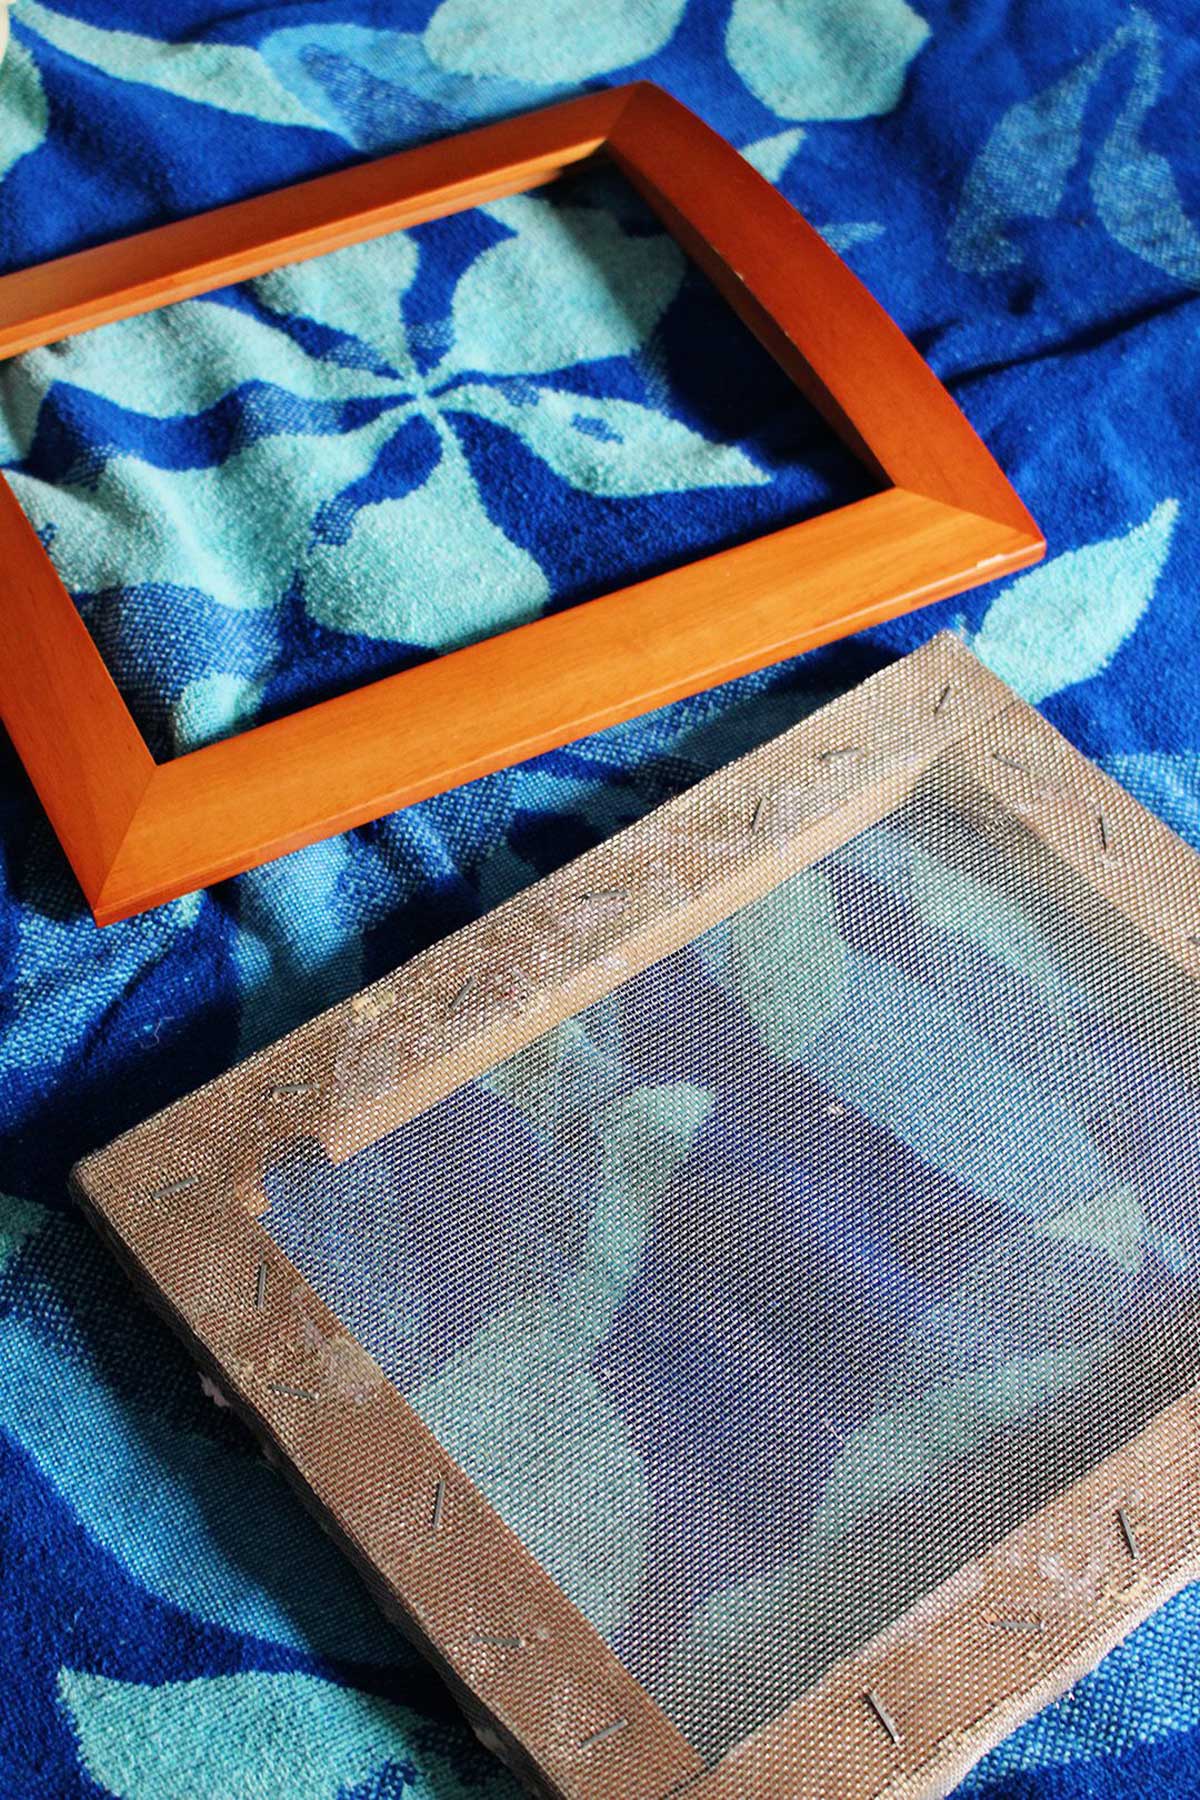
The simplest method to create the mould and deckle is by using two old wooden frames. I utilized an 8 by 10 inch old picture frame, as this results in paper close to a standard 8.5 by 11 inch dimension.
Once you’ve selected your preferred frame size, disassemble them and remove the glass, cardboard, and any nails or tabs present. You only need the wooden frame itself.
Tip: Ensure you select wooden frames. Some plastic ones resemble wood.
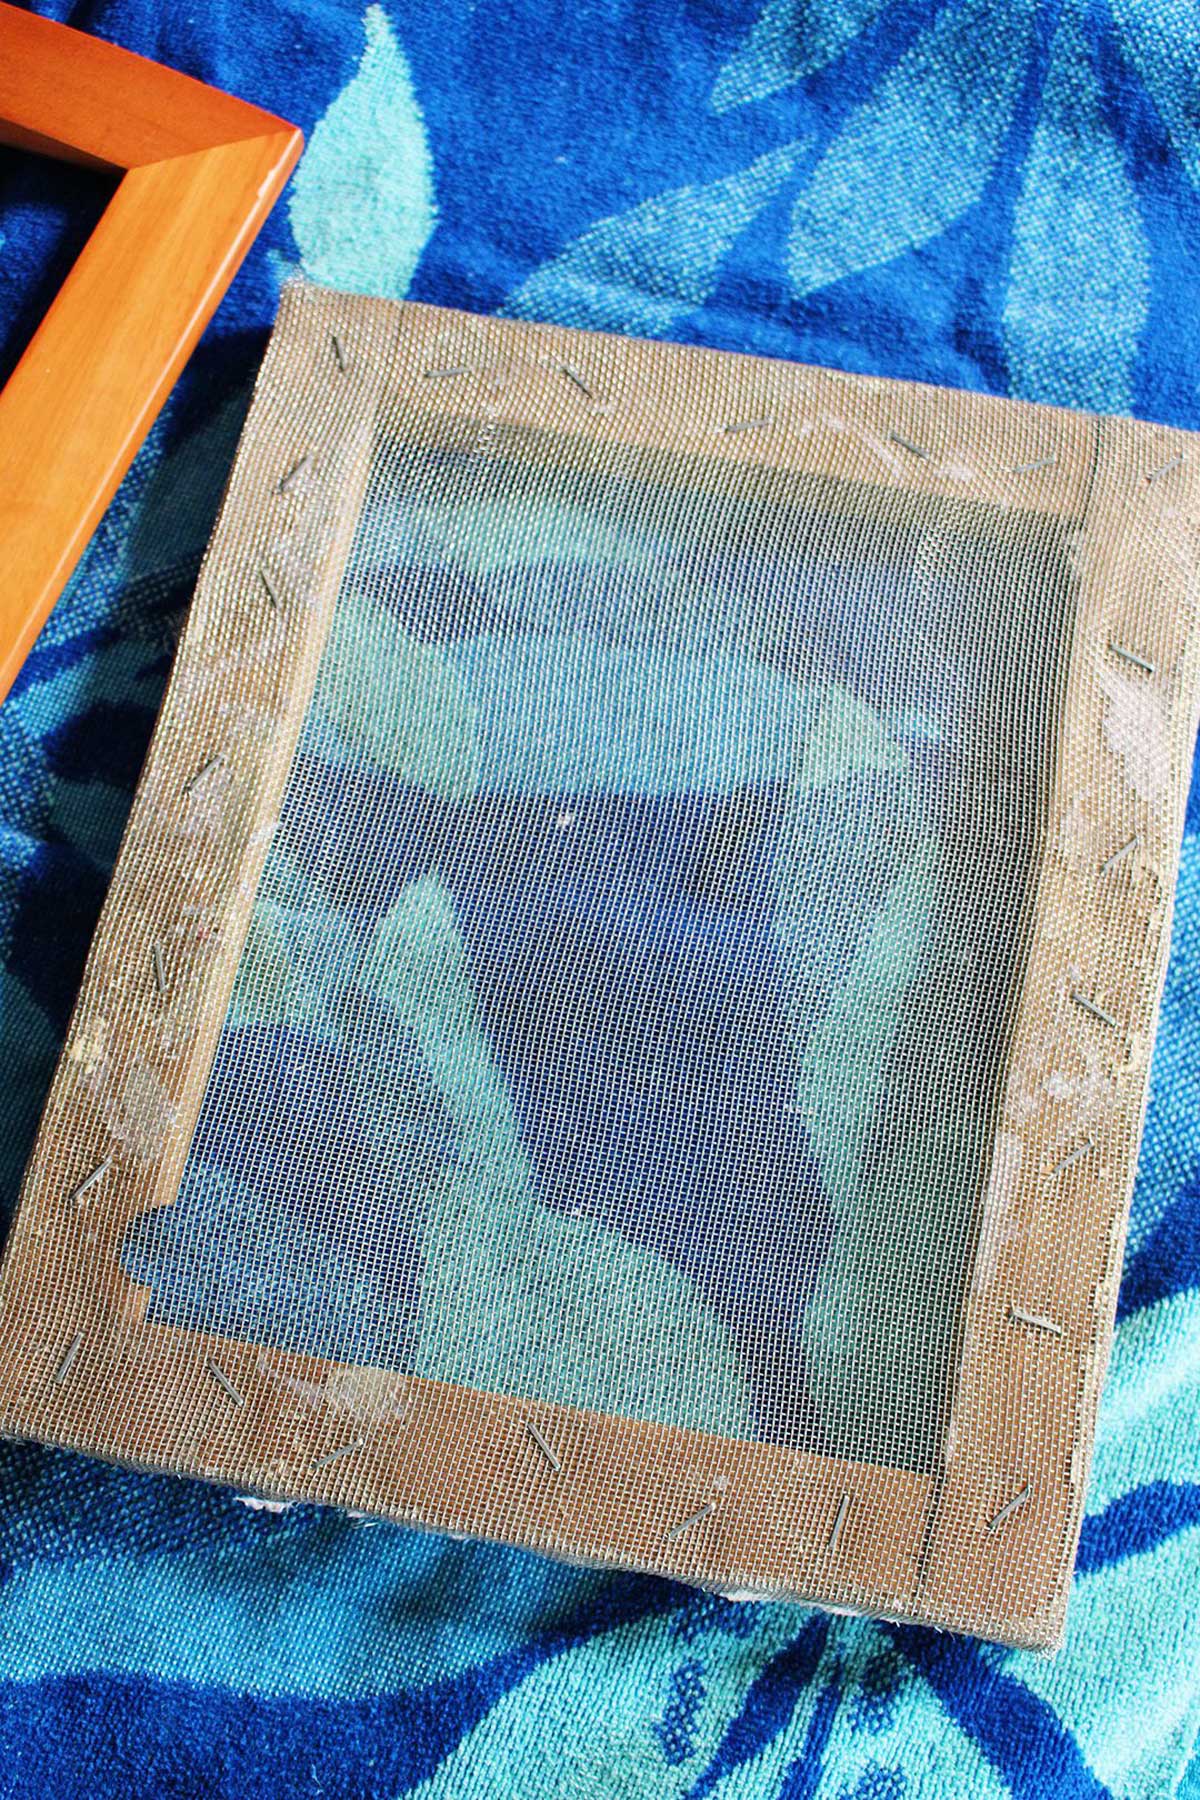
You will take one of the frames and secure a piece of window screen or fine mesh onto it to cover the opening. Attach the screen to the flat side of the frame, avoiding the decorative ridged side.
This serves as your “deckle,” which will strain the paper pulp. Papa constructed 4 boards together for me years ago to create our deckle, so mine appears somewhat different.
The second frame will be used as is on top of the screened frame and will act as the “mould,” providing an edge for the paper. More on this later.
2. Introduce water to the tub…
Subsequently, you’ll require a tub or an extremely large bowl that is ample enough to accommodate the frame size you selected for your mould and deckle. A storage tub functions superbly for this purpose.
Take a few moments to pour sufficient water into the large container so that the mould and deckle can submerge into the water, approximately 3 inches deep or so in the tub.
You will utilize this for dipping shortly.
The Optimal Type of Recycled Paper to Utilize
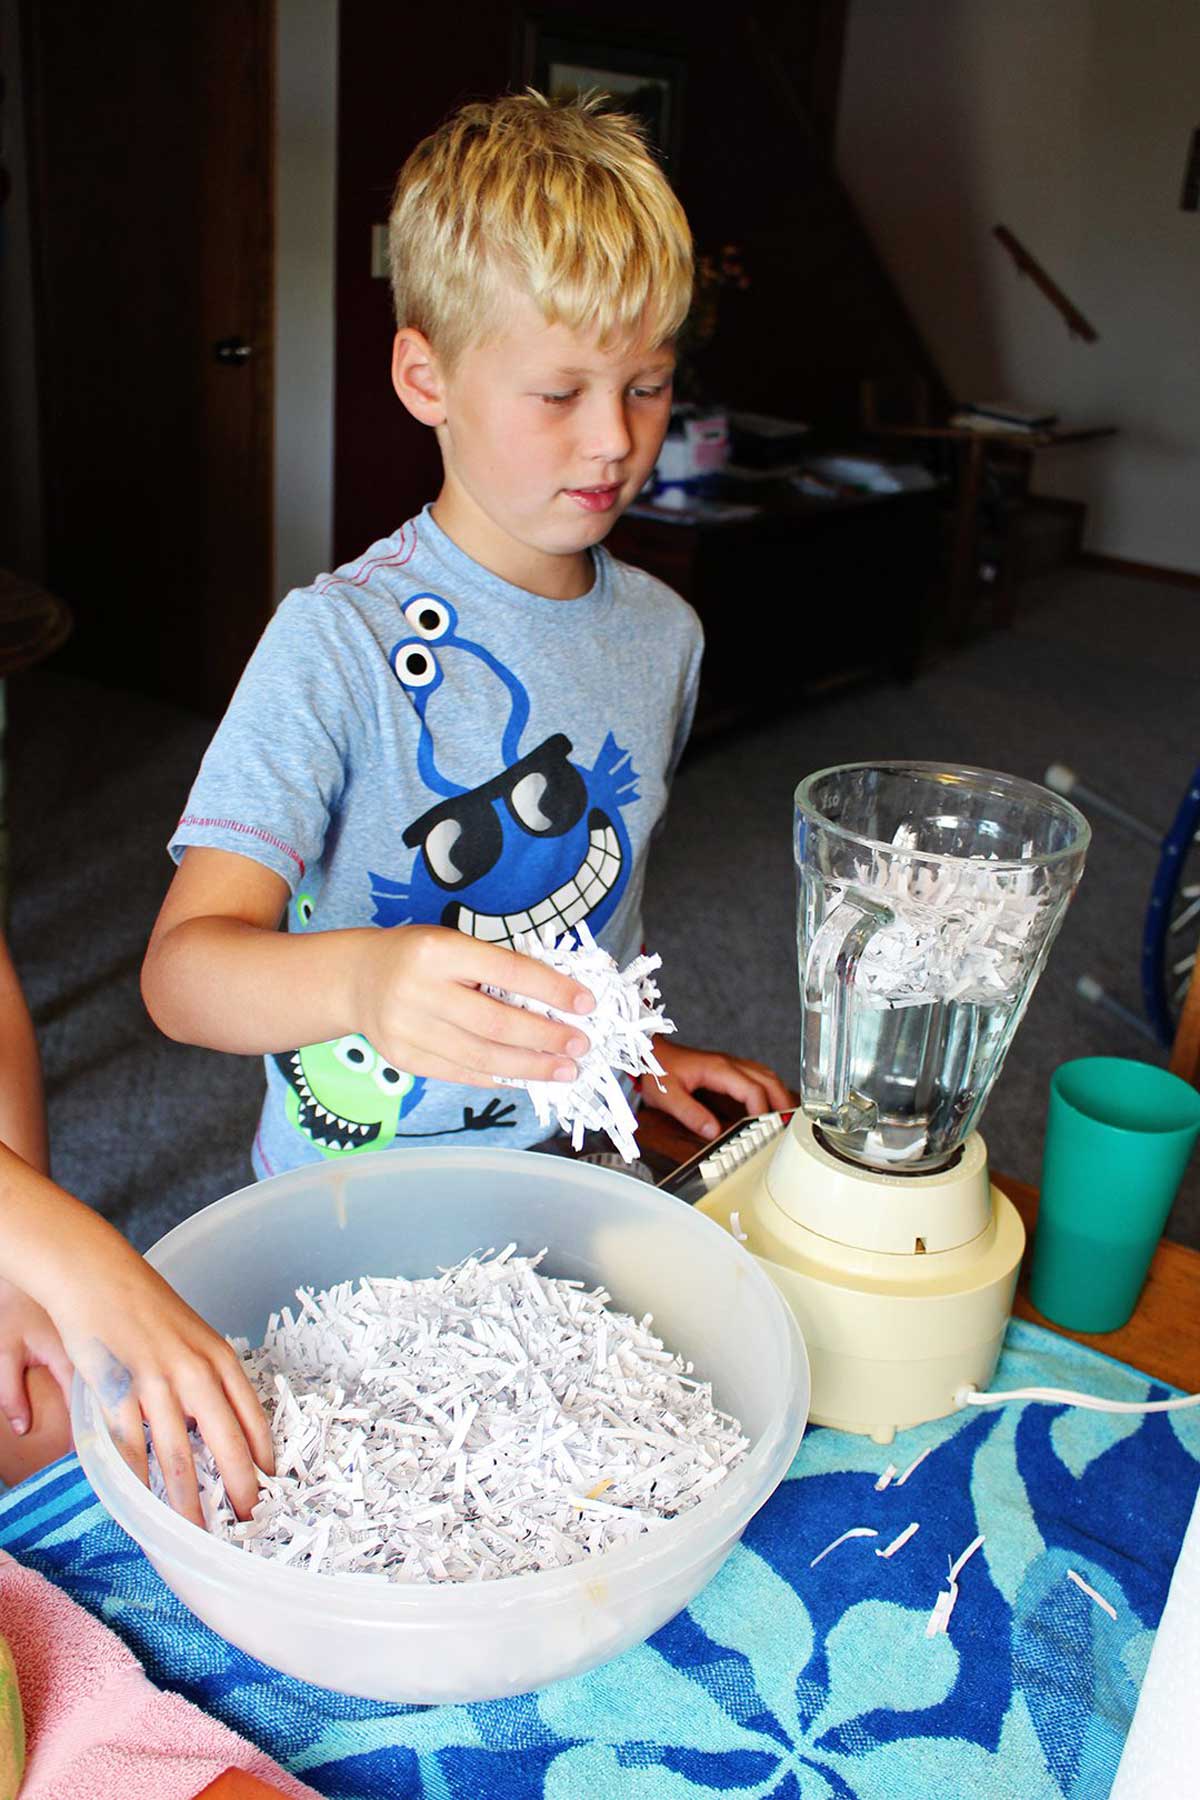
This morning, we invaded my paper shredder and gathered a substantial bowl of shredded scrap paper, as depicted in the images. This lightweight paper worked excellently.
If you lack a shredder, collect old papers intended for the recycling bin, such as office paper, junk mail, or a brown paper sack. Tear your sheets of paper into tiny fragments by hand.
You can also use new paper, selecting vibrant colors or simply ripping printer paper into small pieces.
Tip: Used newspapers are less effective as the ink causes the paper to appear quite dirty.
3. Forming the Paper Pulp
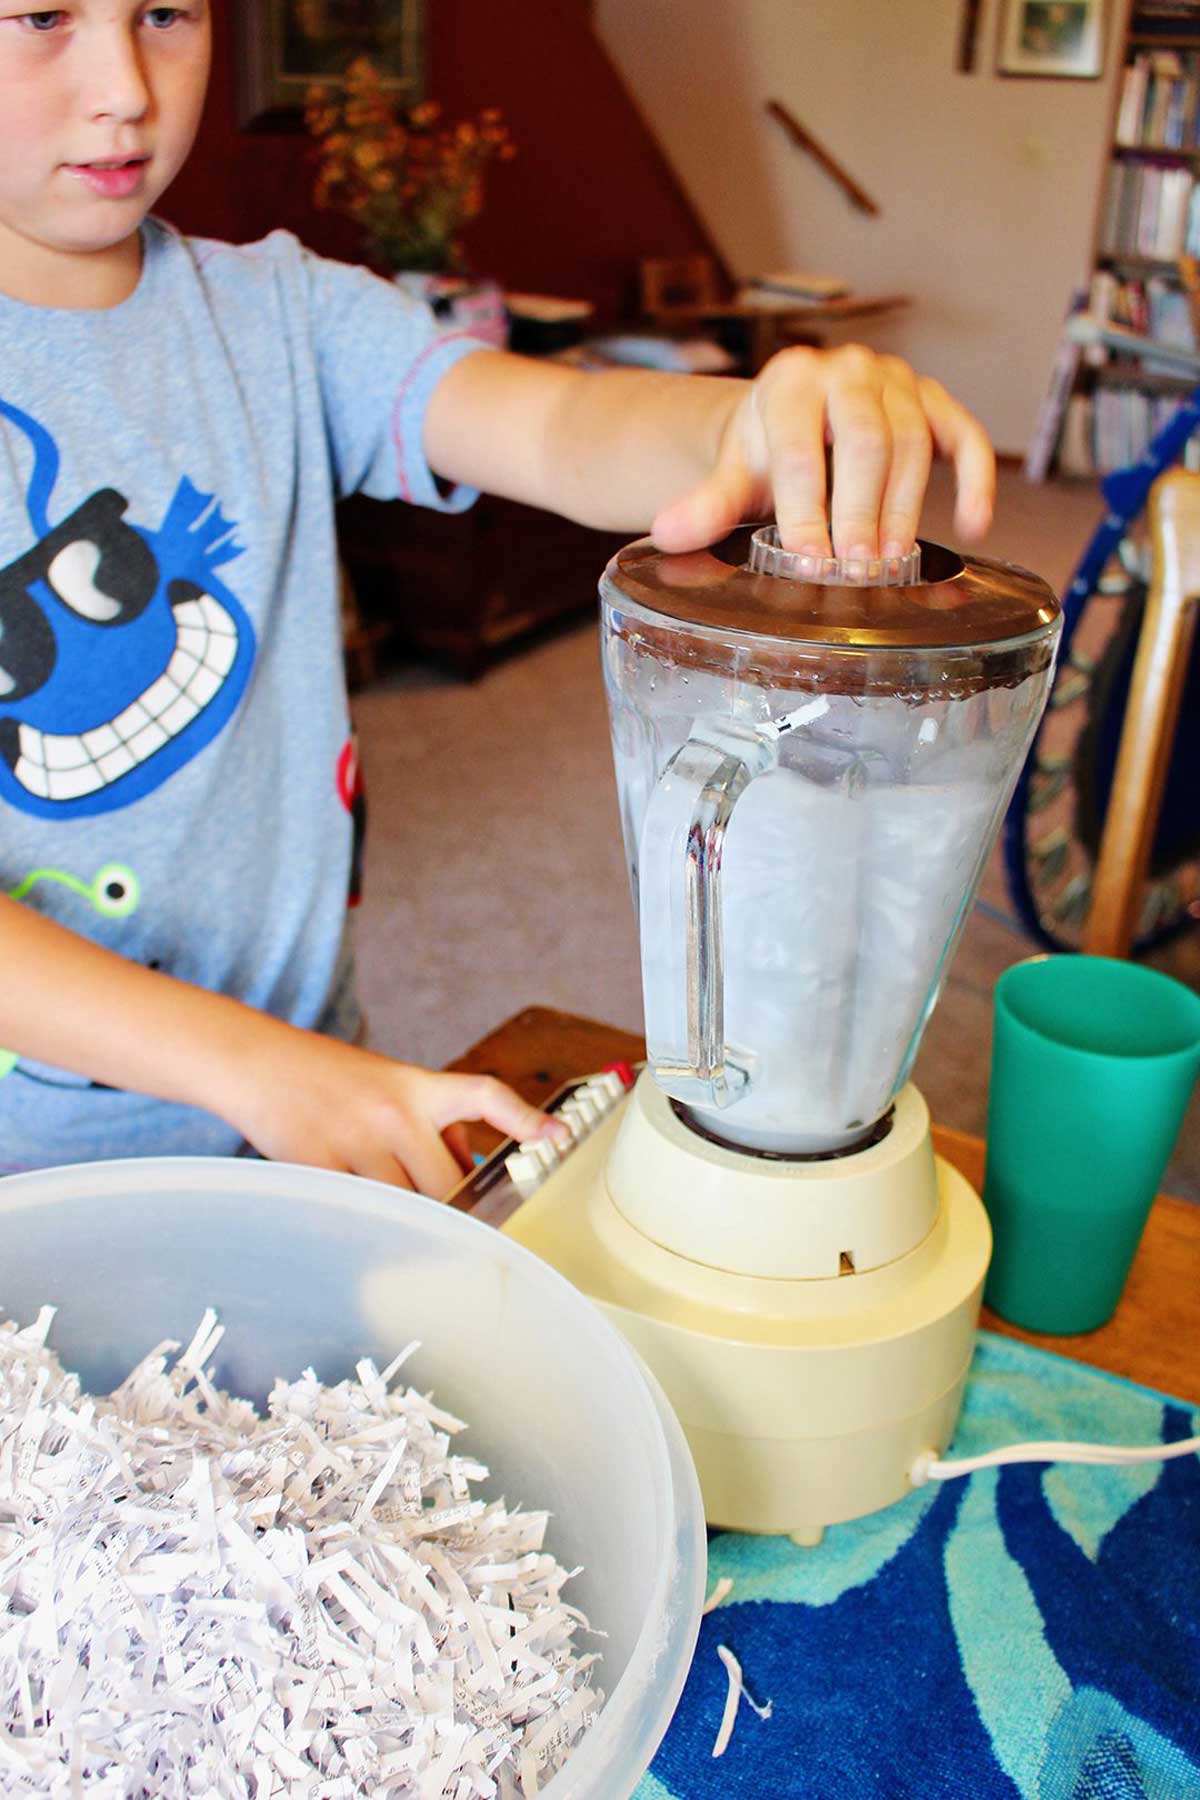
Allow the grandchildren to place a few handfuls of paper into the blender together with a substantial amount of water.
Instruct them to blend the paper mixture and water until it transforms into a mushy consistency. You aim to produce a smooth pulp from the soaked materials.
The kids truly enjoyed this segment.
If you are incorporating thicker items such as cardboard containers, an egg holder, or paper grocery sacks, it might be beneficial to soak them in hot water prior to blending. Although they are made of paper, these materials will benefit from being softened slightly in the warm water before blending.
Now that you have allowed the paper to soak and produced a pulp, you’re prepared for the subsequent stages!
Tip: The paper pulp should be submerged in ample water, or it may strain the blender motor. Add additional water if you discover that it’s not blending well. A loose mixture with surplus water also facilitates a better paper-making process.
4. Now the Enjoyable Portion of Crafting Recycled Paper…
Excited for the fun portion?
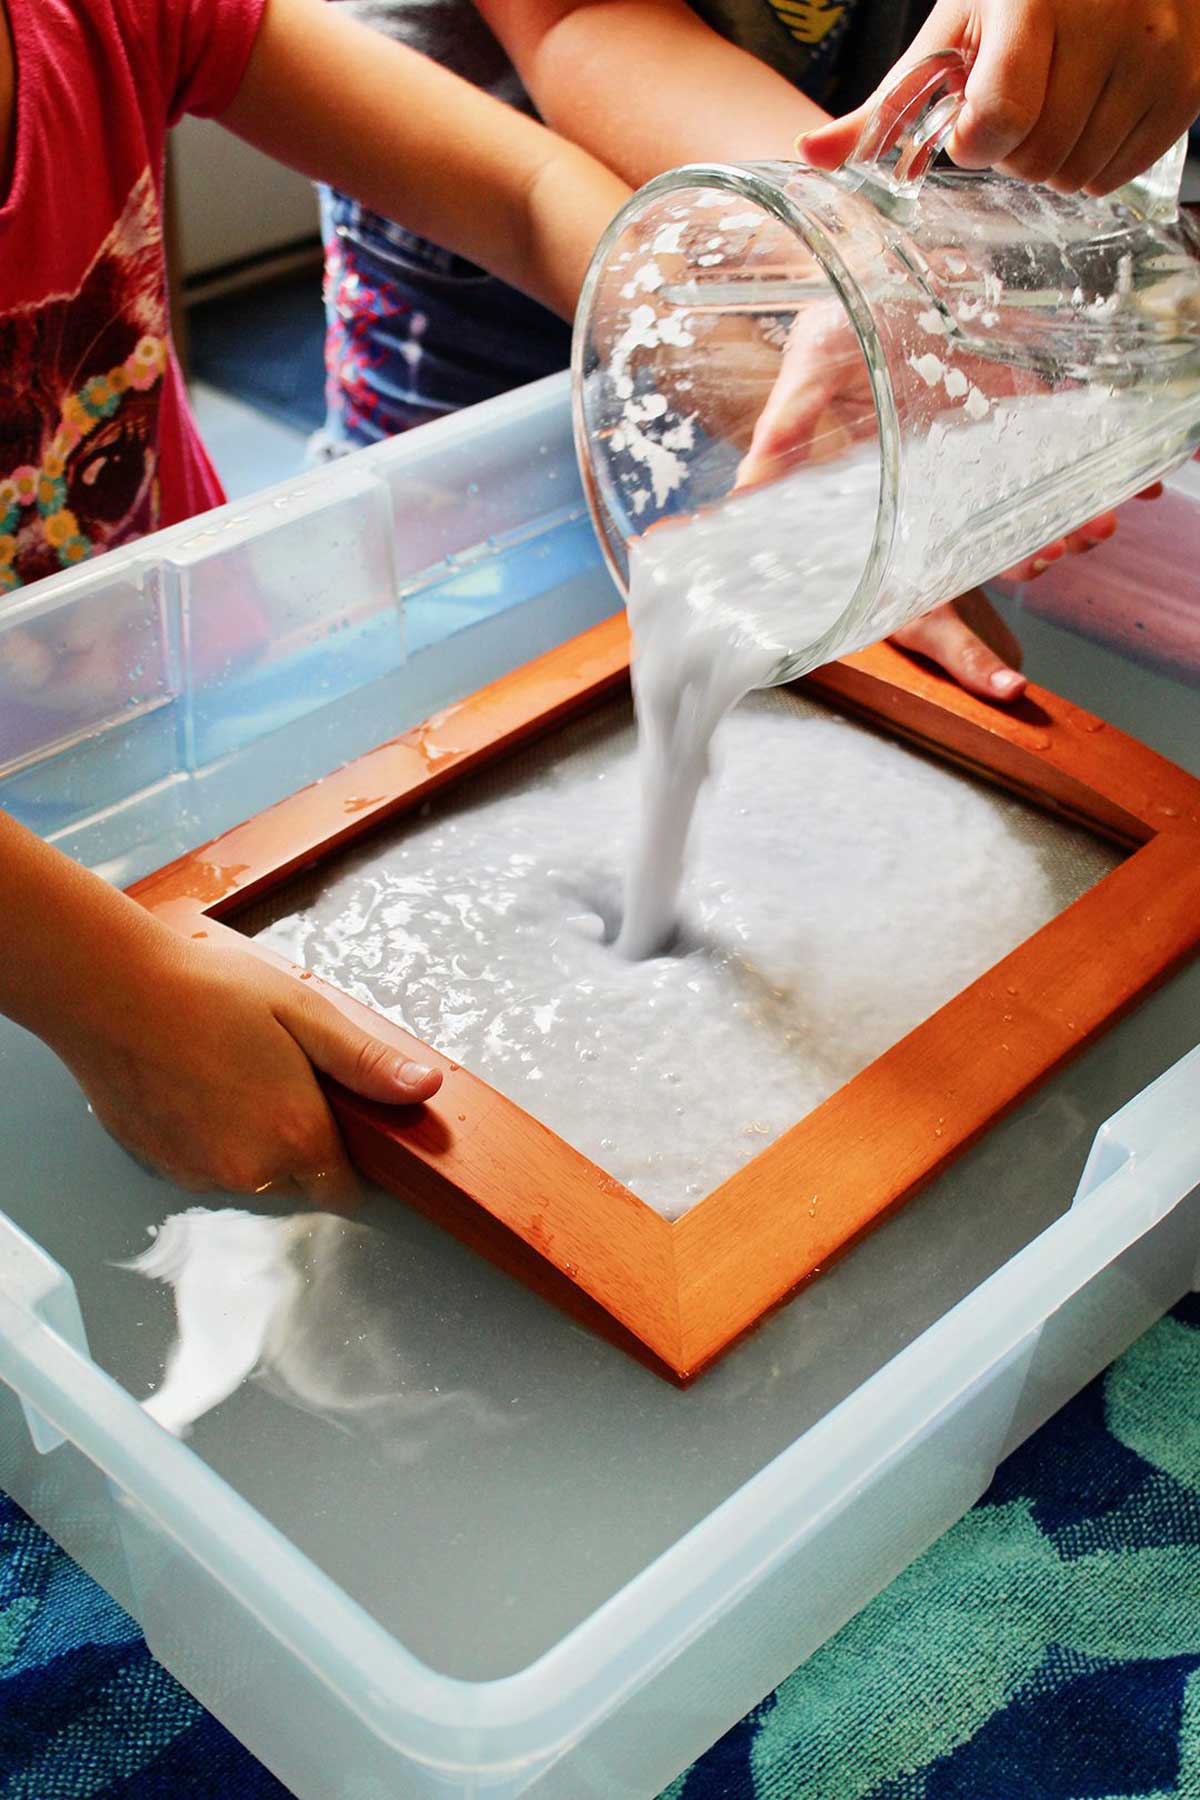
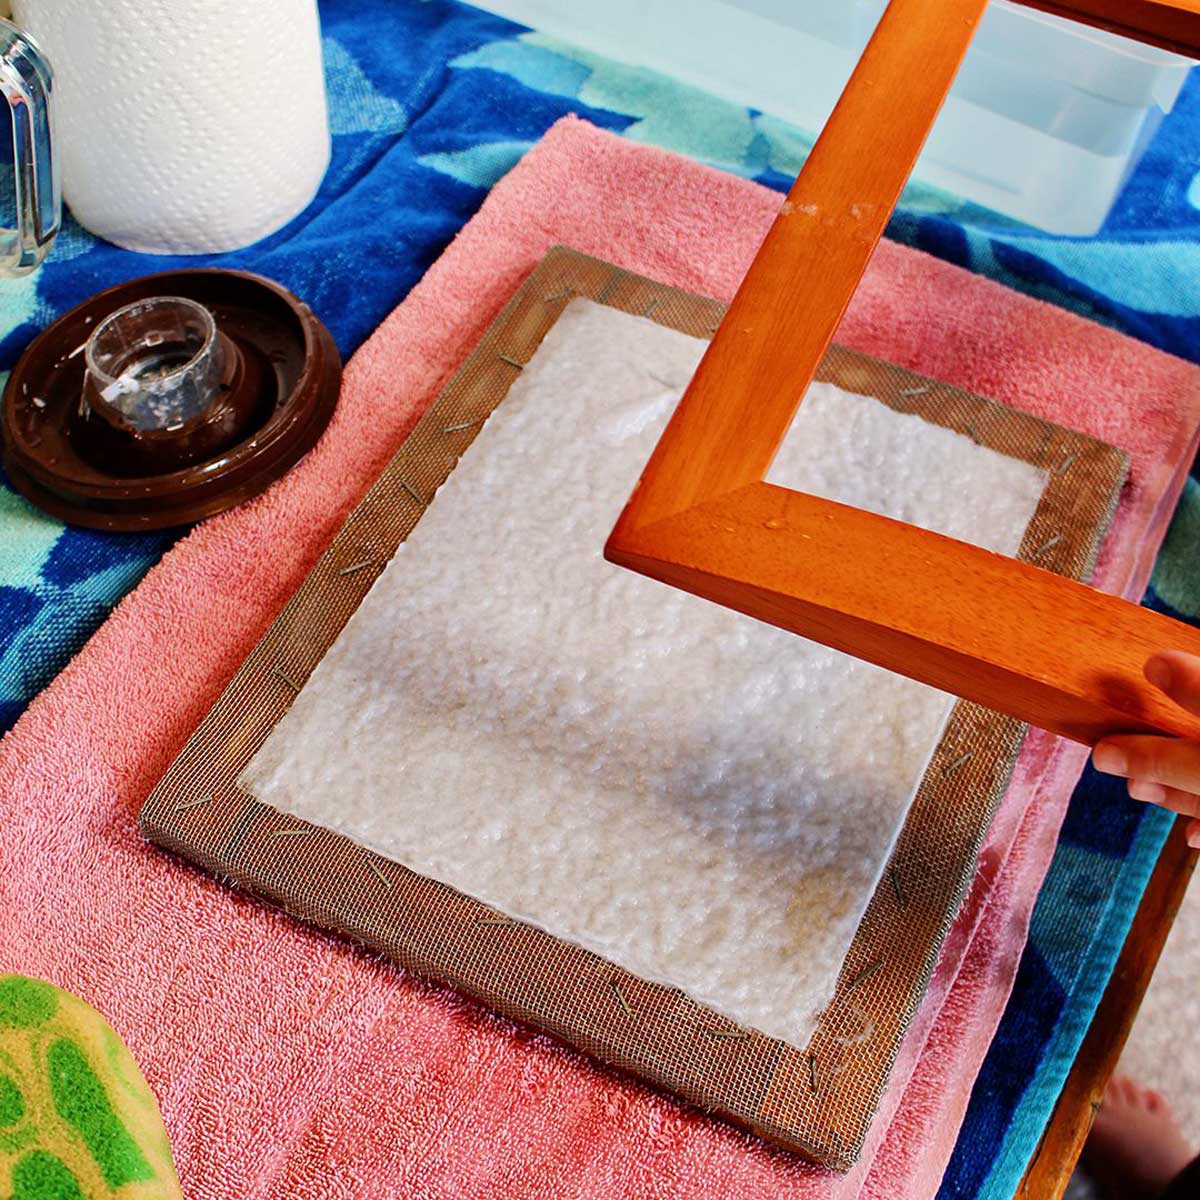
The young creators must hold the mould and deckle, flat sides pressed together, in the water-filled tub (the deckle, with the screen side facing up, should be placed at the bottom). They need to maintain a firm grip during this step and position it so it’s submerged, but not so deep that the pulp disperses throughout the tub.
Gently pour the smooth pulp into the open section of the mould and onto the deckle screen. It should naturally spread out to form a flat sheet.
Have them lift the mould and deckle out of the water and allow the liquid to drain back into the tub.
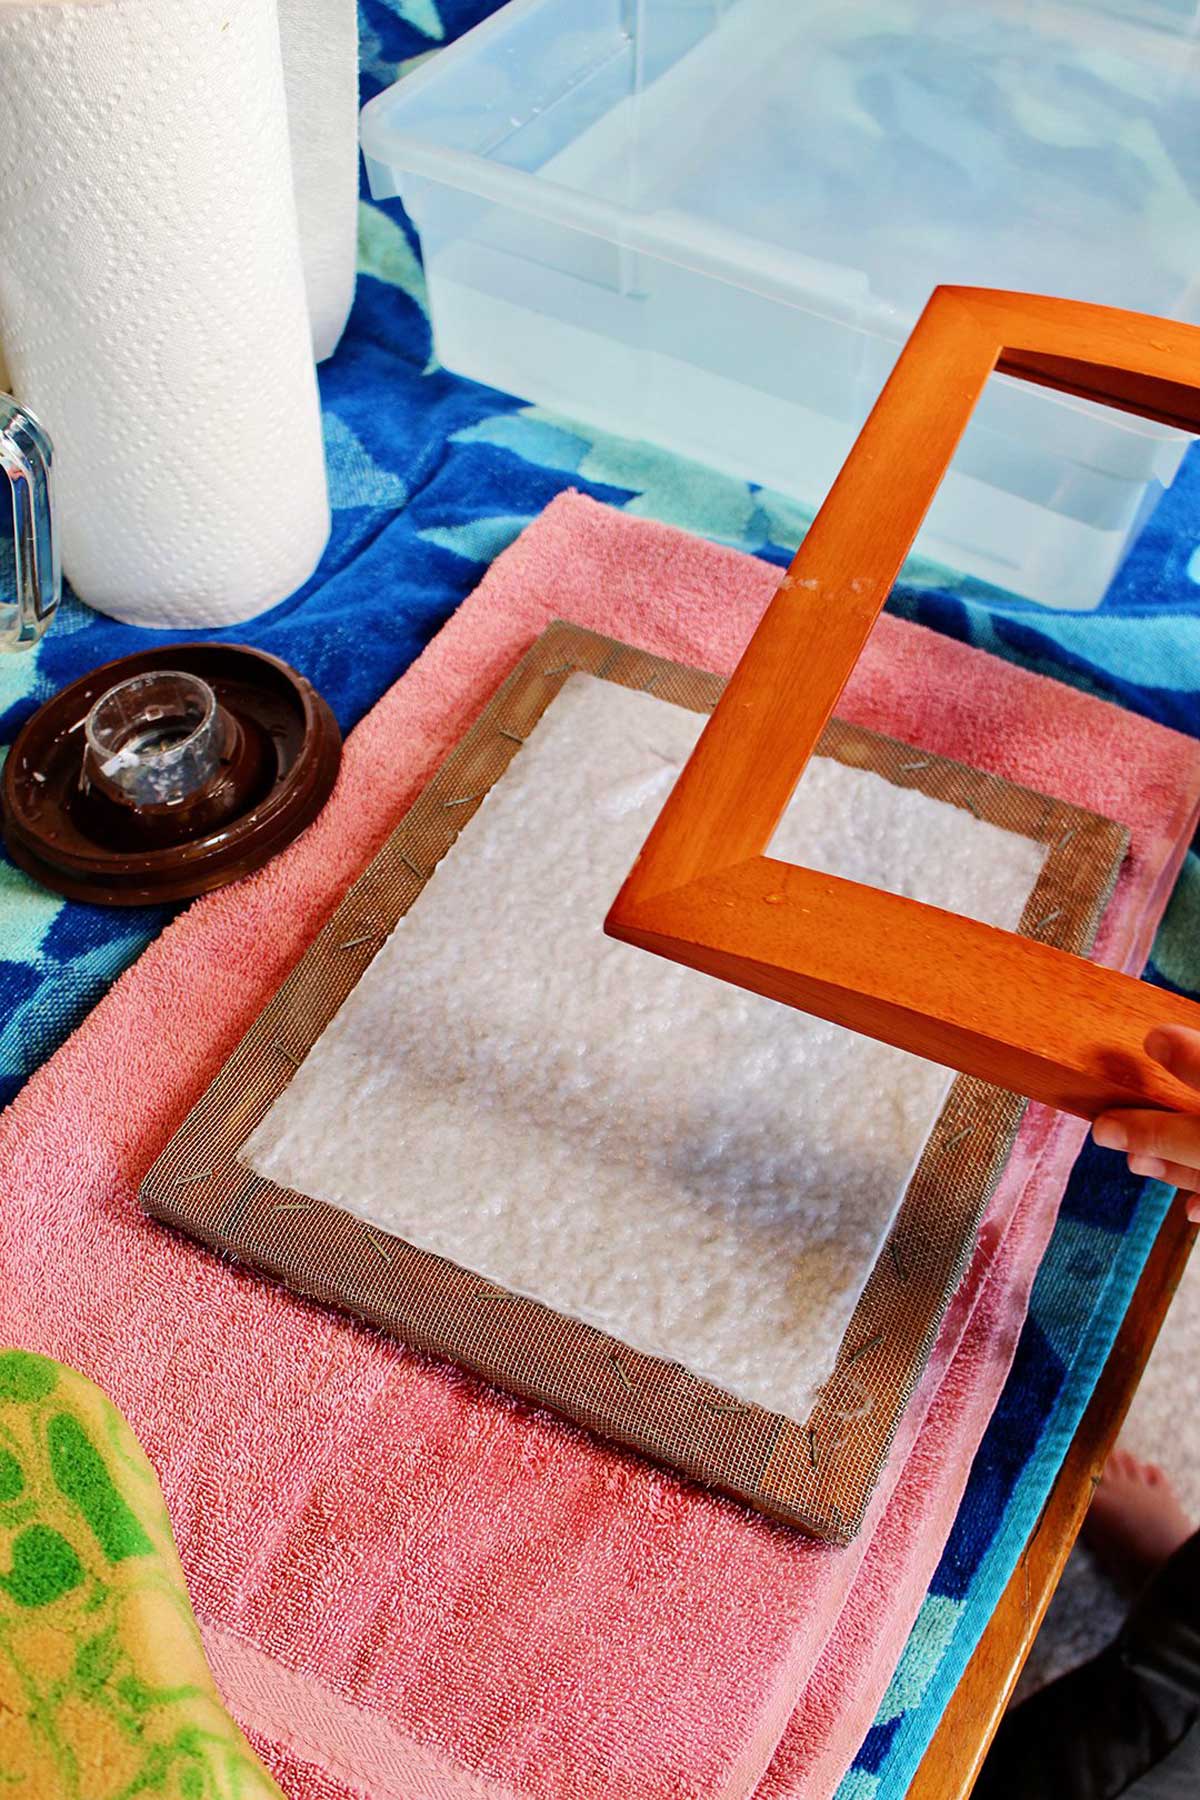
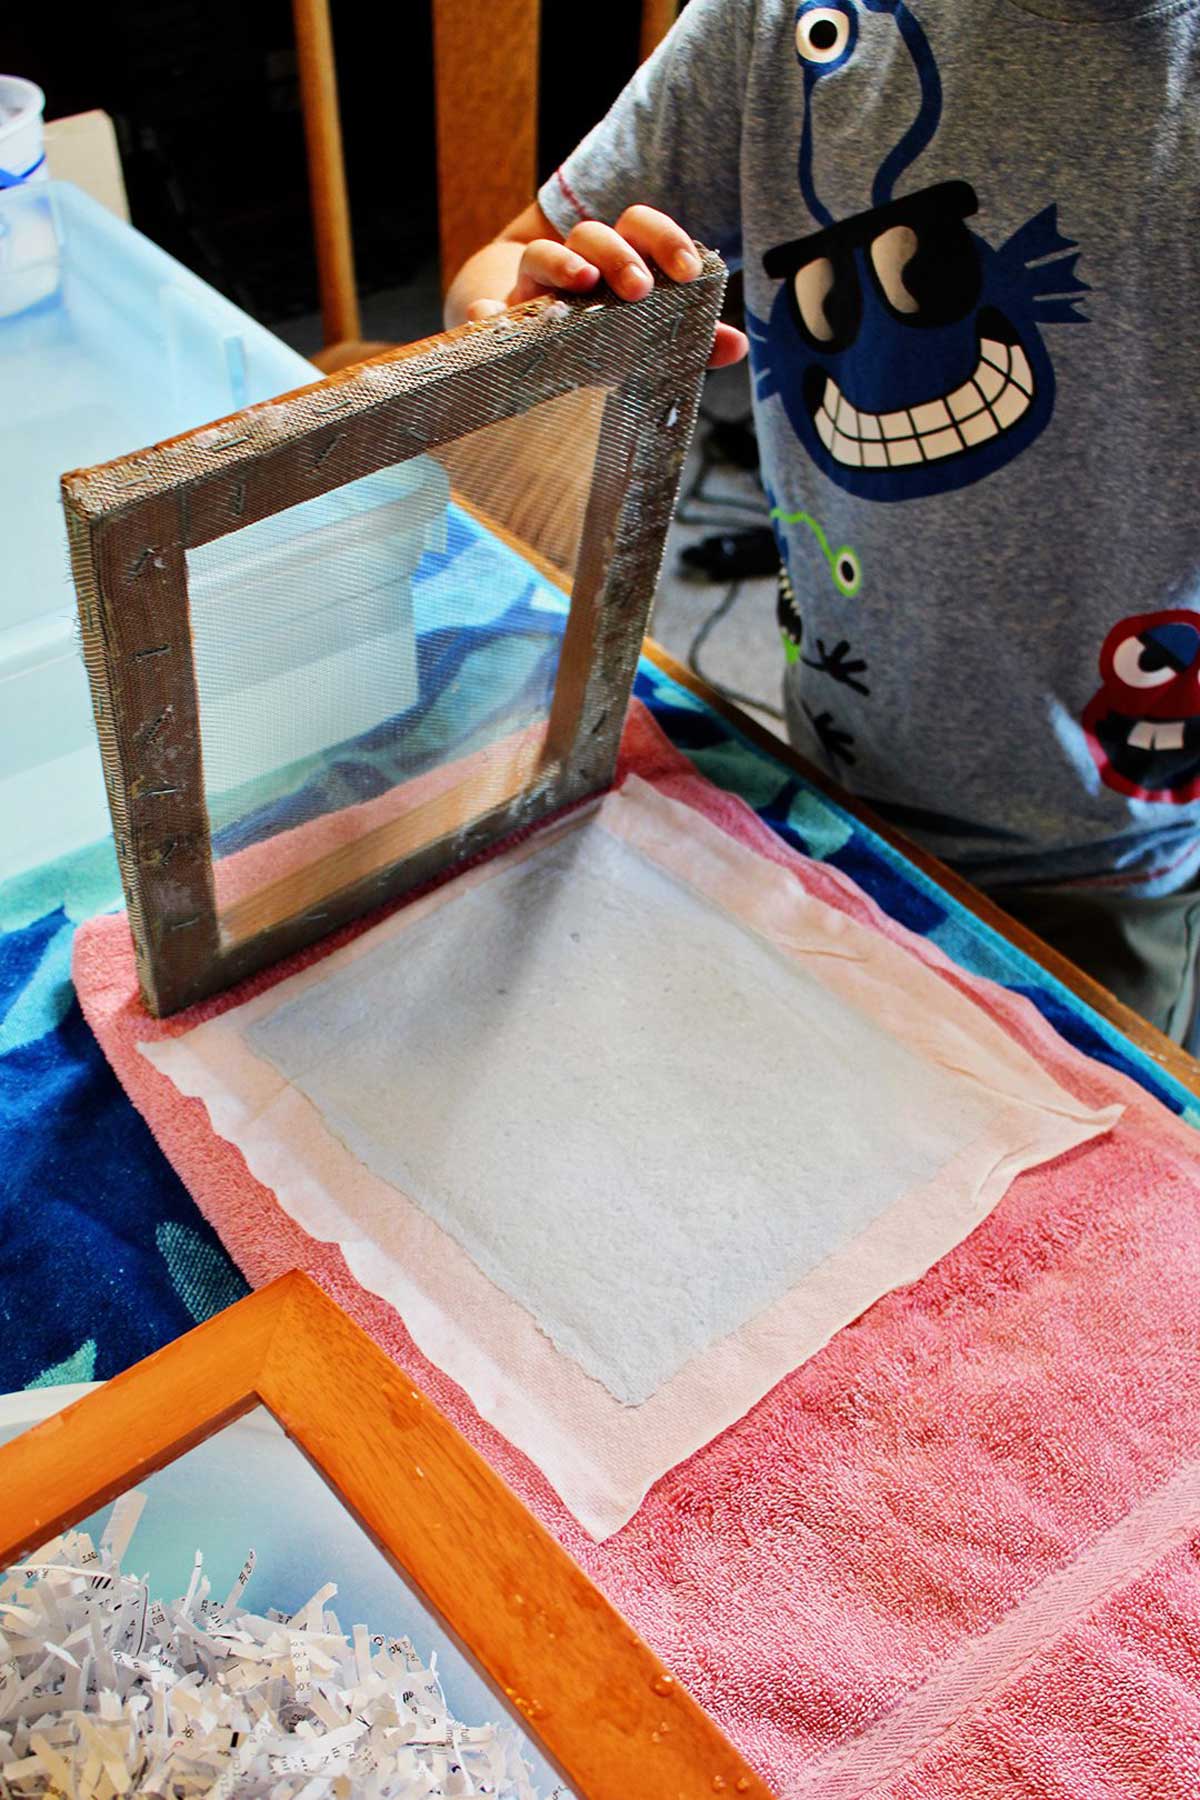
5. Couch the Paper
Position the mould and deckle on a set of towels and carefully lift the mould away. It is fascinating to observe the layer of pulp resting on the deckle screen as a moist sheet.
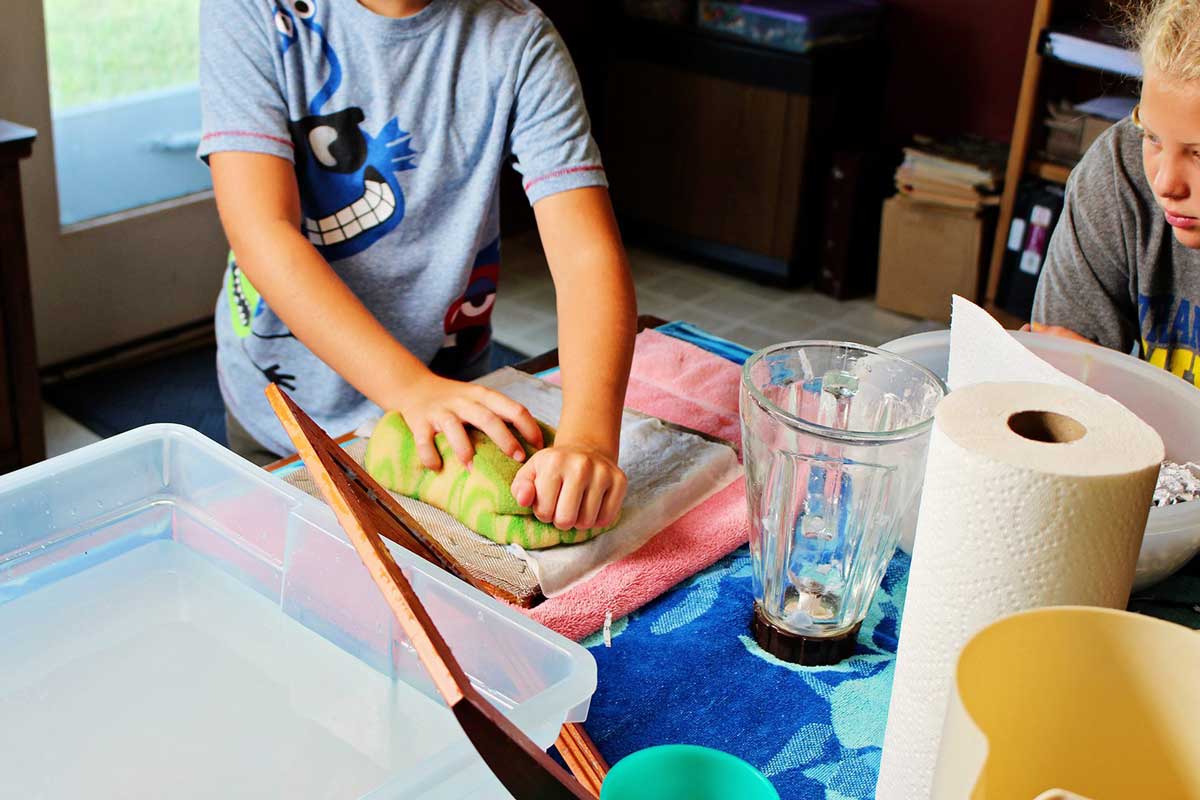
Place a piece of paper
towel over the pulp section. Softly dab it using the flat side of the sponge to soak up a bit of moisture with each attempt.
Twist the water out of the sponge multiple times as you persist in dabbing out as much moisture as you can. Extracting water from the pulp is known as couching (pronounced “cooching”), just so you know.
Have your grand swiftly flip the deckle over so that the paper towel rests flat on the towel. Carefully remove the deckle, leaving the paper towel with the paper attached to it.
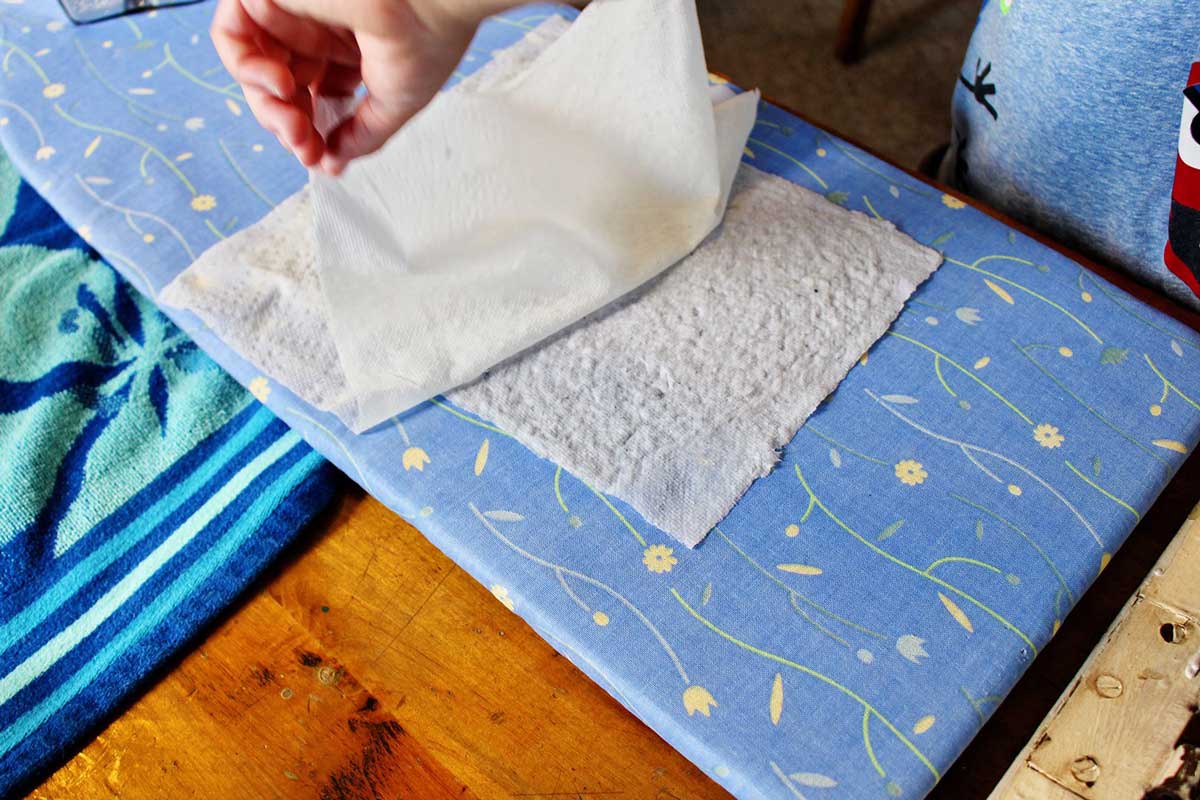
6. Dry the Paper
Move the paper towel and paper to the ironing board.
Lay a tea towel over it and gently press it with a slight ironing motion. Microfiber towels or another finely woven towel can also be employed.
Ironing the paper itself won’t make it dry, but this will apply some heat and pressure to bond the paper fibers together. No glue is used to keep the paper fibers intact!
Typically, paper is placed in a press to dry and flatten out. Lacking that option, this method serves as an alternative.
We set our sheets aside to continue drying.
DIY Paper Variations
Now let’s explore various ways to modify and create different varieties of paper. As mentioned, the options are limitless 😉
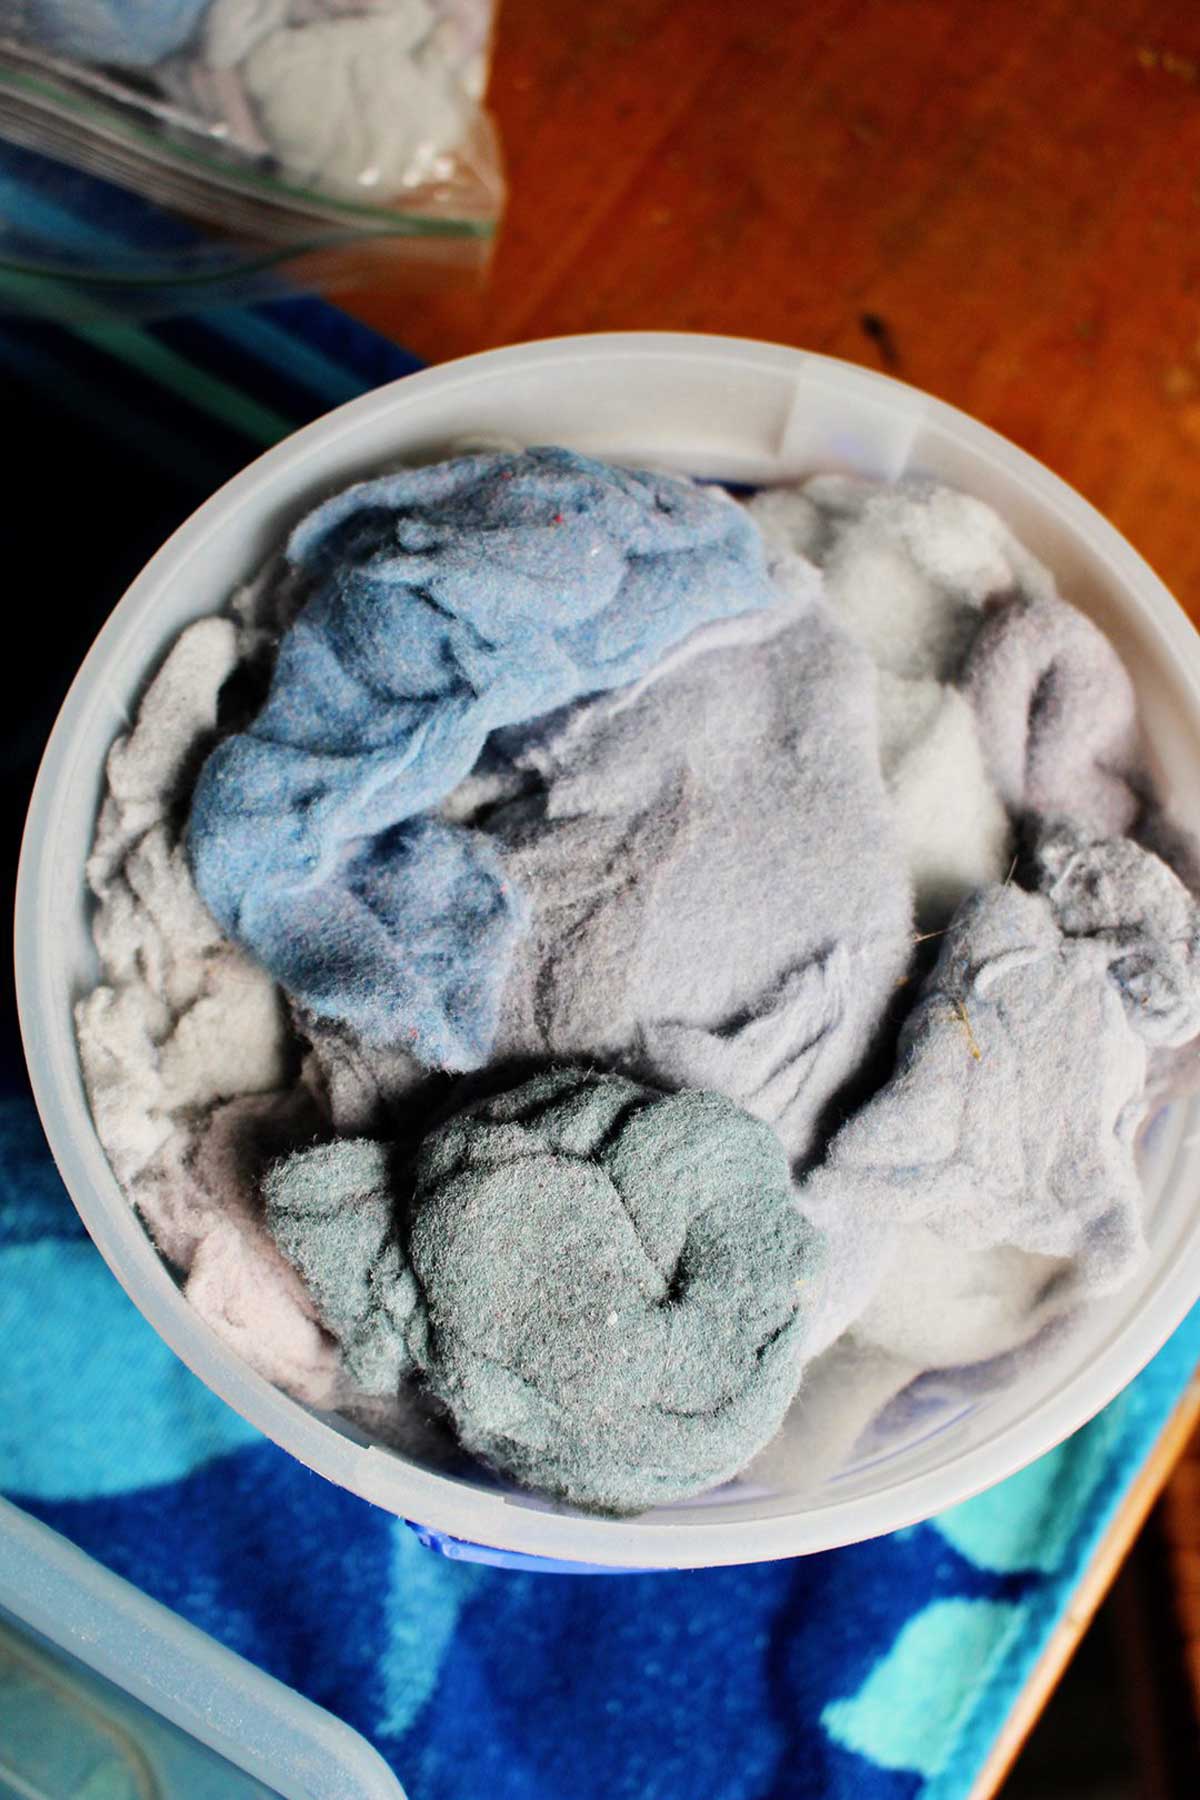
The second sheet of paper produced by the children included some pulp and a handful of dryer lint. They were astonished that I had saved dryer lint!!
It effectively incorporates fabric fibers into the paper. Papa and I often collect blue lint from towels and jeans, resulting in light blue paper.
For altering the color in different ways, consider using scraps of construction paper or colored sheets (what about yellow pages?) to create speckled paper, which appears quite impressive. You could also experiment by adding food dye or food coloring in the blender to achieve vibrant hues like pink and yellow, although I haven’t tested that myself.
I’ve also encountered paper made with decorative elements such as tiny leaves, flower petals, or even fabric fragments. These will be applied immediately after spreading the pulp onto the deckle and mould. These elements bond into the pulp as it undergoes the couching process.
As you can see, this could become an addictive hobby!! I hope you enjoy this project immensely.
Stay tuned as we will utilize this paper in future projects for printing or drawing.
How to Utilize Your Recycled Paper
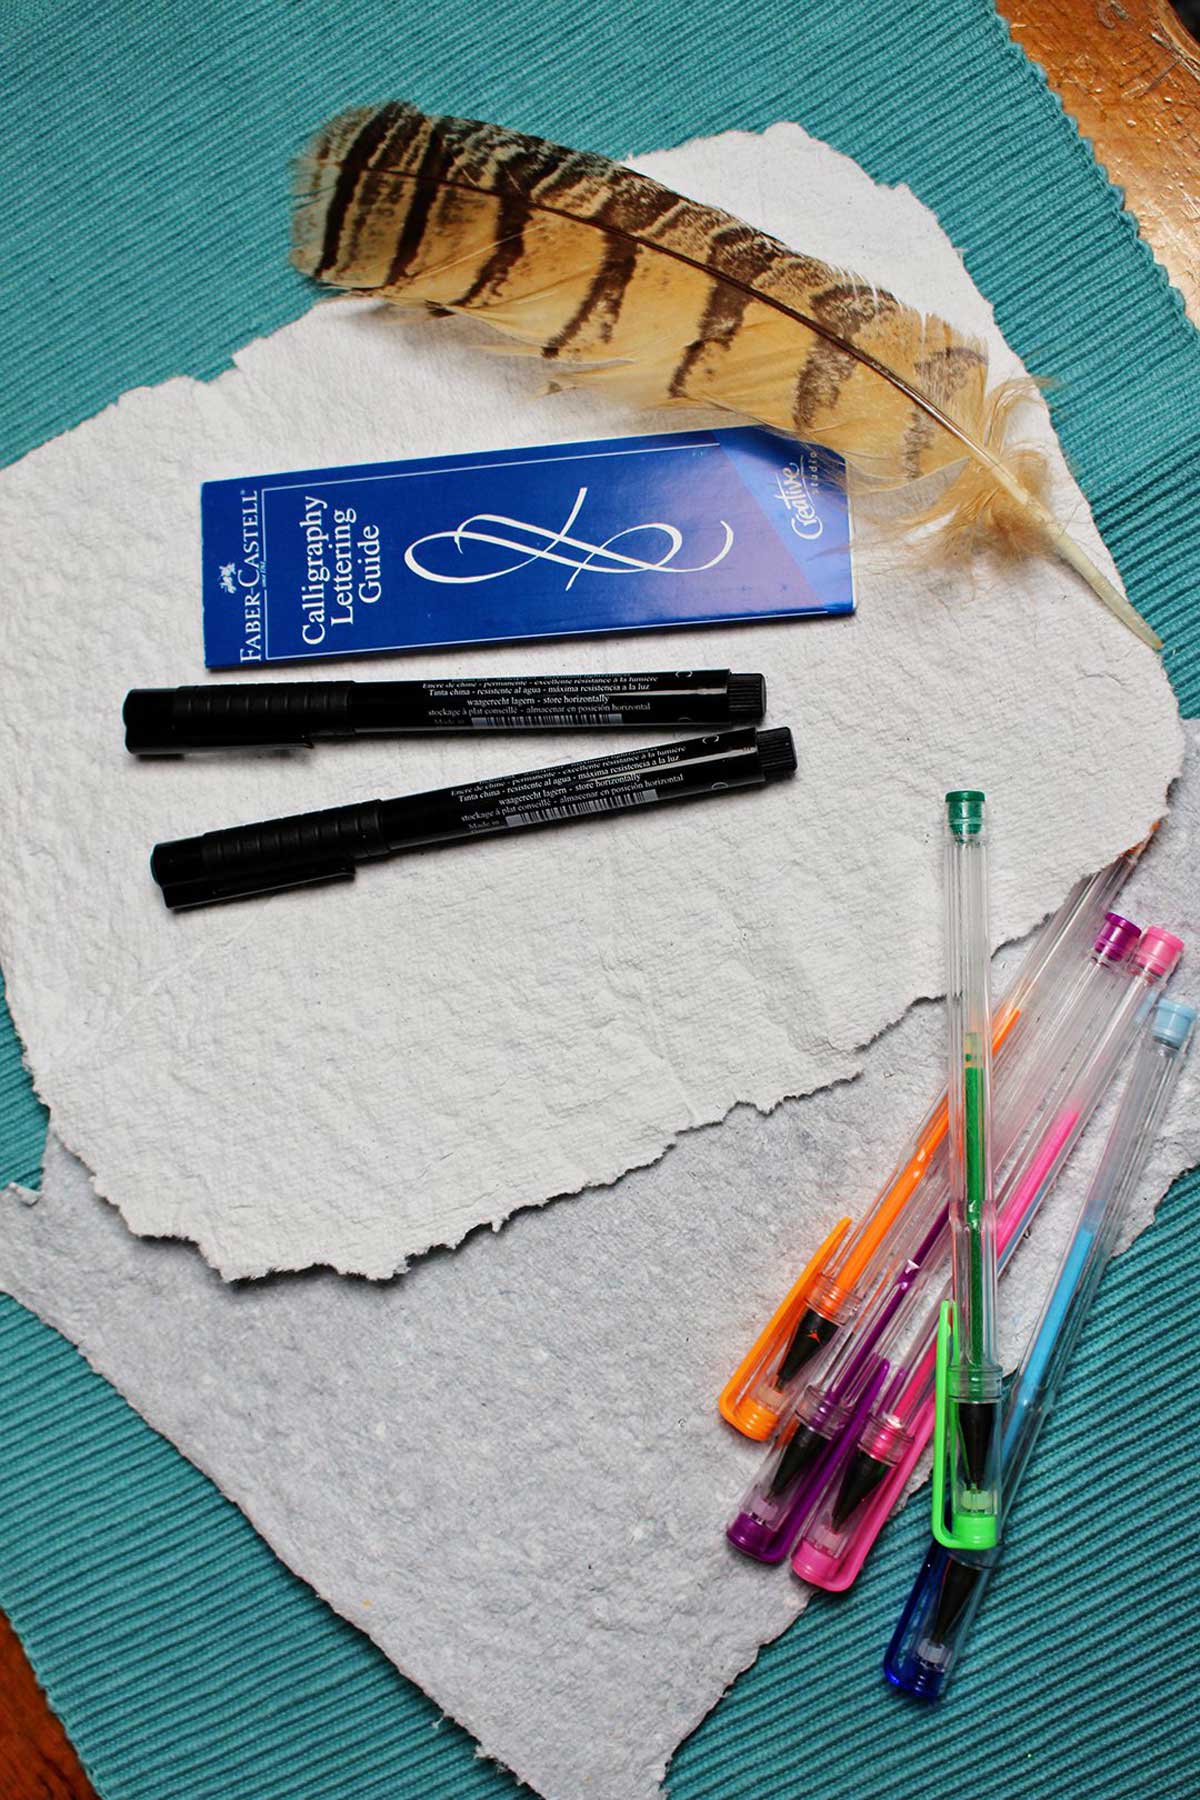
Once your paper has thoroughly dried, this magnificent handmade masterpiece is complete and ready for use!
We employed our paper in artistic projects, painting on it using acrylics. I’ve discovered that this paper is quite delightful to transform into DIY stationery, such as your own customized cards!
This kind of paper can be relatively thick, but I believe you could also bind it to create notebooks or art journals.
The options are limitless!
DIY Paper Frequently Asked Questions
How do you create recycled paper at home?
Crafting your own recycled paper is simpler than you might assume! You can fashion your own mould and deckle from old picture frames, then create a pulp from torn recycled paper and water. Pour the pulp into the frames, which are partially submerged in water, and remove as much liquid as possible. Let it dry completely and you have your own homemade recycled paper!
How to create recycled paper with children?
Making paper is an enjoyable craft for children and a fantastic way to utilize recycled materials! Kids will enjoy blending up recycled paper with water to generate their own pulp. They can pour the pulp onto the mould and deckle, and even assist in drying the paper as well. Ultimately, they will end up with their very own homemade recycled paper!
How to produce eco-friendly paper?
Creating your own eco-friendly paper is straightforward using recycled items! Utilize scraps of paper from a shredder. Alternatively, if you lack a shredder, gather old documents destined for the recycling bin such as office papers, junk mail, or brown paper bags. Just tear the recycled paper into small fragments for your paper pulp!
Additional Enjoyable Recycled Craft Projects for Kids
If the children wish to employ more recycled materials for exciting arts and crafts, explore these concepts from around the blog!
Have Fun!
If you attempt this craft, please inform me! Feel free to leave a remark, rate it, and tag a picture with #WelcometoNanas wherever you share.
Come participate in the excitement at https://welcometonanas.com
Additional from Welcome To Nana’s
The Process of Crafting Homemade Paper
Shelly
Adhere to these straightforward step-by-step directions to create your own, personalized, Recycled Paper at Home!
Preparation Duration 45 minutesmins
Drying Duration 1 dayd
Overall Duration 1 dayd45 minutesmins
Category Paper Craft, Recycled Craft
Tools
Sturdy stapler
Mixer
Container
Cleaning sponge
Bath linens
Disposable towels
Materials Needed
28×10″ Framesrepurposed from old ones, ideally wooden
1pieceWindow mesh
Recycled cardstockshredded or ripped
Lint from dryer, colorful paper, other sheets for creativityoptional
Directions
Create a Mould and Deckle
Disassemble the two frames and remove the glass, cardboard, and any fasteners or tabs they might include. You only need the frame itself.
Attach a section of the window mesh to one of the frames using staples to cover the opening.
Staple the mesh onto the flat face of the frame, not the textured decorative side. This serves as your “deckle” to filter the paper pulp.
The second frame will remain intact and sit atop the screened frame, acting as the “mould” that provides an outline for the paper.
Let’s Craft Some Paper!
Take a moment to fill the tub with water until it’s approximately 3 inches deep.
Shred or tear the old papers destined for the recycling bin into small fragments.
Allow the little ones to add a couple of handfuls of paper to the blender with ample water. Blend until it turns into a chunky mixture. Ensure the paper pulp is submerged in plenty of water to avoid straining the blender motor, and it improves the paper-making process.
Hold the mould and deckle together, flat sides facing each other, submerged in the tub (the deckle should have the mesh side facing up). Grip them securely throughout this step and ensure they stay under the water without allowing the pulp to scatter throughout the tub.
Pour the pulp into the open section of the mould, directly onto the deckle’s screen. It will naturally spread out.
Remove the mould and deckle from the water, allowing excess water to drain back into the tub.
Position the mould and deckle onto a set of towels and carefully detach the mould.
Cover the pulp with a paper towel. Softly press it with the flat side of the sponge, twisting out water from the sponge multiple times as you continue dabbing some moisture out.
Flip the deckle so that the paper towel rests flat on the towels. Carefully lift the deckle, leaving the paper towel along with the paper.
Transfer the paper towel and paper to the ironing board. Cover it with a tea towel and gently iron it with minimal pressure. This will apply some heat and pressure to bond the paper fibers.
Set your finished paper aside to dry and get ready to create more!
Create DIY baggage tags utilizing Mod Podge, cardboard, and textile! A delightful, simple method to customize your suitcase and recognize it quickly. [...]
Card Directions Now let’s convert those virtual papers into a completed card. Separate the four printed rectangles. Slice a sheet of 8.5 x 11 white ca [...]
Have you ever pondered why certain gardens flourish while others falter? The answer isn't sorcery—it lies in the earth. By enhancing garden soil prior [...]
Here's the text with synonyms and altered sentence structure, while maintaining the HTML tags and format: Cricut Design Space In the subsequent steps, [...]
Craft fashionable washer necklaces with this simple guide! Ideal for handmade jewelry enthusiasts, this craft is enjoyable, economical, and imaginativ [...]
These DIY Mod Podge magnets are adorable, personalized, and simple to create using scrapbooking paper and glass gems! Ideal for children's crafts, pre [...]
In our location, it’s a central hub for farmers’ markets, brimming with fresh produce, artisanal items, and enthusiastic sellers. However, thriving at [...]
This article and pictures might incorporate Amazon or other affiliate links. Should you buy something through any link, I could receive a nominal comm [...]
We use cookies on our website to give you the most relevant experience by remembering your preferences and repeat visits. By clicking “Accept”, you consent to the use of ALL the cookies.
This website uses cookies to improve your experience while you navigate through the website. Out of these, the cookies that are categorized as necessary are stored on your browser as they are essential for the working of basic functionalities of the website. We also use third-party cookies that help us analyze and understand how you use this website. These cookies will be stored in your browser only with your consent. You also have the option to opt-out of these cookies. But opting out of some of these cookies may affect your browsing experience.
Necessary cookies are absolutely essential for the website to function properly. These cookies ensure basic functionalities and security features of the website, anonymously.
Cookie
Duration
Description
cookielawinfo-checbox-analytics
11 months
This cookie is set by GDPR Cookie Consent plugin. The cookie is used to store the user consent for the cookies in the category "Analytics".
cookielawinfo-checbox-functional
11 months
The cookie is set by GDPR cookie consent to record the user consent for the cookies in the category "Functional".
cookielawinfo-checbox-others
11 months
This cookie is set by GDPR Cookie Consent plugin. The cookie is used to store the user consent for the cookies in the category "Other.
cookielawinfo-checkbox-necessary
11 months
This cookie is set by GDPR Cookie Consent plugin. The cookies is used to store the user consent for the cookies in the category "Necessary".
cookielawinfo-checkbox-performance
11 months
This cookie is set by GDPR Cookie Consent plugin. The cookie is used to store the user consent for the cookies in the category "Performance".
viewed_cookie_policy
11 months
The cookie is set by the GDPR Cookie Consent plugin and is used to store whether or not user has consented to the use of cookies. It does not store any personal data.
Functional cookies help to perform certain functionalities like sharing the content of the website on social media platforms, collect feedbacks, and other third-party features.
Performance cookies are used to understand and analyze the key performance indexes of the website which helps in delivering a better user experience for the visitors.
Analytical cookies are used to understand how visitors interact with the website. These cookies help provide information on metrics the number of visitors, bounce rate, traffic source, etc.
Advertisement cookies are used to provide visitors with relevant ads and marketing campaigns. These cookies track visitors across websites and collect information to provide customized ads.