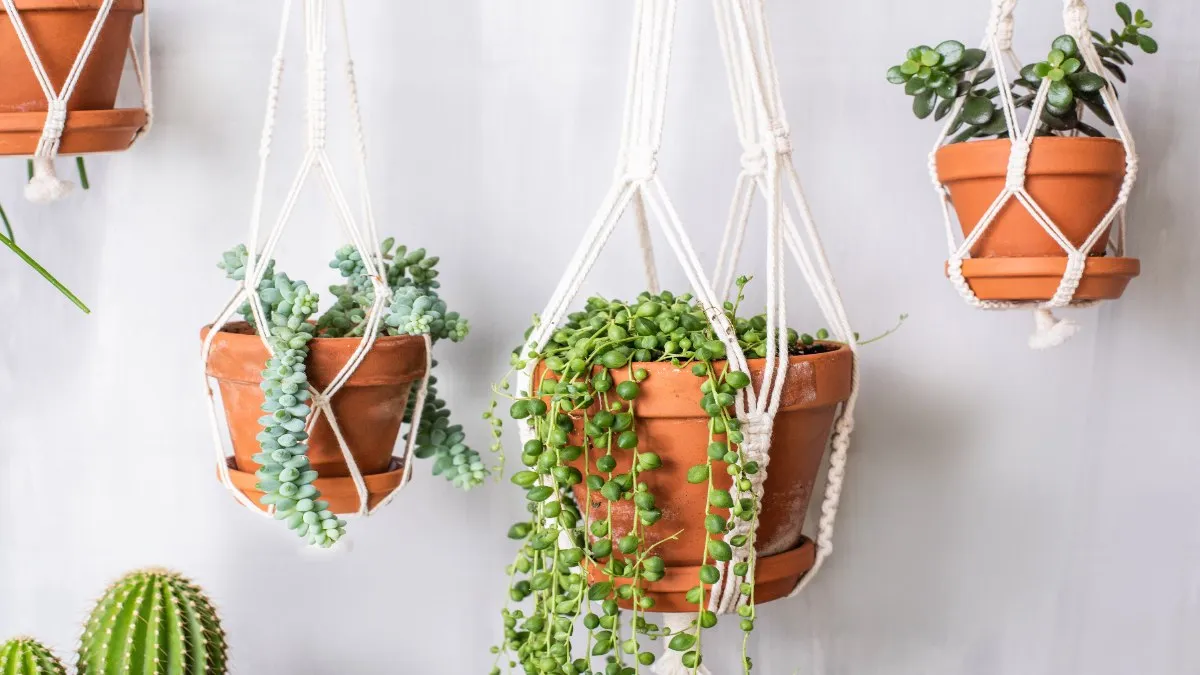
Macrame is an age-old knotting method that has become fashionable once more in recent times. It’s ideal for crafting ornamental items that not only appear stunning but are also practical. A DIY macrame plant hanger is perfect for enhancing your balcony without incurring hefty expenses. In these guidelines, you will discover how to proceed step by step to create a unique piece that complements your balcony stylishly.
Proper preparation is essential for macrame
Before getting started, ensure you have all the necessary materials on hand. For a traditional plant hanger, it’s best to utilize:
- 3-4mm thick Makramee-Garn 🛒 (cotton for indoor use, polyester for outdoor use), approximately 20-30 meters
- 1 wooden ring or metal loop for suspending
- 1 plant pot (diameter 12-18 cm)
- Measuring tape
- Scissors
- Adhesive tape or clips for securing
- Optional: wooden beads or colored twine for embellishments
Step 1: Cutting and securing
Cut four strands of macrame yarn, each measuring 3-4 meters in length. Fold each strand in half, resulting in eight equal-length ends. Pass the center points through the ring and fasten with a lark’s head knot. Now eight strands hang uniformly from the ring – the foundation of your plant hanger.
Step 2: Craft the upper knot area
To ensure that the hanging piece appears both functional and ornamental, initiate a decorative section about 3-5 cm below the ring. You may tie multiple spiral or square knots to form a lovely design. Ensure your work is consistent so that the hanger doesn’t tilt later.
Step 3: Create working groups
Separate the eight strands into four pairs – each pair represents an “arm” of your plant holder. Tie 8-12 square knots on each arm. The knots should be at the same height to ensure your plant pot hangs evenly later.
Step 4: Construct the net for the pot
Now comes the fundamental step: the support net. Align your arms side by side, and take one strand from one arm and one from the adjacent arm. Tie these together halfway up the pot using 3-4 square knots. Repeat this around the whole circumference. This will create a net in which you can securely place the pot.
Step 5: Finalizing and adding finishing touches
Gather all the strands and secure them with a wrap knot about 2-3cm below the pot’s base. Trim the ends neatly or leave them to hang as decorative fringes. If you wish to use wooden beads, you can thread them onto the strands before making the last knot.
Step 6: Position the pot and suspend it
Gently place the pot in the net and ensure it sits level. Hang the completed macrame plant hanger on a sturdy hook on the balcony, from the ceiling, or a wall bracket. Confirm that the hook can easily bear the weight of the pot and plant.
Get imaginative with colors
You can experiment with colored yarn to coordinate the hanger with the rest of your balcony decor. Incorporating beads or mixing two yarn colors also produces intriguing effects. If you desire something particularly striking, you can arrange several hangers of varying lengths side by side.
A macrame plant hanger is not only a clever way to display your plants in a space-efficient manner, but also a decorative focal point that instantly adds warmth. With a bit of practice and imagination, you can craft unique pieces that align perfectly with your style – and you will take pride in your handmade creations every time you gaze at them.