This DIY breakfast in bed tray was created with a $2 thrift store find! Top with a vintage graphic and resin to personalize and make it beautiful.
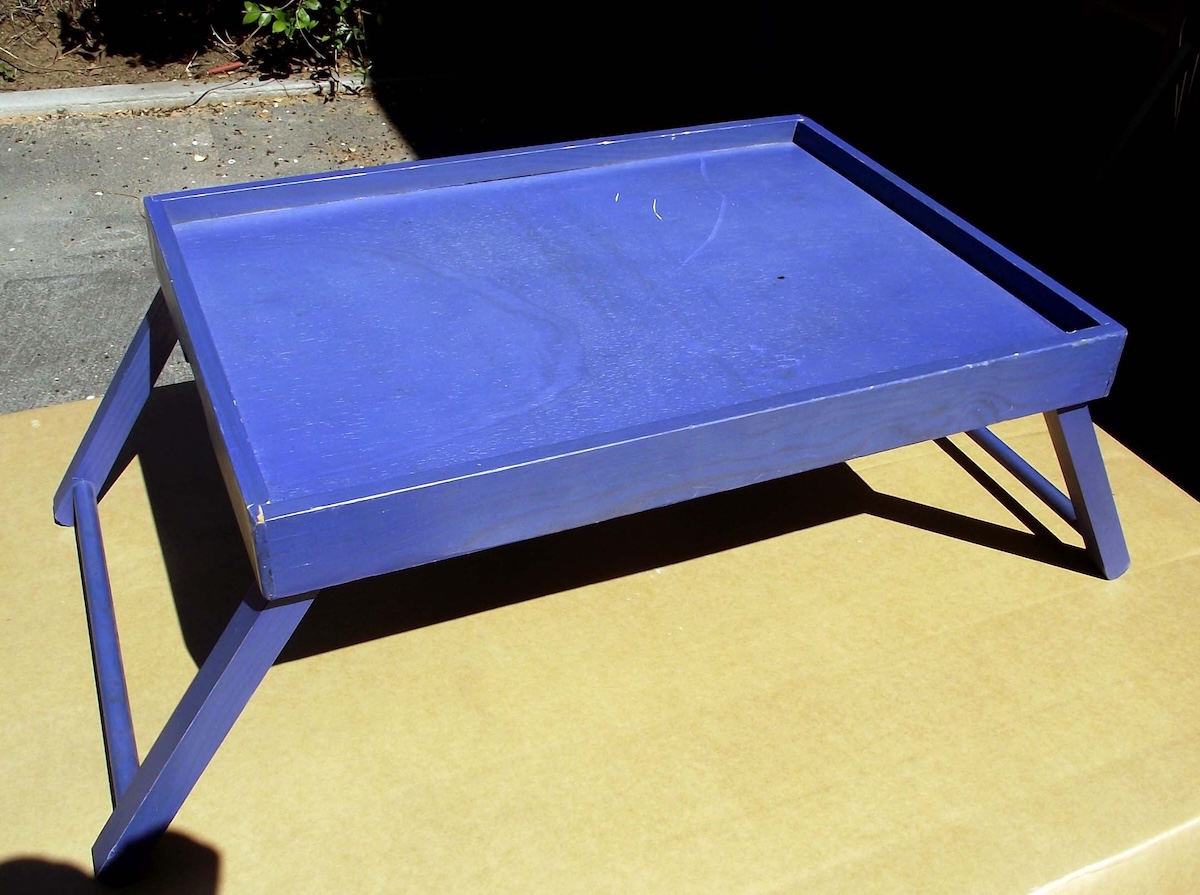
When I saw this breakfast in bed tray marked down to $2.00 at a local thrift store, I knew I had to get it for a resin project.
Furthermore, in a rare moment of clarity, I knew exactly what I wanted to do with it and it involved Mod Podge Transfer Medium. There was also going to be a red theme to go along with my kitchen tool shadow box, rolling pin bookends, and kitchen cabinet hardware.
Did I mention that croissants and coffee were in my vision as well? Here’s what I did to revamp this breakfast in bed tray. Once you try this you’re going to have to paint a tray of your own ASAP!
Gather These Supplies
- Spray paint
- Envirotex Lite 2-part resin kit
- Sander
- An old candle (not pictured)
- Sandpaper (220-grit and 100-grit)
- Mod Podge Photo Transfer Medium
- Mod Podge Furniture (you can use Hard Coat as well)
- Brush
- Rags
- Printed design
- Trisodium Phosphate (TSP) (optional)
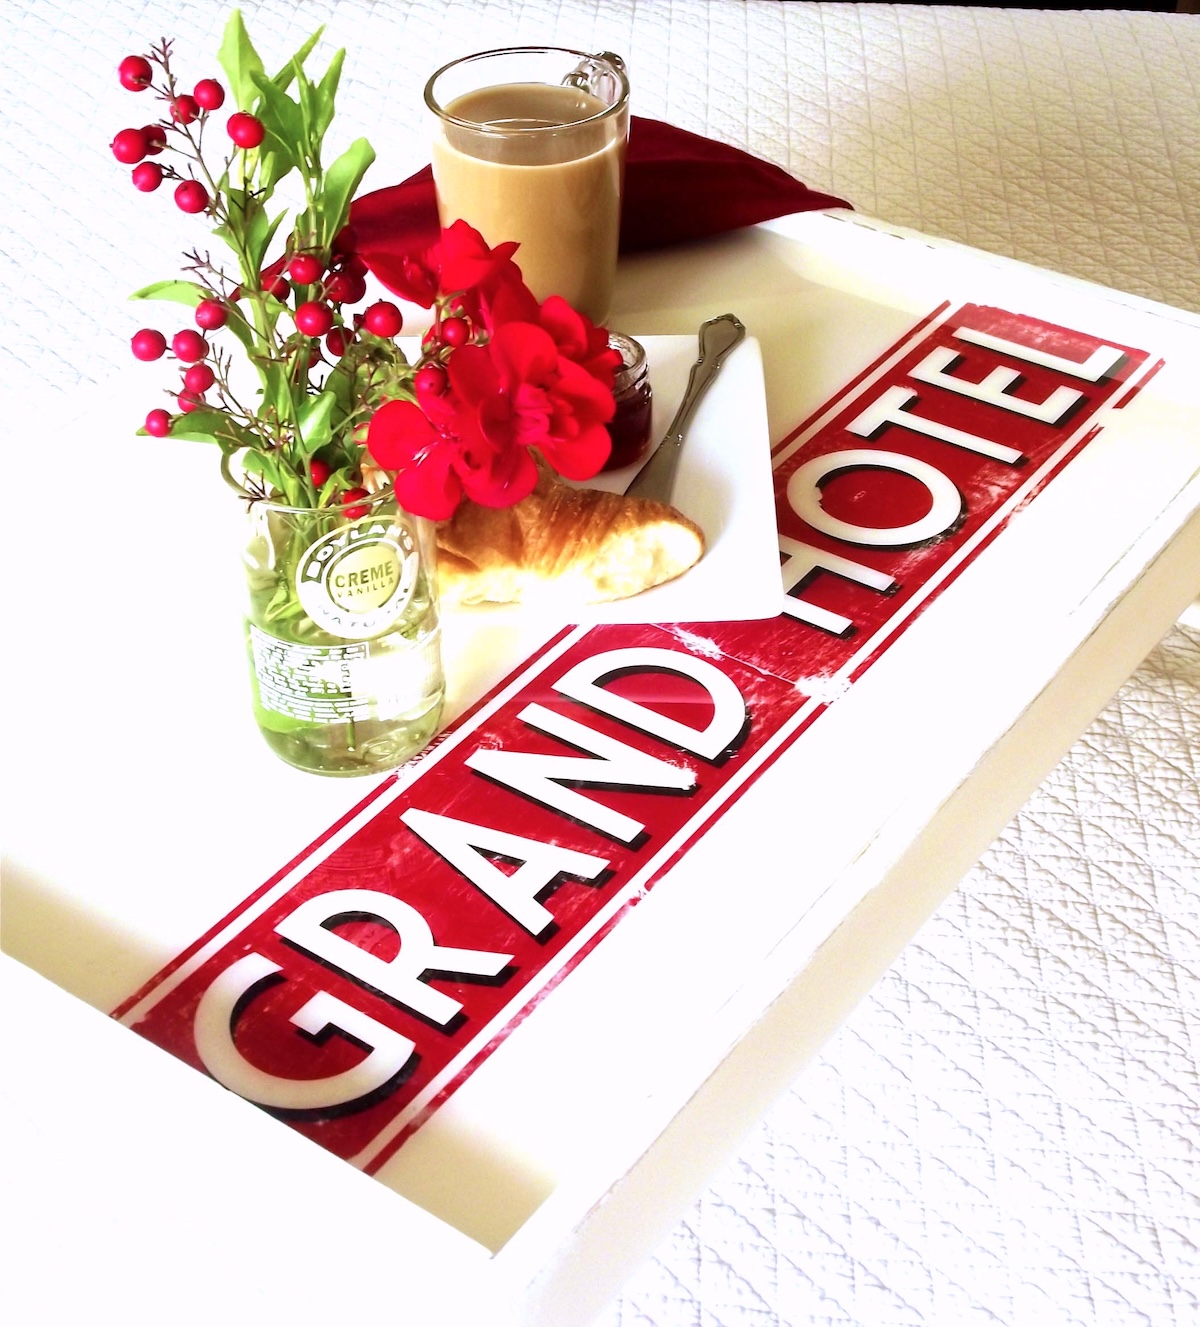
There’s my CROISSANT! (and coffee . . . I really needed some coffee).
Get the printable how to below:
DIY Bed Tray
Learn how to decorate a thrift store find in this DIY bed tray table project. Resin makes the perfect waterproof coating for your tray.
Prep Time30 minutes mins
Active Time1 hour hr 15 minutes mins
Dry Time1 day d
Total Time1 day d 1 hour hr 45 minutes mins
Yield: 1 tray
Cost: $12
-
Clean your surface with TSP and sand, if necessary. This allows the next layer of paint to stick effectively. Wipe away any sanding dust.
-
Rub a wax candle on the edges. A quick rub creates a barrier that prevents the spray paint from sticking in those spots. Give the tray two light coats of spray paint and set aside to dry for several hours.
-
Run the 100-grit sandpaper over the waxed edges to remove some paint here and there, giving an antique look.
-
Print out the image of your choice using a laserjet printer. If you use any words – you’ll need to reverse them when printing so they show up correctly when transferred.
-
Apply Mod Podge Transfer Medium to the printed side of the graphic and lay down on the tray. Smooth out bumps and clean up any excess medium that has squeezed out the sides of the paper. Leave to dry overnight.
-
Lay a wet towel over the image for several minutes. Begin to rub away the layers of paper. Repeat until your image is completely revealed and no more paper is left.
-
Use the 220-grit sandpaper to distress the tray and graphic to desired levels.
-
Cover the tray with a coat of Mod Podge and let dry for a few hours.
-
Mix and pour the Envirotex Lite according to package instructions. Give at least 12 hours of cure time before using.
Step 1: I wanted an antique look for my tray with wear and tear on the edges, but I didn’t want the original bright blue color to show. I sanded the entire tray using a 220-grit sandpaper (the sanding roughs up the surface giving it “teeth” which allow the next layer of paint to stick better).
Step 4: I came up with a design that I liked – just some simple text on a red band. I used the font called “Market Deco” which is available for free at DaFont.com (an amazing resource for free fonts). I work in Adobe Illustrator when I’m designing, but the same look can be achieved in Canva, basic MSWord using shapes from the graphics bar and the built in Word Art function. Or you can use photos.
Mod Podge Transfer Medium requires you to use a “dry toner” (laser) copy of your graphics, which is available at any Kinkos or Staples if you don’t have access to a laser printer.
Step 9: You don’t *have* to use the Envirotex. A brush on waterproof sealer or Engine Enamel (which comes in a spray) are also options. It depends on if you want the resin or not.
If you have any questions about this tutorial, please don’t hesitate to ask – I’ll monitor the site and try to get back to you as quickly as possible. Plus check out these other photo transfer ideas here:
Christmas Napkins • Family Reunion Centerpiece • How to Transfer Photos to Wood • Inkjet Transfer • Photo Keychain • Photo Transfer to Canvas • Transfer Paper to Fabric • Transfer Photos to Fabric • Transfer to Furniture • Transfer to Glass • Transfer to Metal