Create an adorable tissue paper bunny craft on canvas! This is a delightful and straightforward Easter activity for children utilizing Mod Podge, tissue paper, and pom poms.
During my childhood, we didn’t engage in crafting for Easter very often. Perhaps it wasn’t “a trend” back then? I’m not sure – but I feel like I totally missed out on pom poms and pastel tissue paper!
Just joking, really . . . but genuinely, I didn’t partake in numerous Easter crafts for kids when I was younger. The emphasis was mainly on the baskets and the sweets (not necessarily the true essence but we were kids).
I might have created a bunny using cotton balls and glue or something similar. The straightforward decoupage task I am presenting to you today elevates the classic cotton ball bunny!
If you’re in search of an enjoyable craft suitable for Easter and beyond, this bunny canvas is ideal for you.
Gather your children’s crafting supplies – a bit of tissue, craft paint, Mod Podge . . . and you’ll have the chance to utilize those pom poms I longed for as well. Do you feel a twinge of sympathy for me yet?
If you’re prepared to dive in, discover how to create it below!
Tissue Paper Bunny Canvas
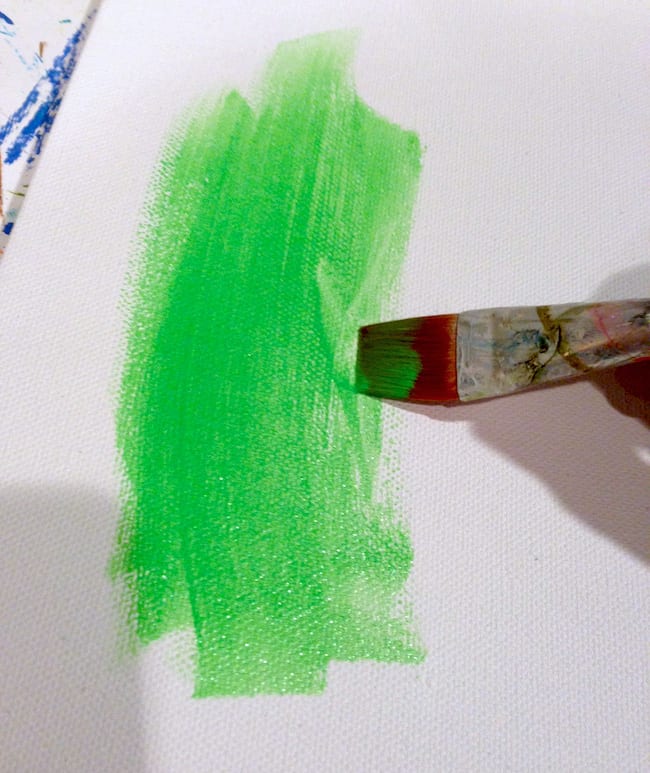
Paint the Canvas
Apply multiple layers of paint to your canvas and allow it to dry. Ensure it dries thoroughly between applications.
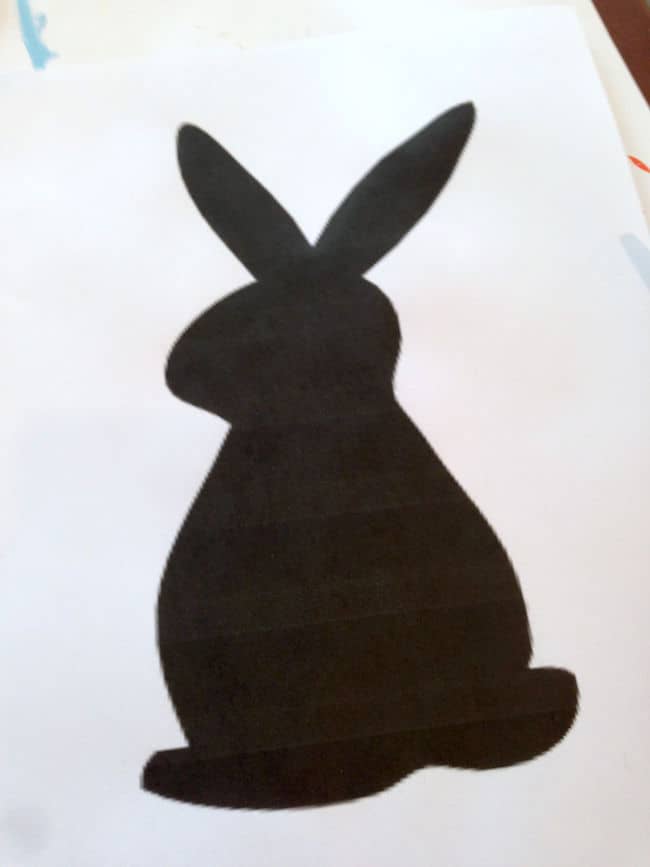
Trace the Bunny
Print the bunny silhouette to match your canvas – an upright bunny is ideal for this task.
Avoid making it too intricate. It should be relatively straightforward and large enough for the tissue paper to effectively shape.
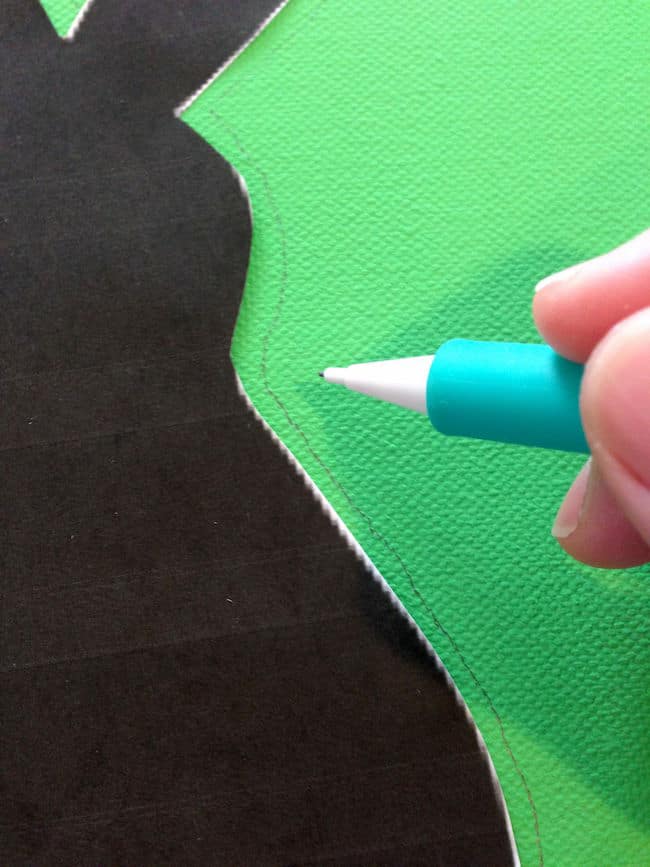
Cut out the bunny silhouette and outline the edges using a pencil, directly on the painted canvas.
Apply the Tissue Paper
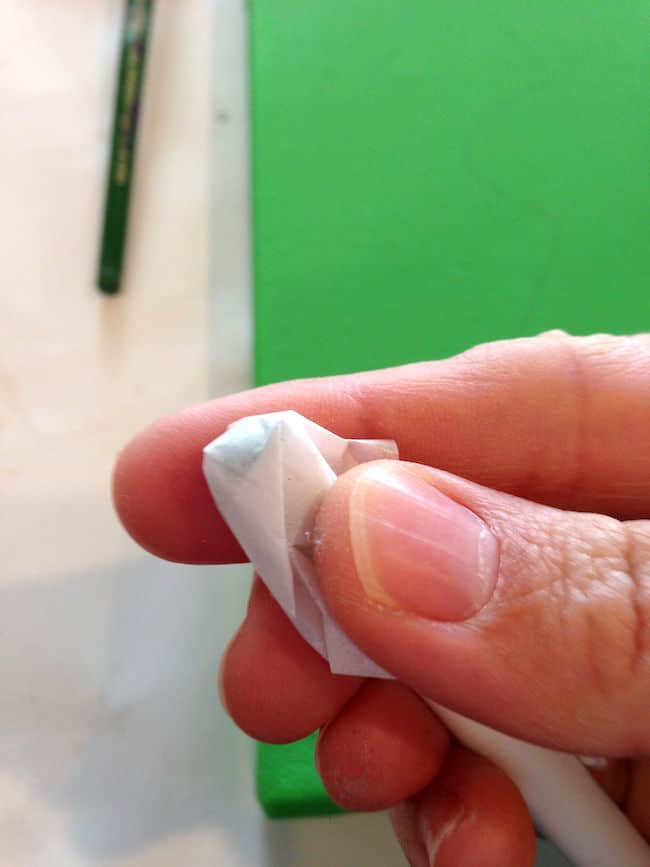
Cut out several small squares of white tissue paper. Take a single square of tissue paper and wrap it around the eraser of your pencil.
Pour some Mod Podge onto a palette or sheet of paper and dip your tissue/pencil into the Mod Podge.
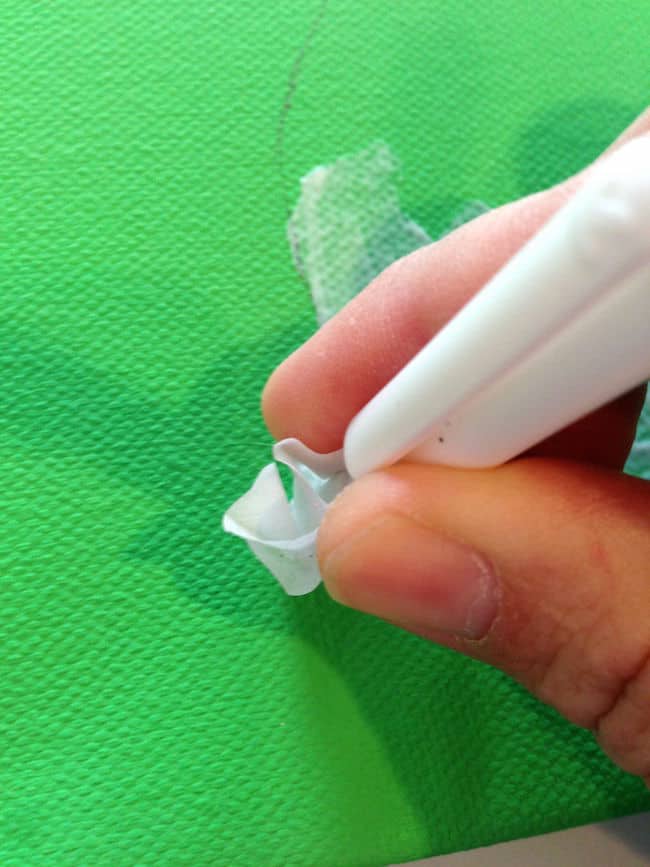
Press the tissue paper onto the canvas within the boundaries of the bunny silhouette. Remove the pencil, and it should leave the tissue paper behind.
Continue placing tissue paper in the same manner until the complete bunny shape is filled. You will notice if there are any gaps needing coverage after stepping back slightly.
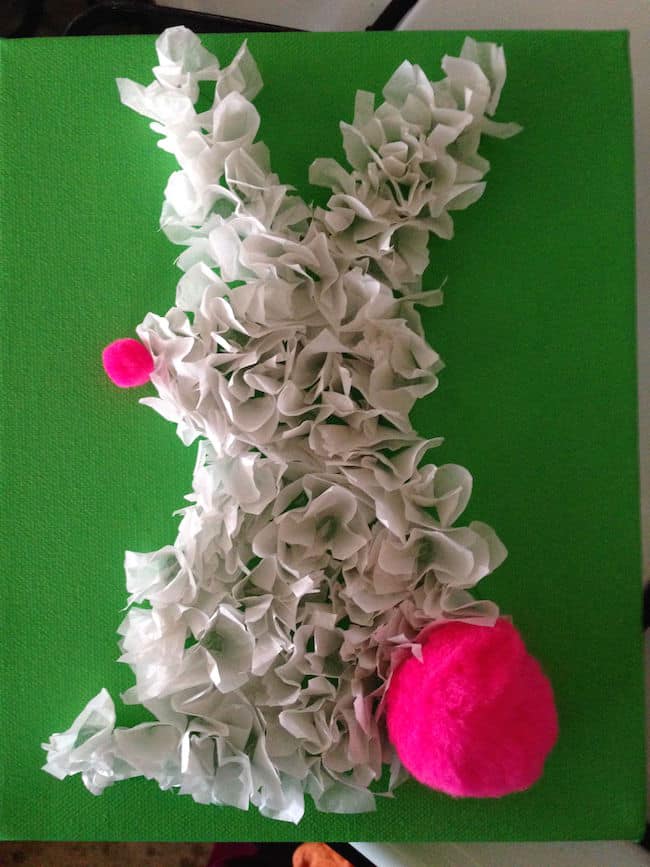
Incorporate the Features
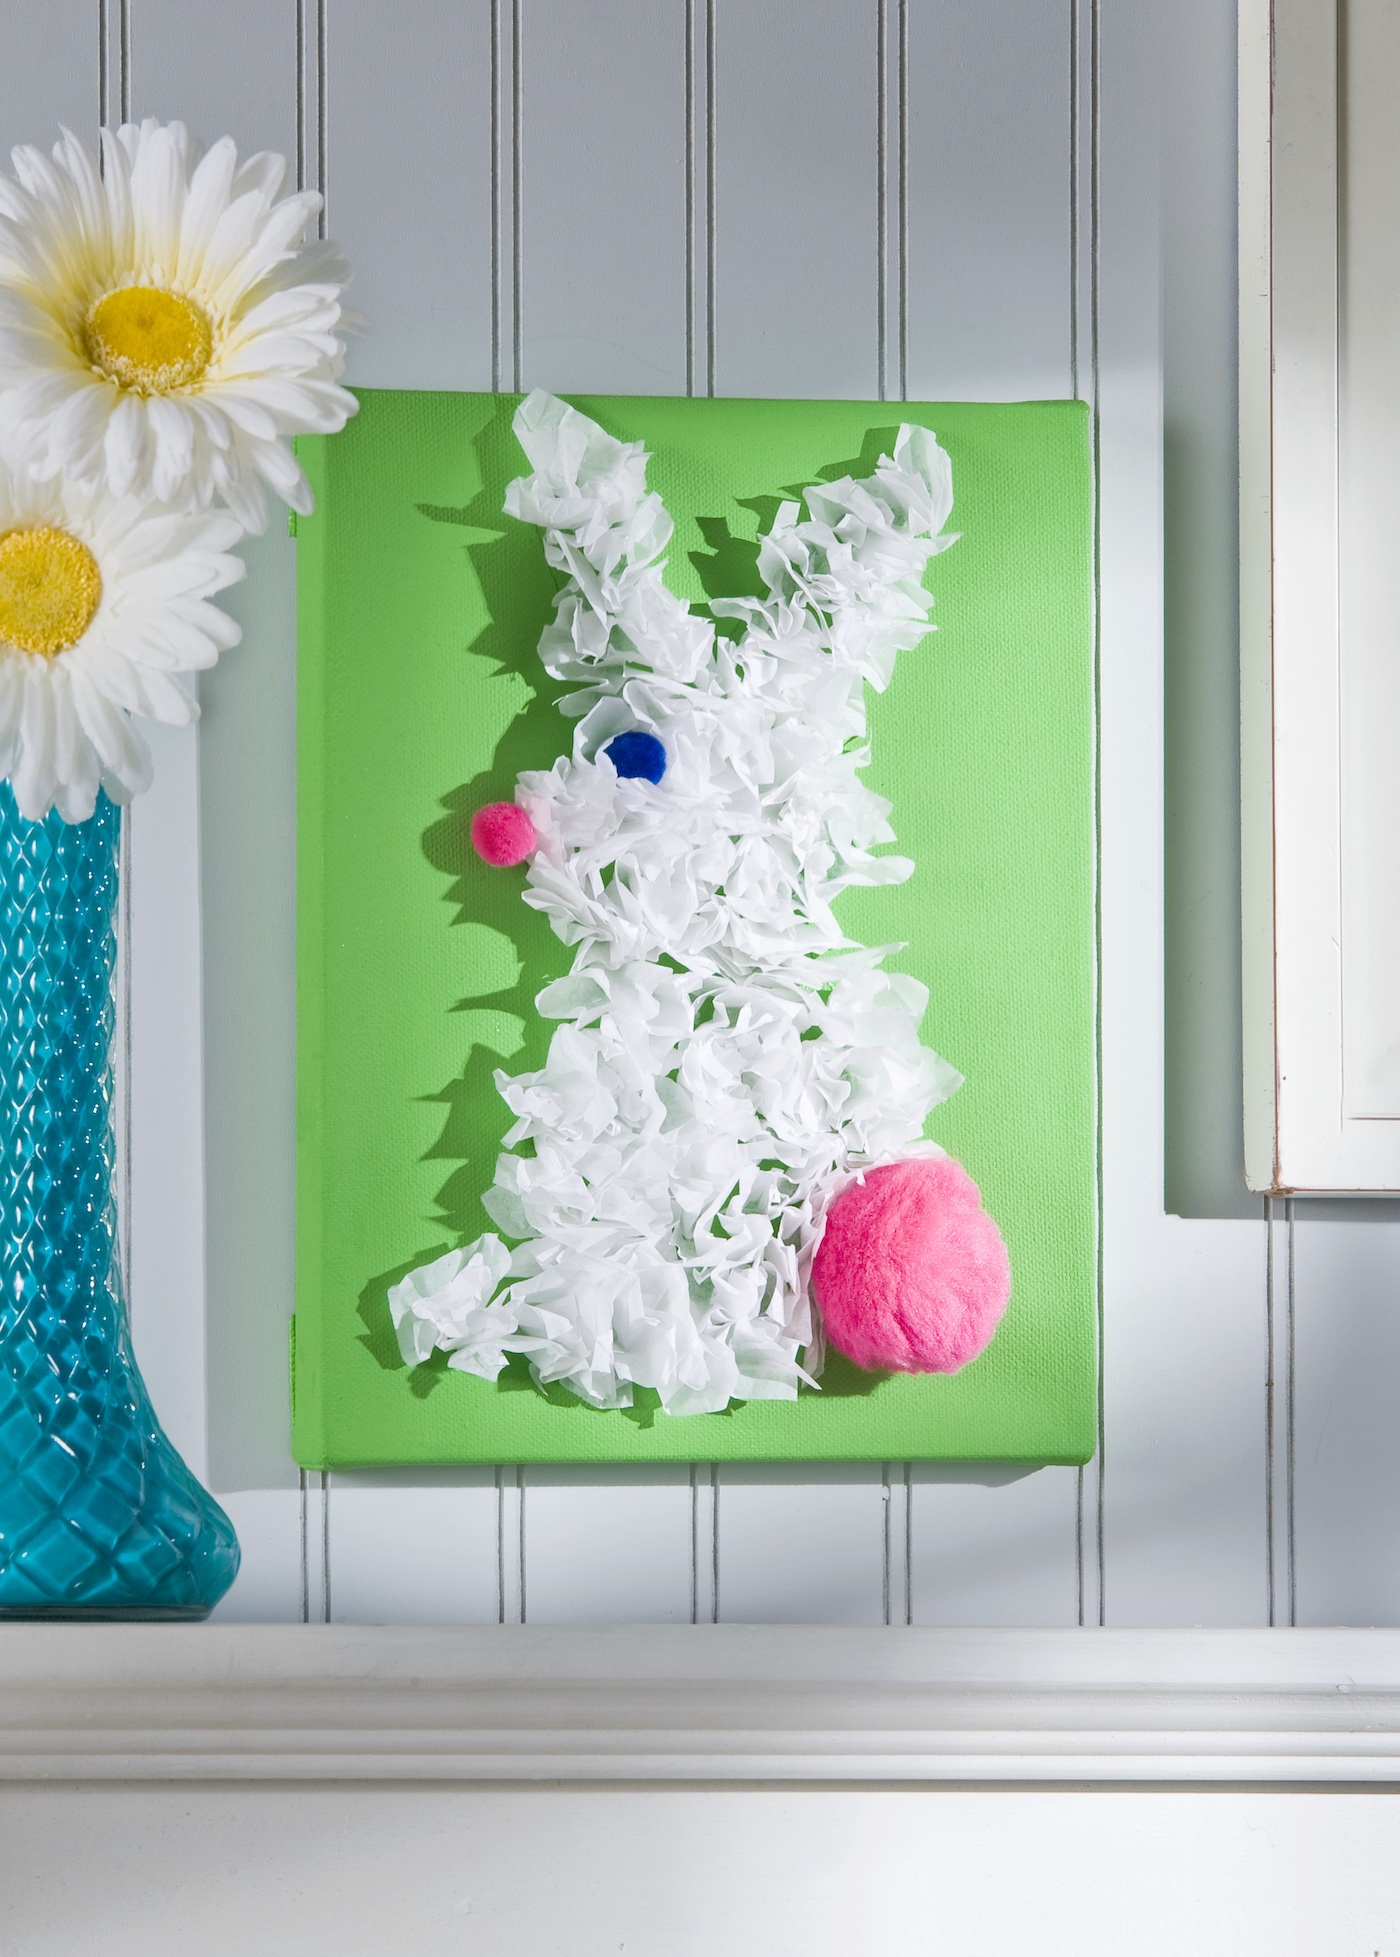
Adhere pom poms at the locations for the nose, eyes, and tail using craft adhesive.
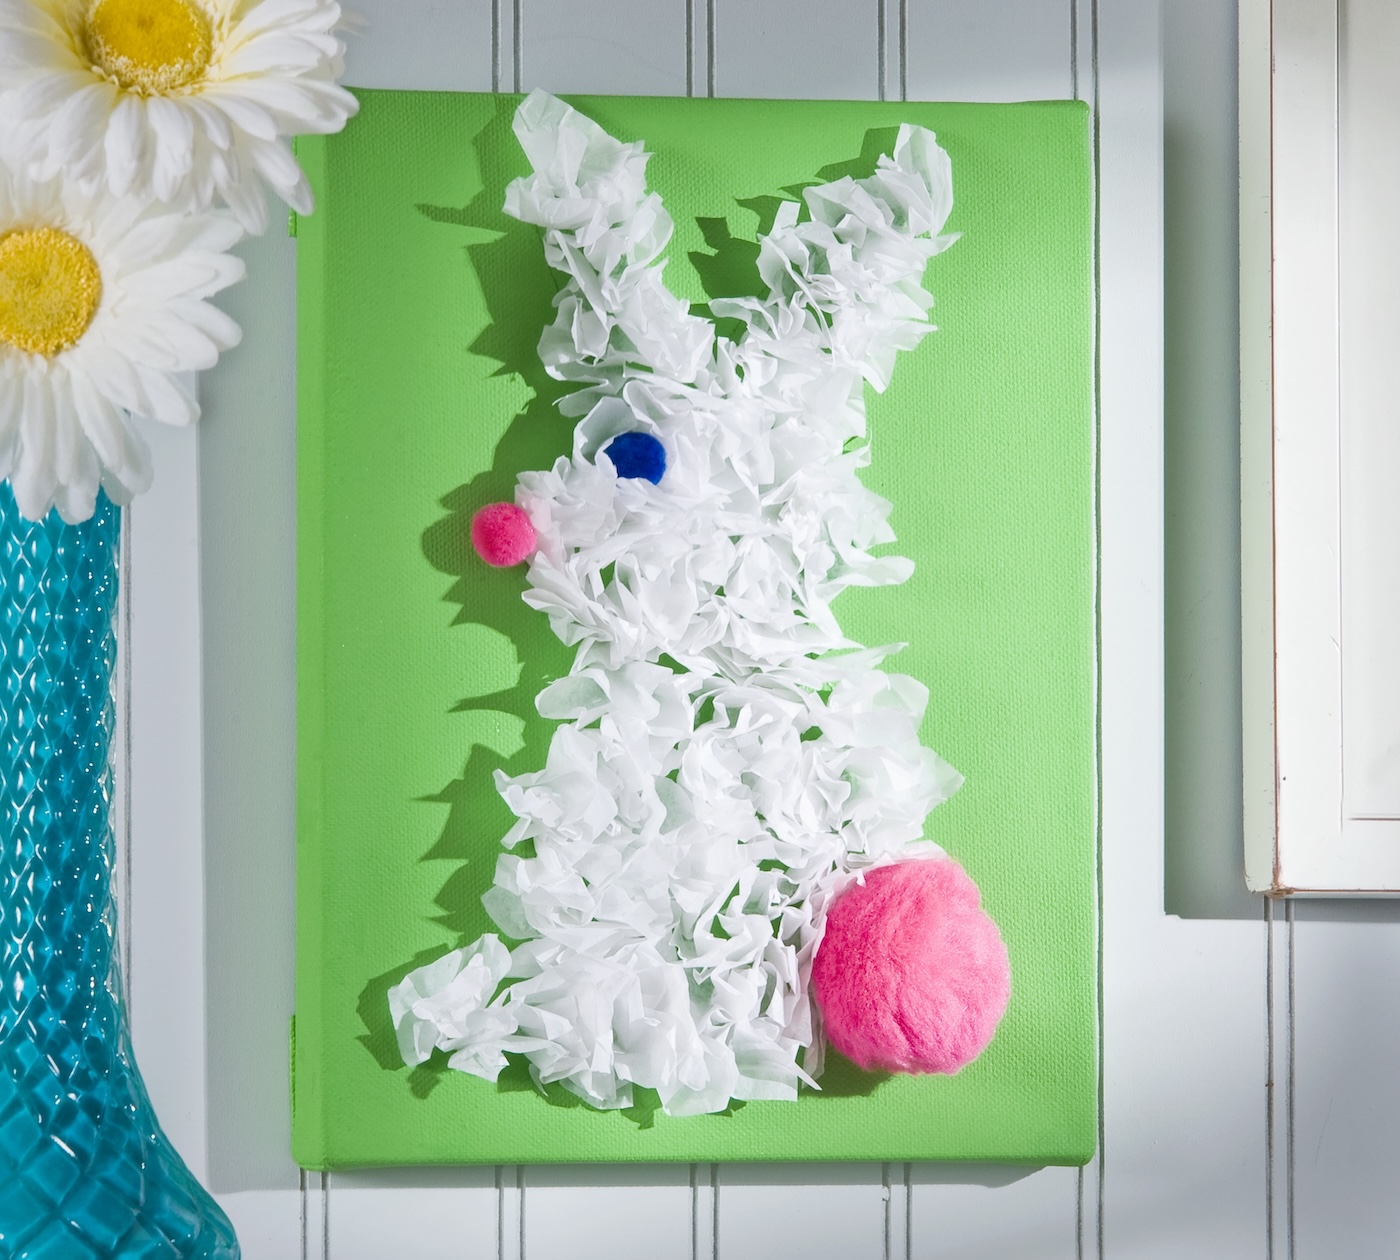
Allow to dry thoroughly before showcasing! I must say, I can’t help but adore the size of his adorable tail. I believe it’s the largest pom pom I’ve ever encountered.
Now display your tissue paper bunny! I’ll confess, this project thrilled me . . . as I’m curious about what other silhouette artwork I can create with tissue. Share your thoughts in the comments!
What are your thoughts on this concept? Please share in the comments! I would also love for you to explore these related projects: