What if you could discover How to Illustrate the Grinch Step by Step? I will leverage my extensive drawing background (over 50 years!) to simplify the illustration into manageable segments so you can master it, even if you’re not very experienced in drawing.
Jump to:
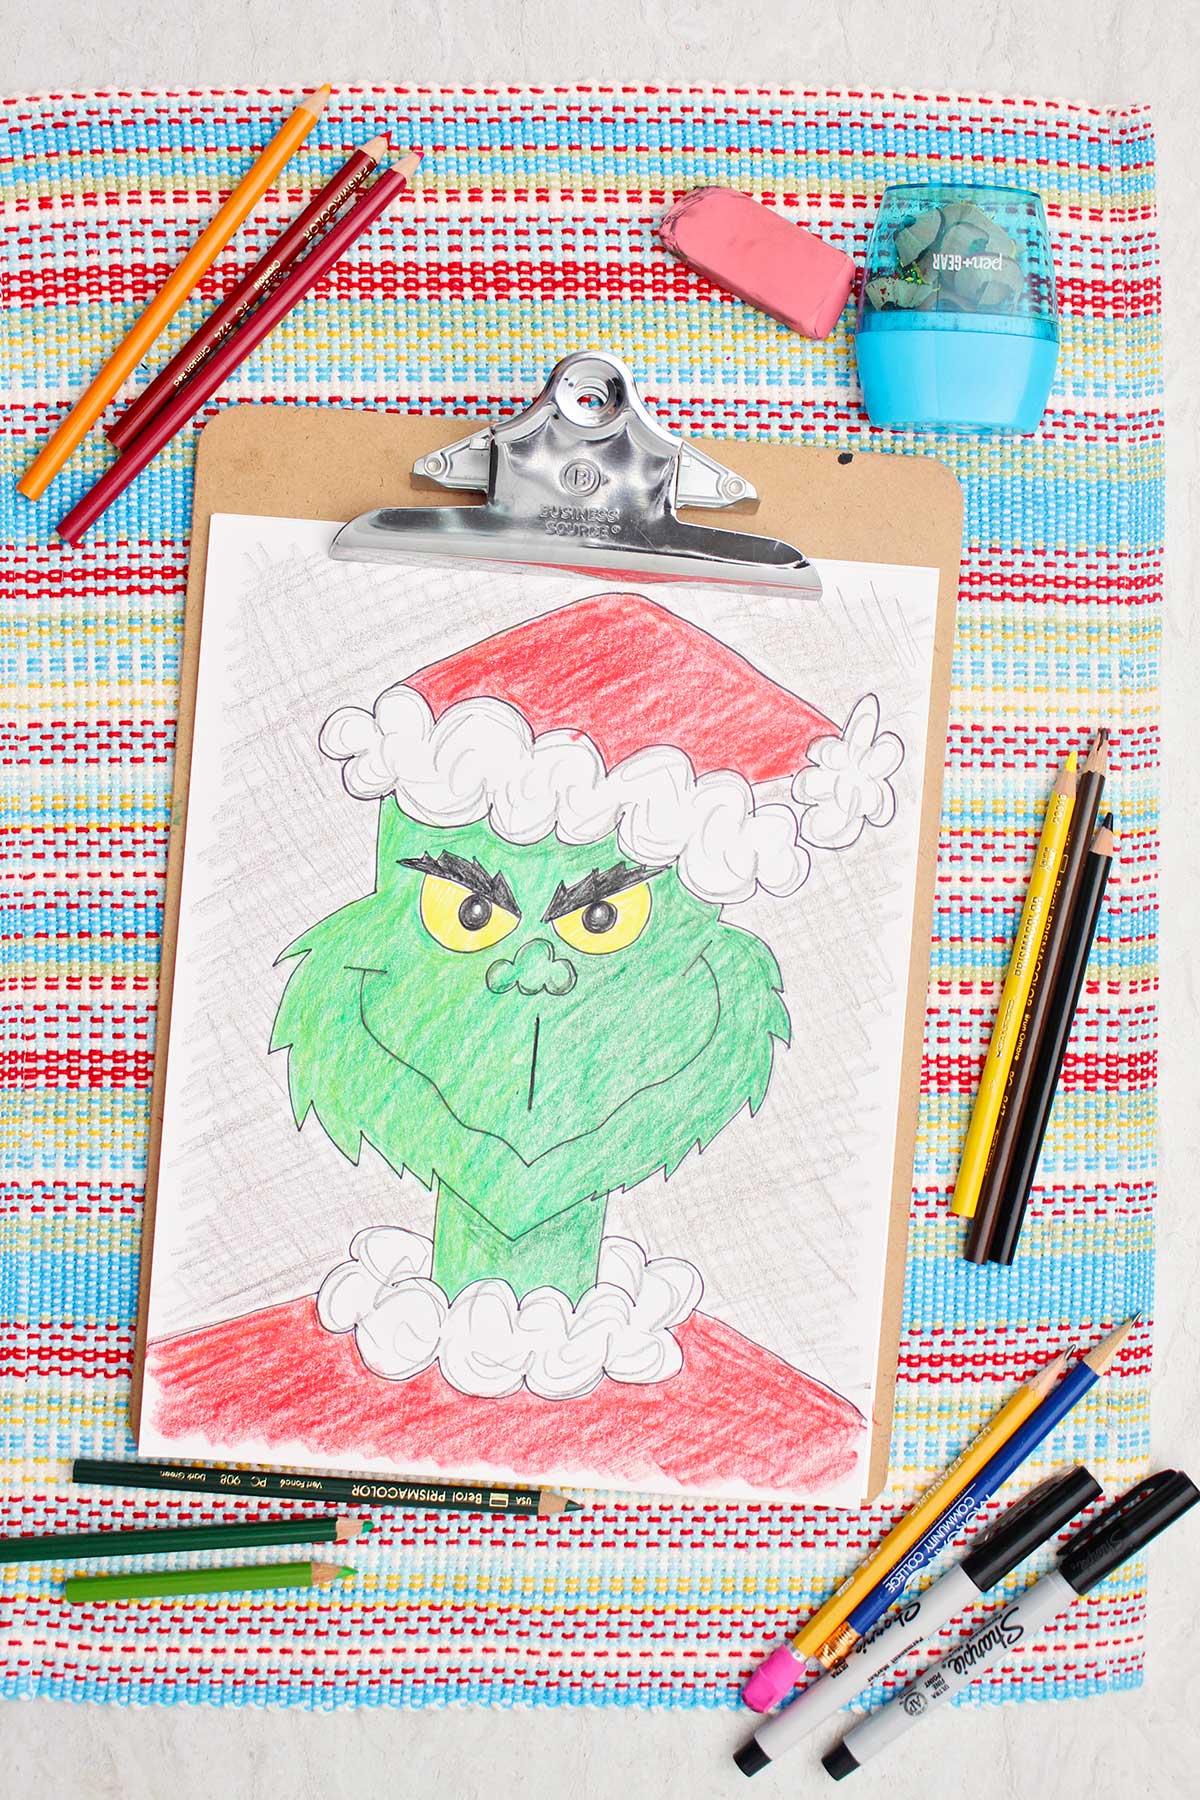
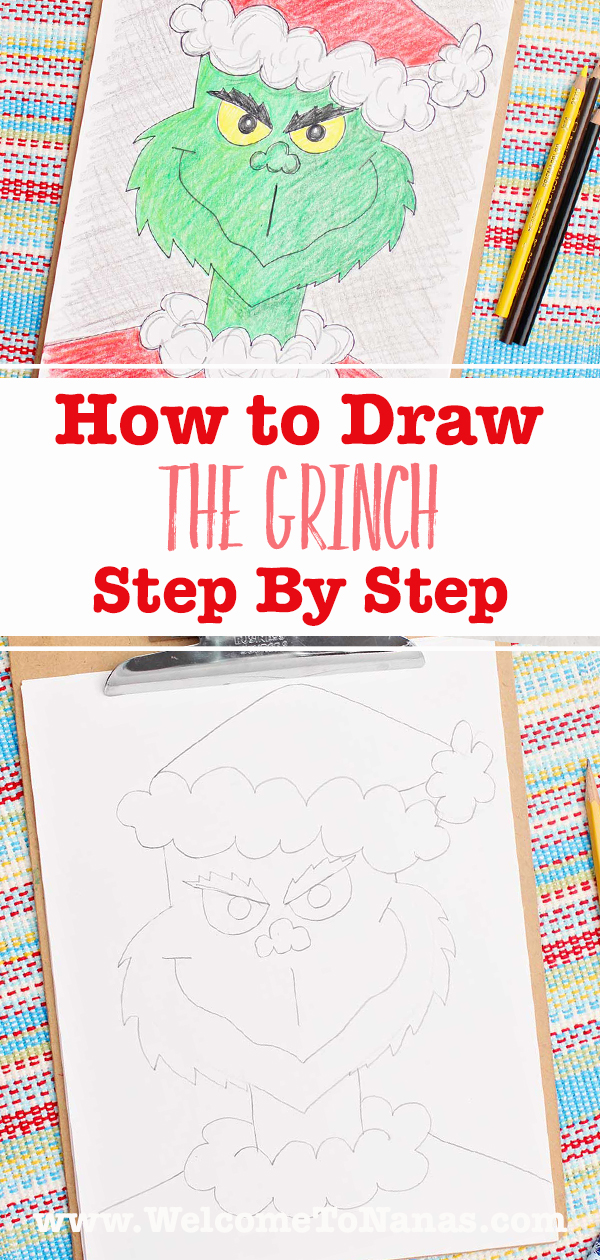
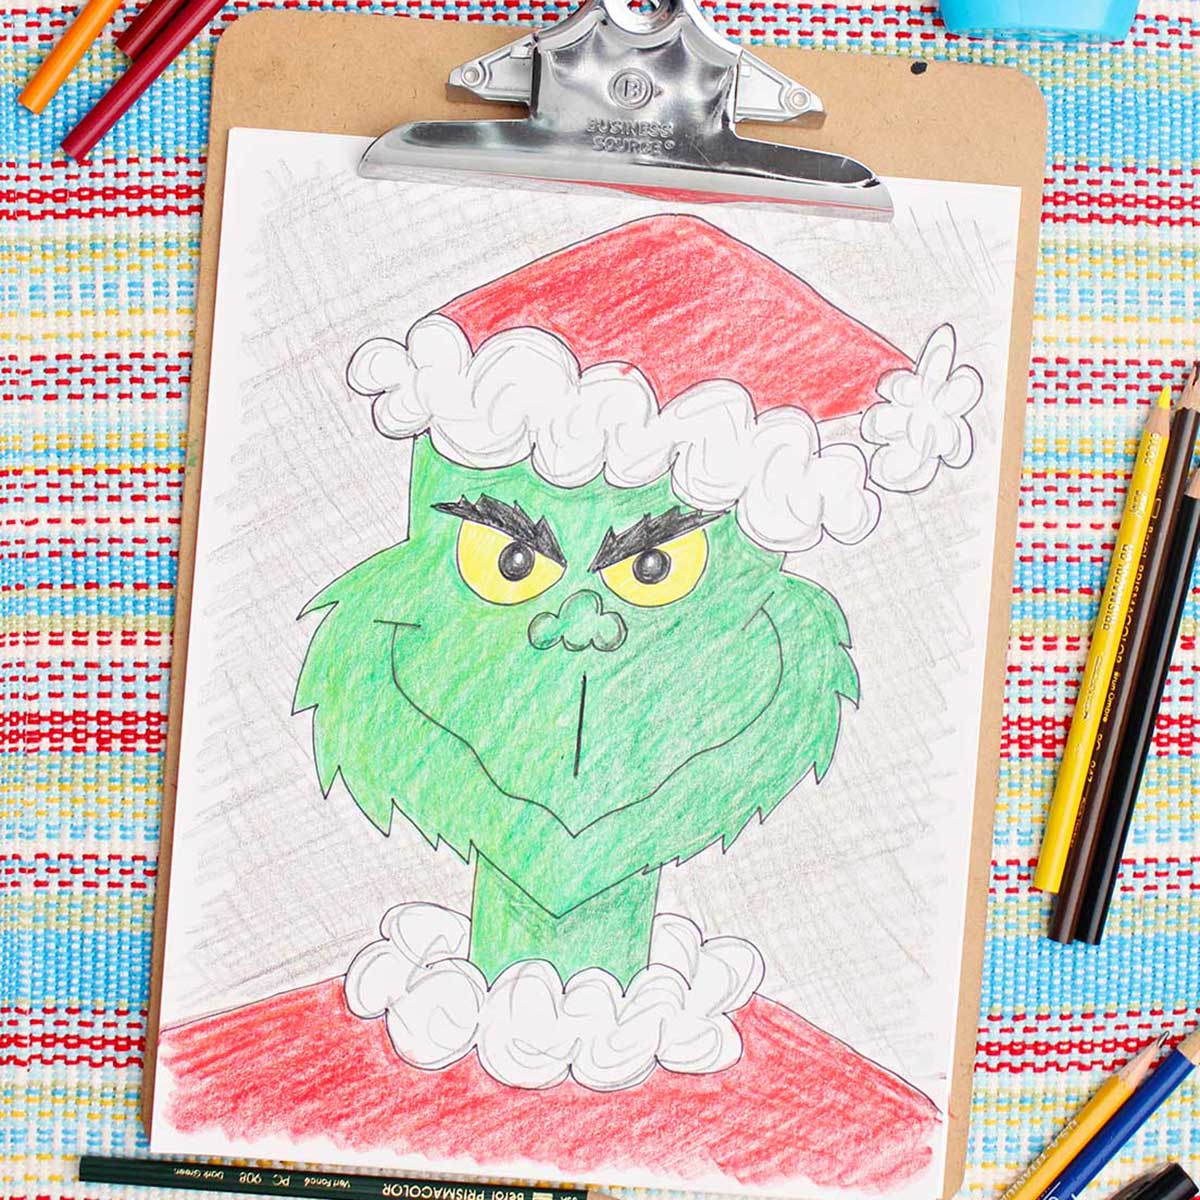
How to Illustrate the Grinch Step by Step
The Grinch is an iconic holiday character, making it enjoyable to learn how to depict his face and cheeky grin!
I’ll be here to assist with every step; the video proves quite beneficial. Don’t hesitate to pause the video at any moment to complete a step.
Adorable Craft Notification: How to Illustrate the Grinch
My sibling and I have cherished the original “How the Grinch Stole Christmas” animation since its debut on TV in 1966. I adored how the green Grinch was initially displeased with the Whoville residents for their exuberance about Christmas. It irked him so much that he resolved to take Christmas to prevent it from happening.
His scheme backfires and…well, you need to either read the book or view the film to discover how his heart expands from small to large by the end! The story never gets old, and my father and I enjoy watching that original Grinch cartoon every year—How the Grinch Stole Christmas.
Grab a pencil and a sheet of paper because we’re going to sketch the Grinch’s renowned face together, step-by-step. I assure you, the image you create will astonish you, even if you’re not an experienced artist! We’ll tackle it together, and the key element is simply to enjoy the process. Remember to check out the video for this tutorial, pausing it whenever needed to finish a step. Let’s get started!
The Essential Art Materials Required for this Sketching
Here’s the list of materials for this Grinch Sketching activity- you likely already possess them.
How To Sketch the Grinch Step by Step Full Length Video on YouTube- which may assist you in following along methodically. How to Sketch the Grinch Video link.
Pencil– A basic pencil like the one you carry to school will get you going with your drawing. You can later obtain specific drawing pencils if you wish to explore the various types of leads in pencils (hint, they create lighter and darker lines).
Black permanent marker– We will trace our pencil lines with a permanent black marker to enhance the cartoon appearance and subsequently utilize the drawing for coloring.
Eraser– You’ll require an eraser to correct errors and to remove pencil lines after we use the black marker. I prefer a pink soft eraser that doesn’t leave smudges on the pencil lead.
Colored pencils, markers or crayons– We will color our sketch in the end with Colored Pencils or Colored Markers and Crayons. If you desire the true Grinch colors you will need green, red, yellow, and black.
Adhere to these instructions and view the video to grasp the process!
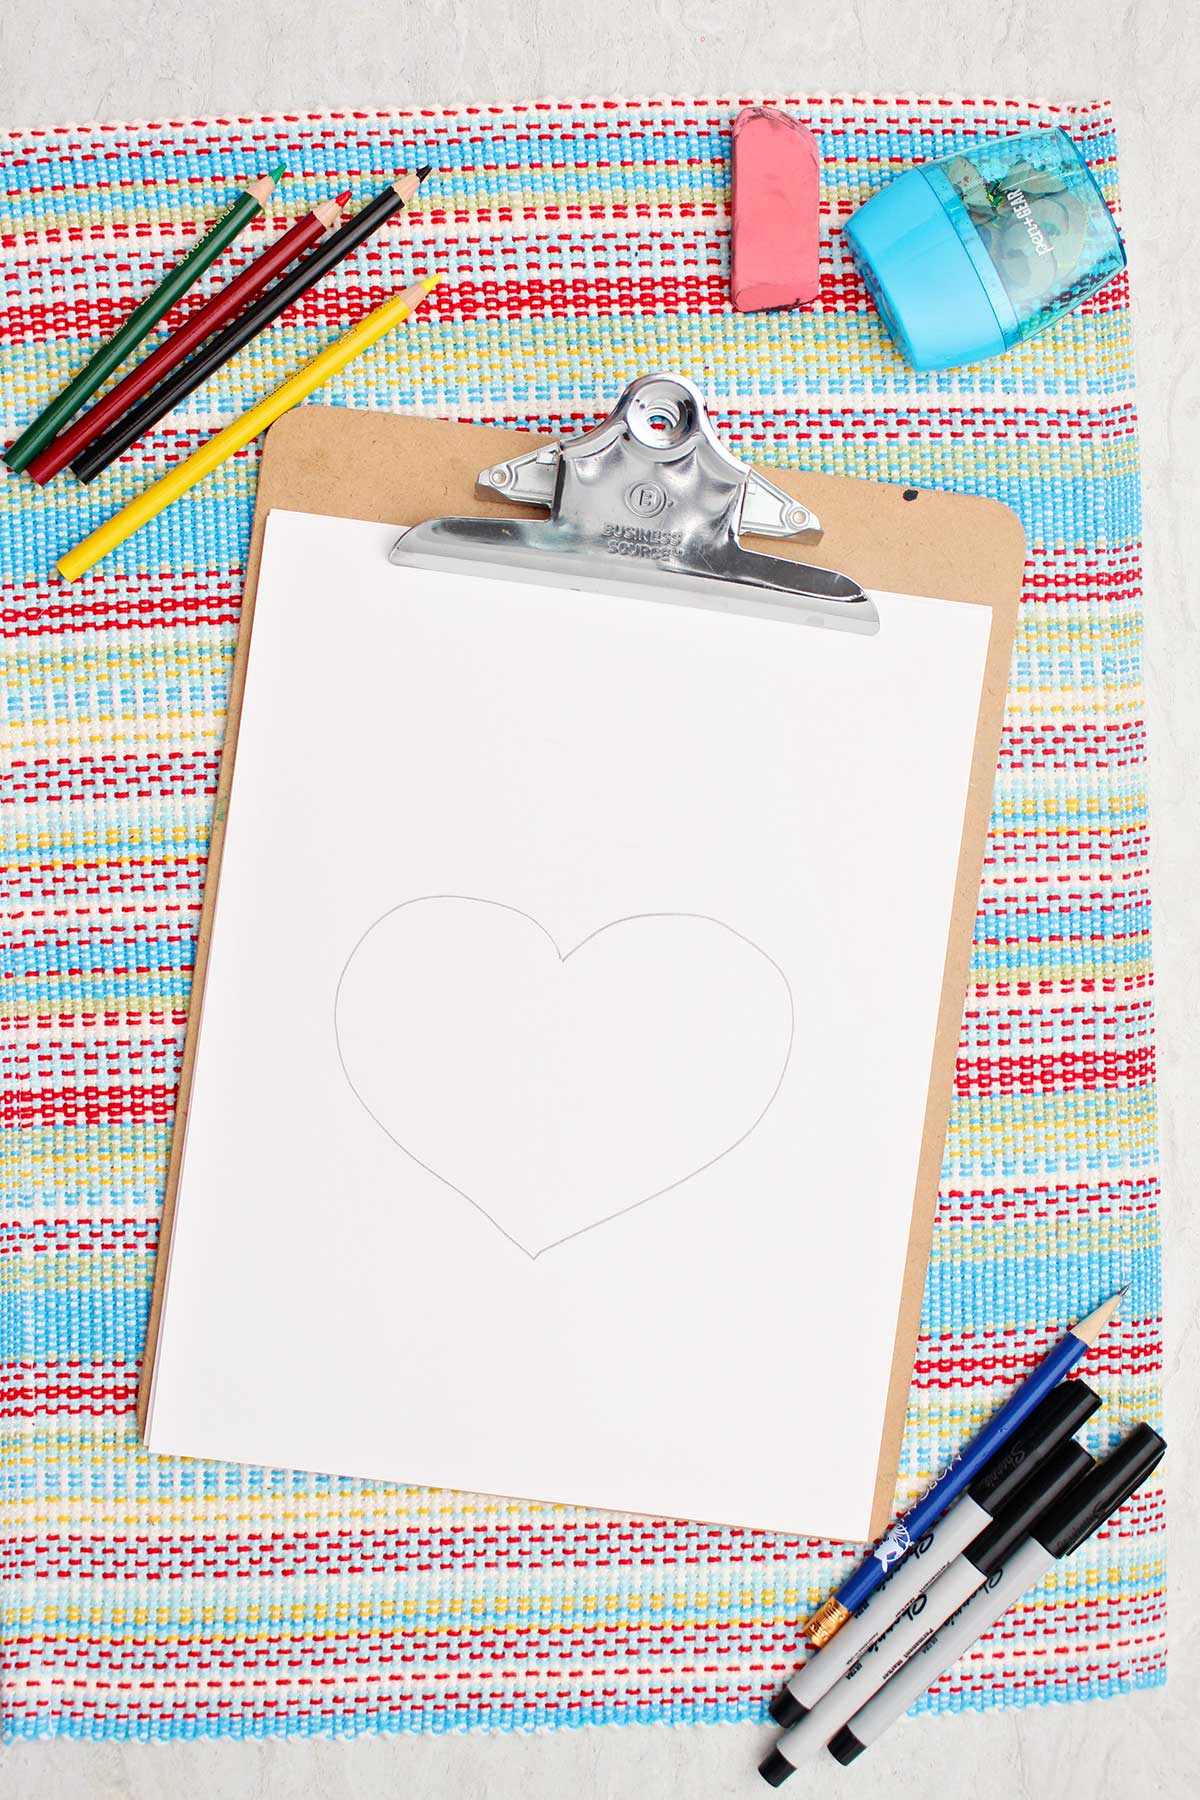
Step 1: How to Illustrate the Grinch Face Easily
To begin with the Grinch’s face, we will initiate with a heart shape. So sketch a heart in the center of the paper as symmetrically as you can. Perfection isn’t required since the Grinch’s face isn’t symmetrically shaped. You may utilize a sketchbook or just plain copy paper if that’s available to you.
A useful drawing tip is to commence with faint pencil marks. A lighter line is simpler to erase, and later you can redefine the line with a bolder stroke when satisfied with the form.
On the upper right area of the heart, sketch a line that rises about an inch.
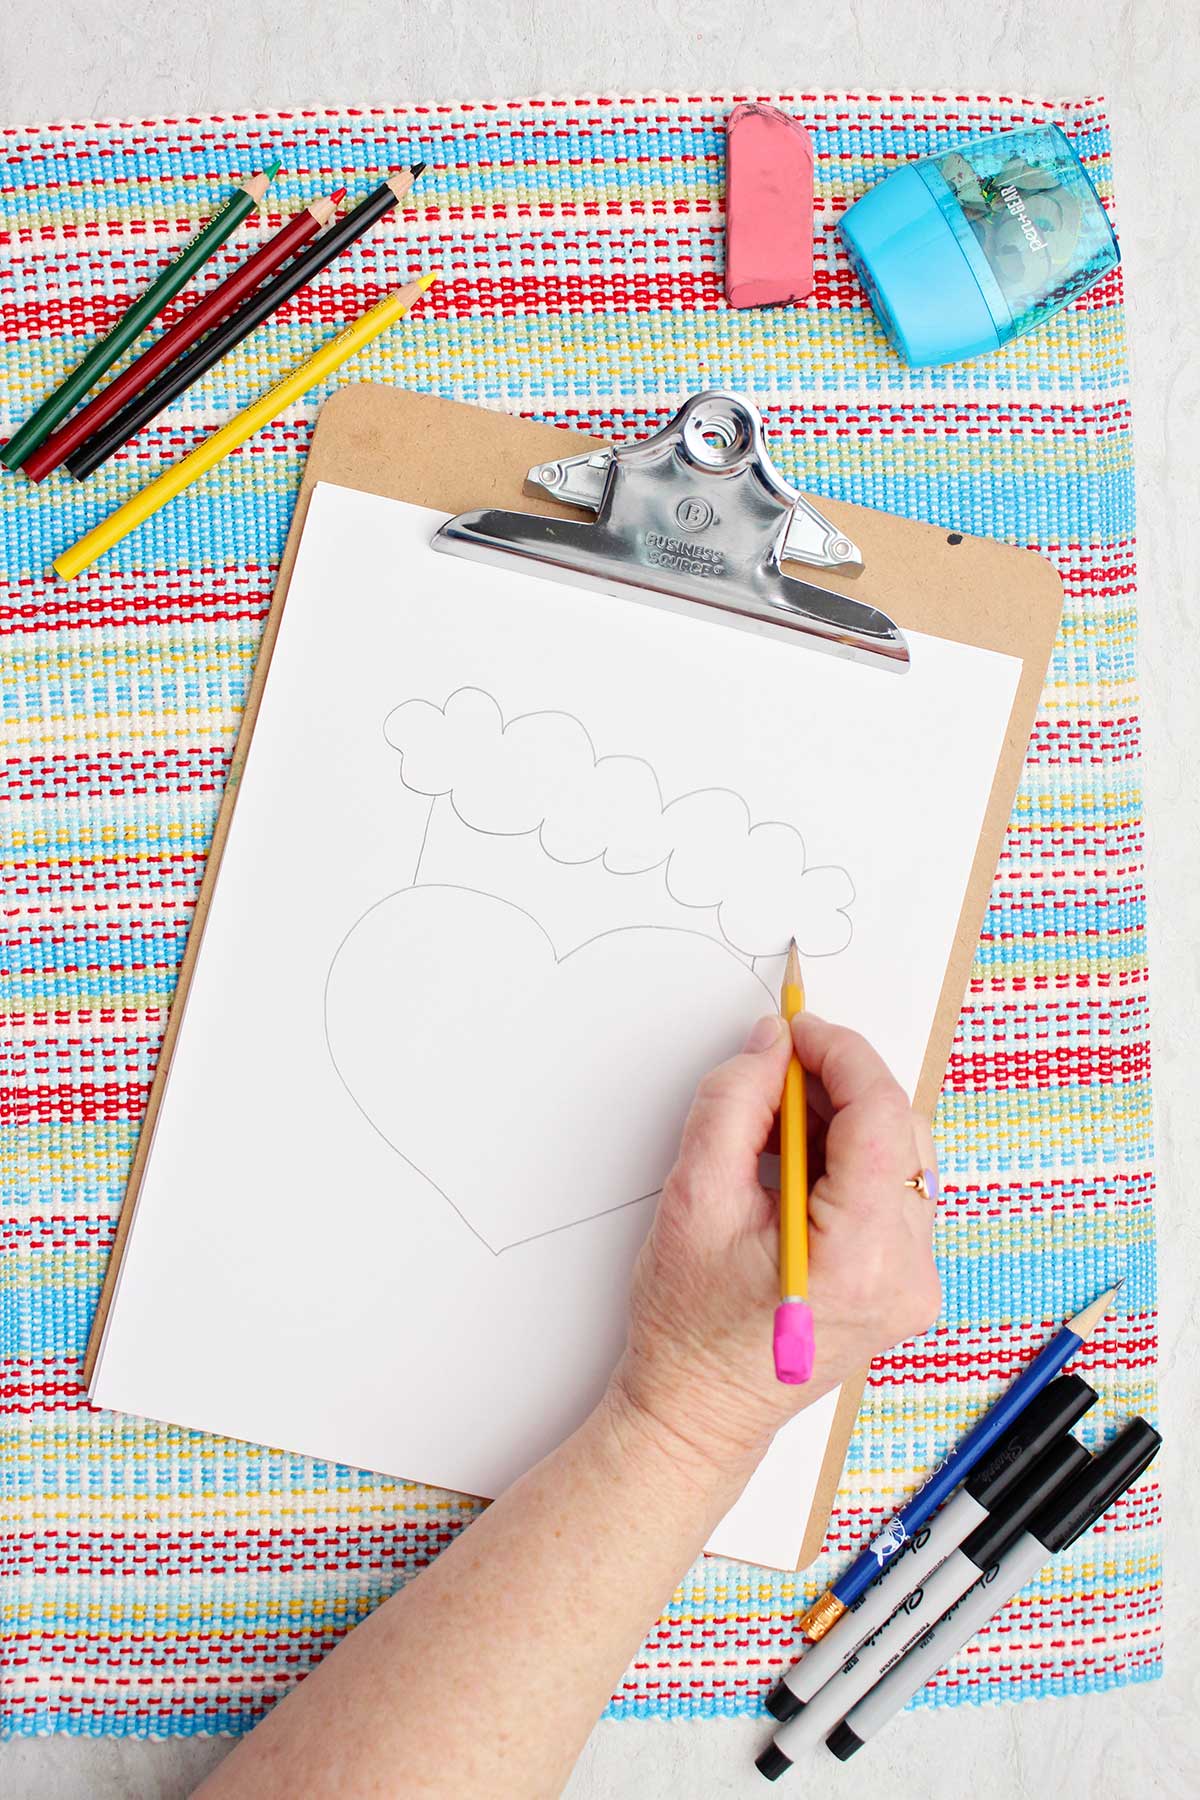
Step 2: Illustrating the Santa Hat
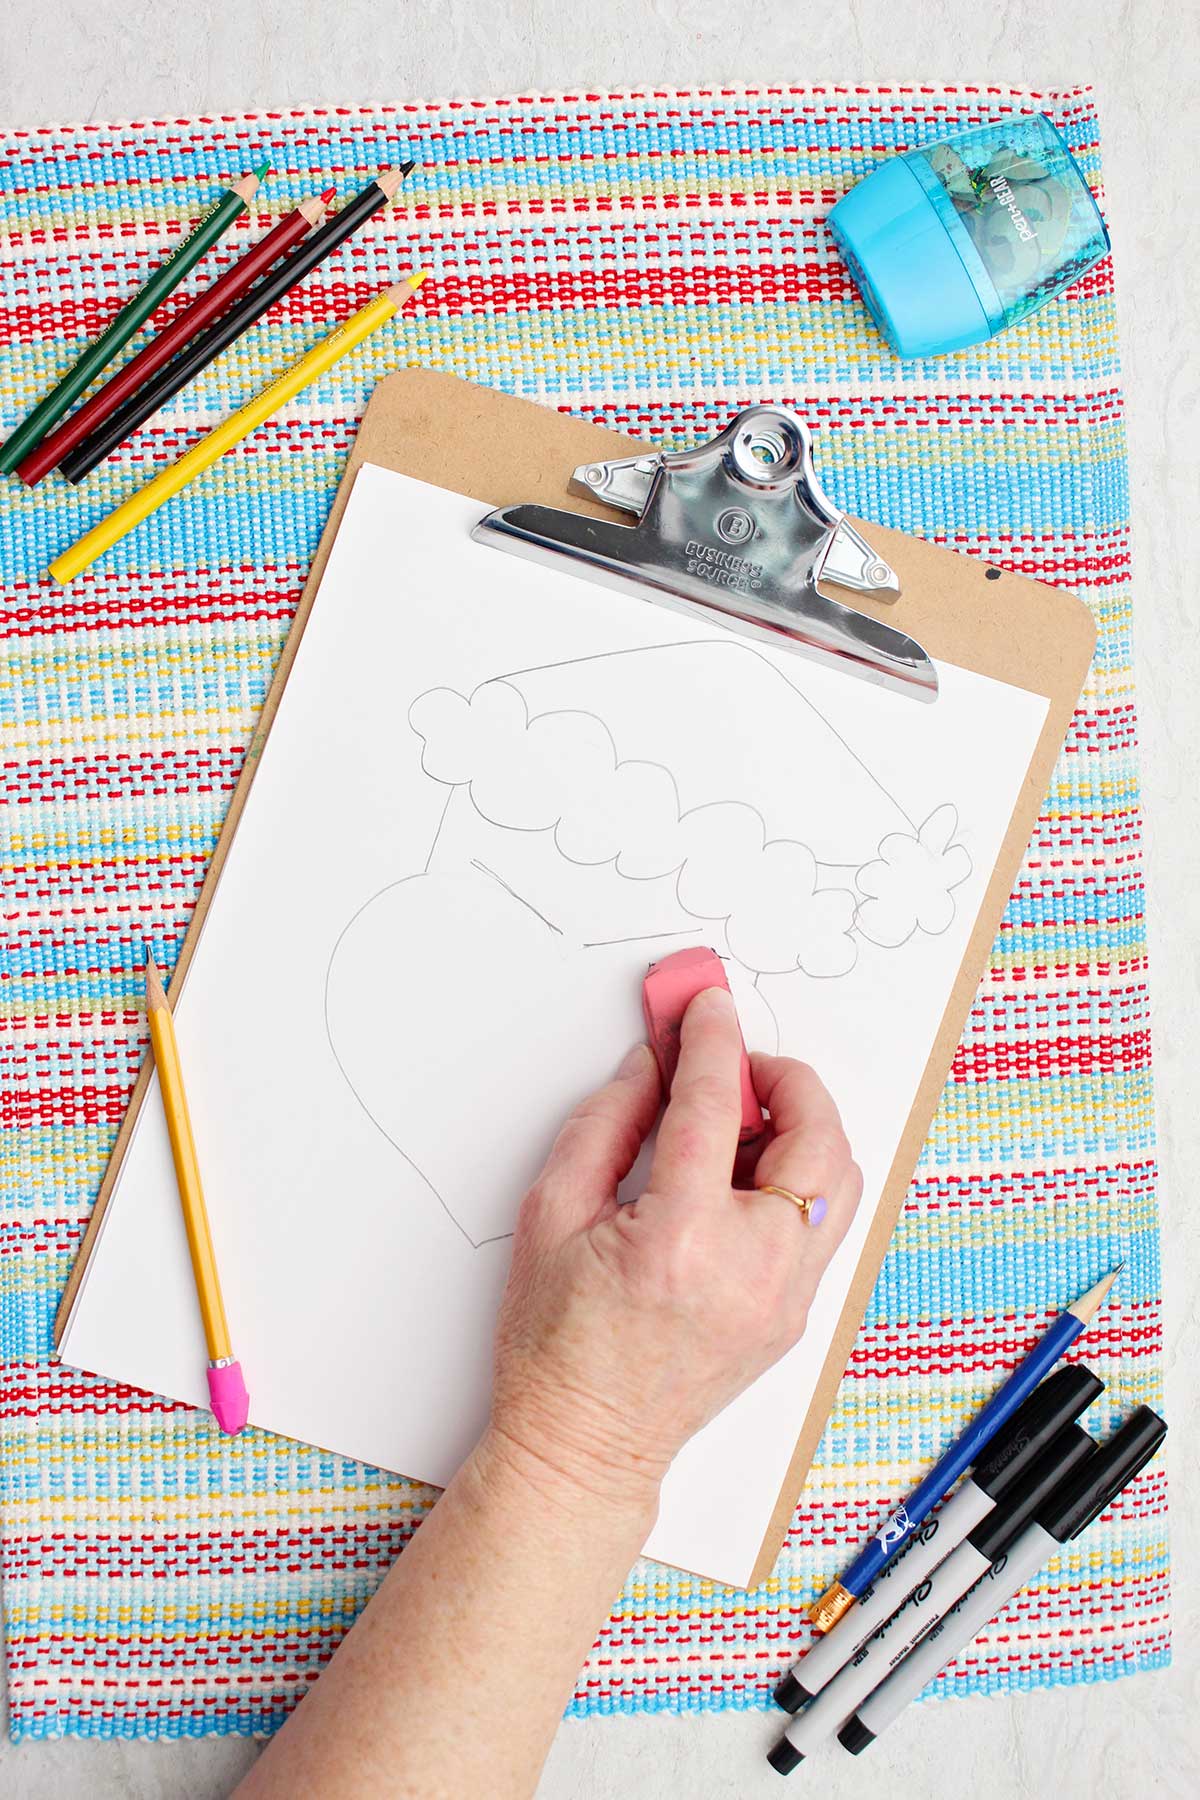
Next, we are going to add the fluffy white border of the Santa hat. Draw a cloud-like line starting from the top of the line you just drew, slanting downward to the right. The line should be uneven, resembling the outline of a cloud. Then, draw another cloud-like line above the first one, connecting it on both sides. Watching the video for this tutorial can be quite helpful.
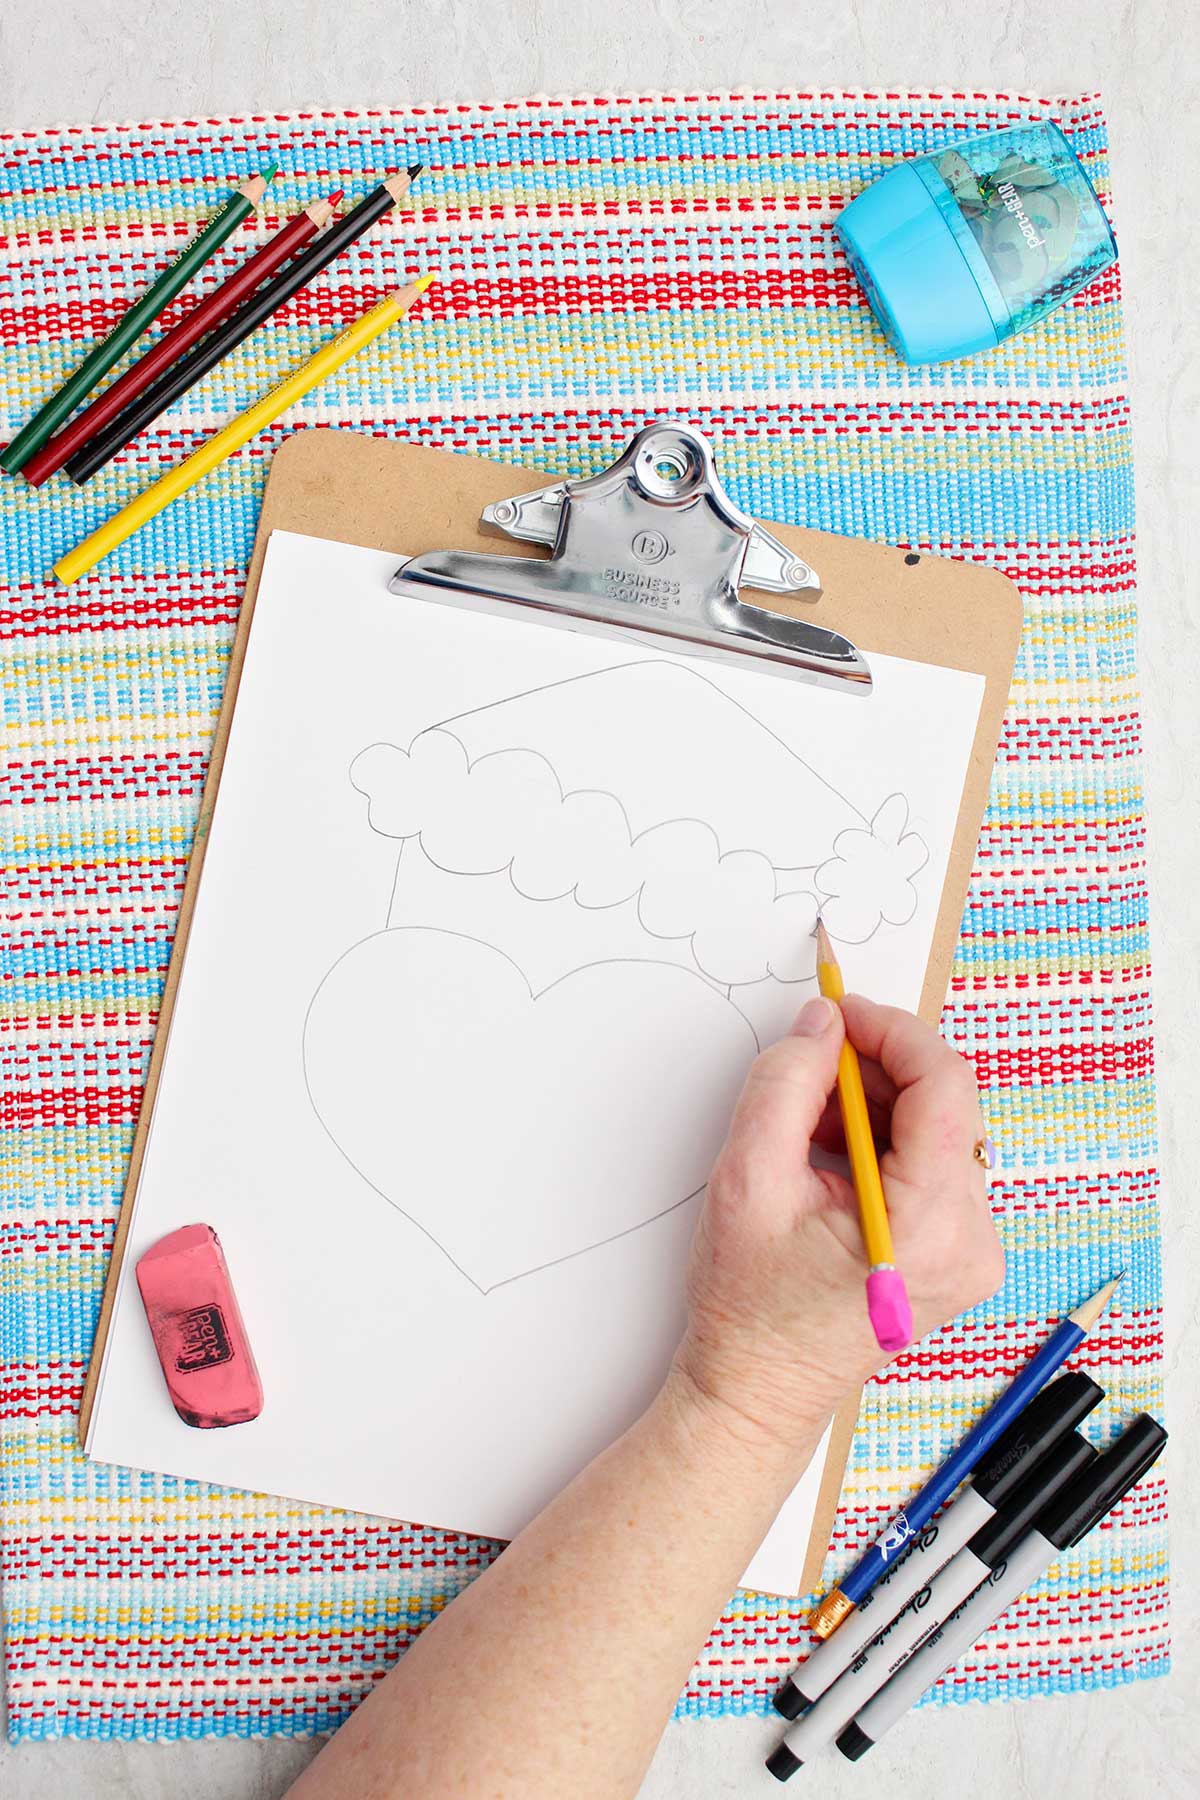
Now we’ll illustrate the top part of the hat. Sketch a mountain-like line stretching from left to right, beginning at the left edge of the trim. This line will rise and then sink. Afterwards, draw a short line from the other end of the trim towards the right end of the mountain line.
At the endpoints of these two lines, we’ll illustrate a pom-pom at the hat’s tip. It should mirror the bumpy outline of the trim.
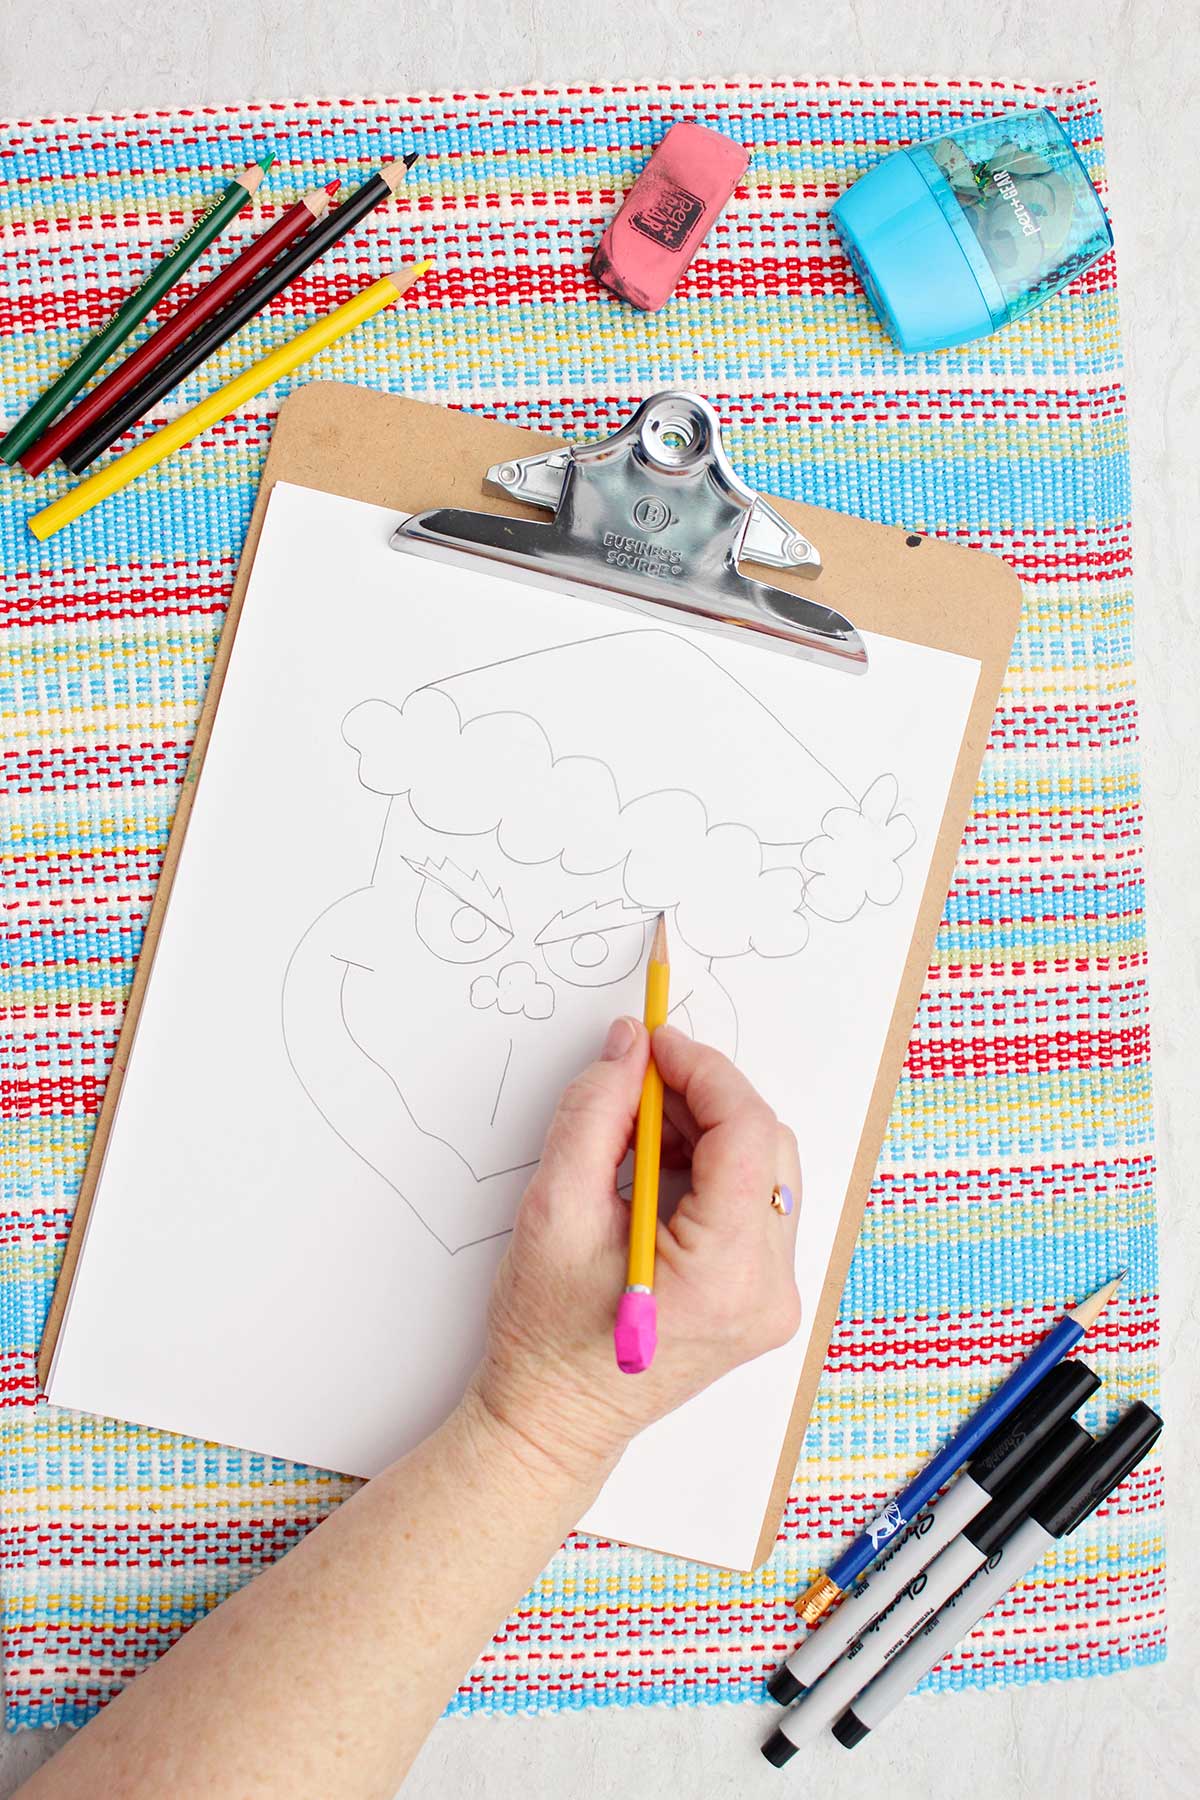
Step 3: How to Illustrate a Grinch Face and Expression
The Grinch is all about his wickedly delightful expression, from his plotting eyes to his wide grin. Let’s accomplish this correctly!
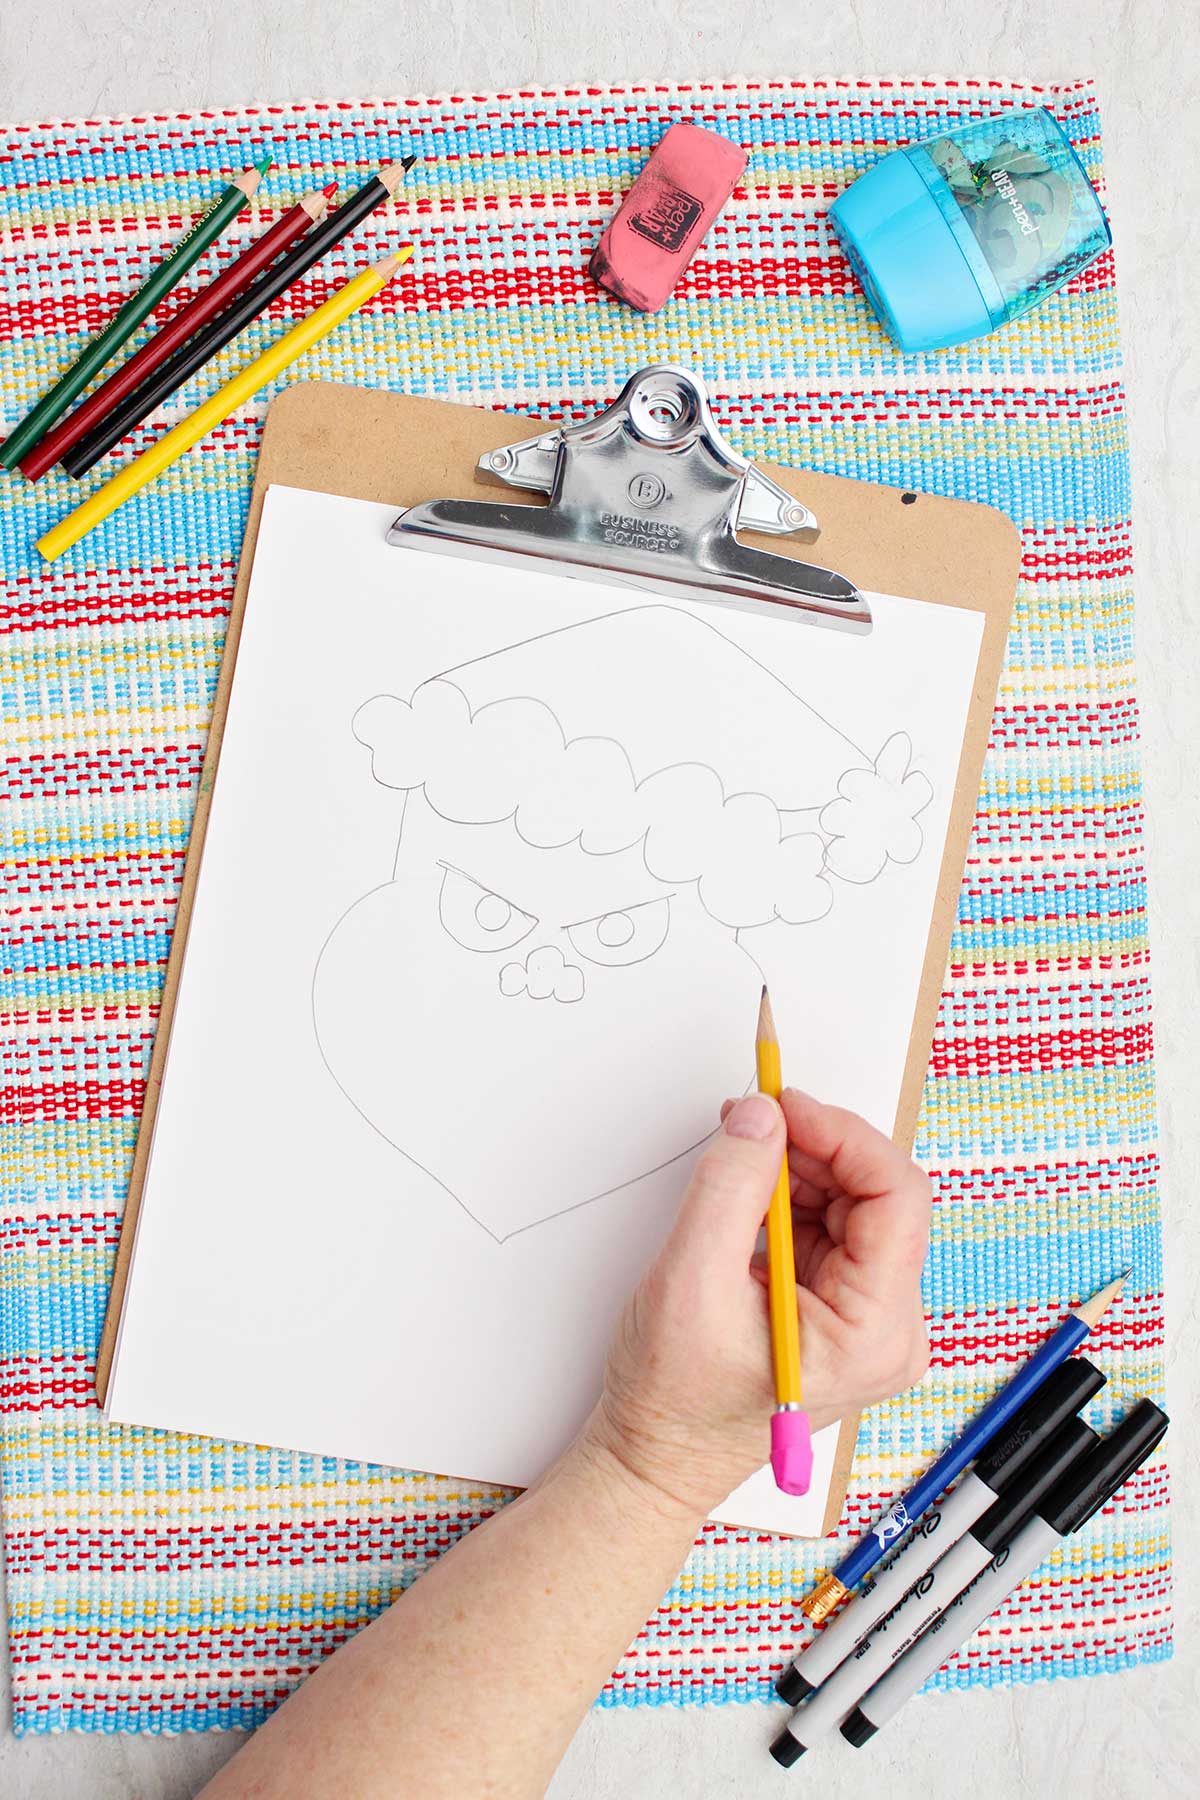
Initiate by sketching two lines on the upper two humps of the heart shape. These lines will incline downward towards each other and will form the bottom part of the eyebrows.
Then take an eraser and remove the upper section of the heart lines surrounding the brow lines from one side of the Grinch’s face to the opposite side (leaving
the brow contours of course).
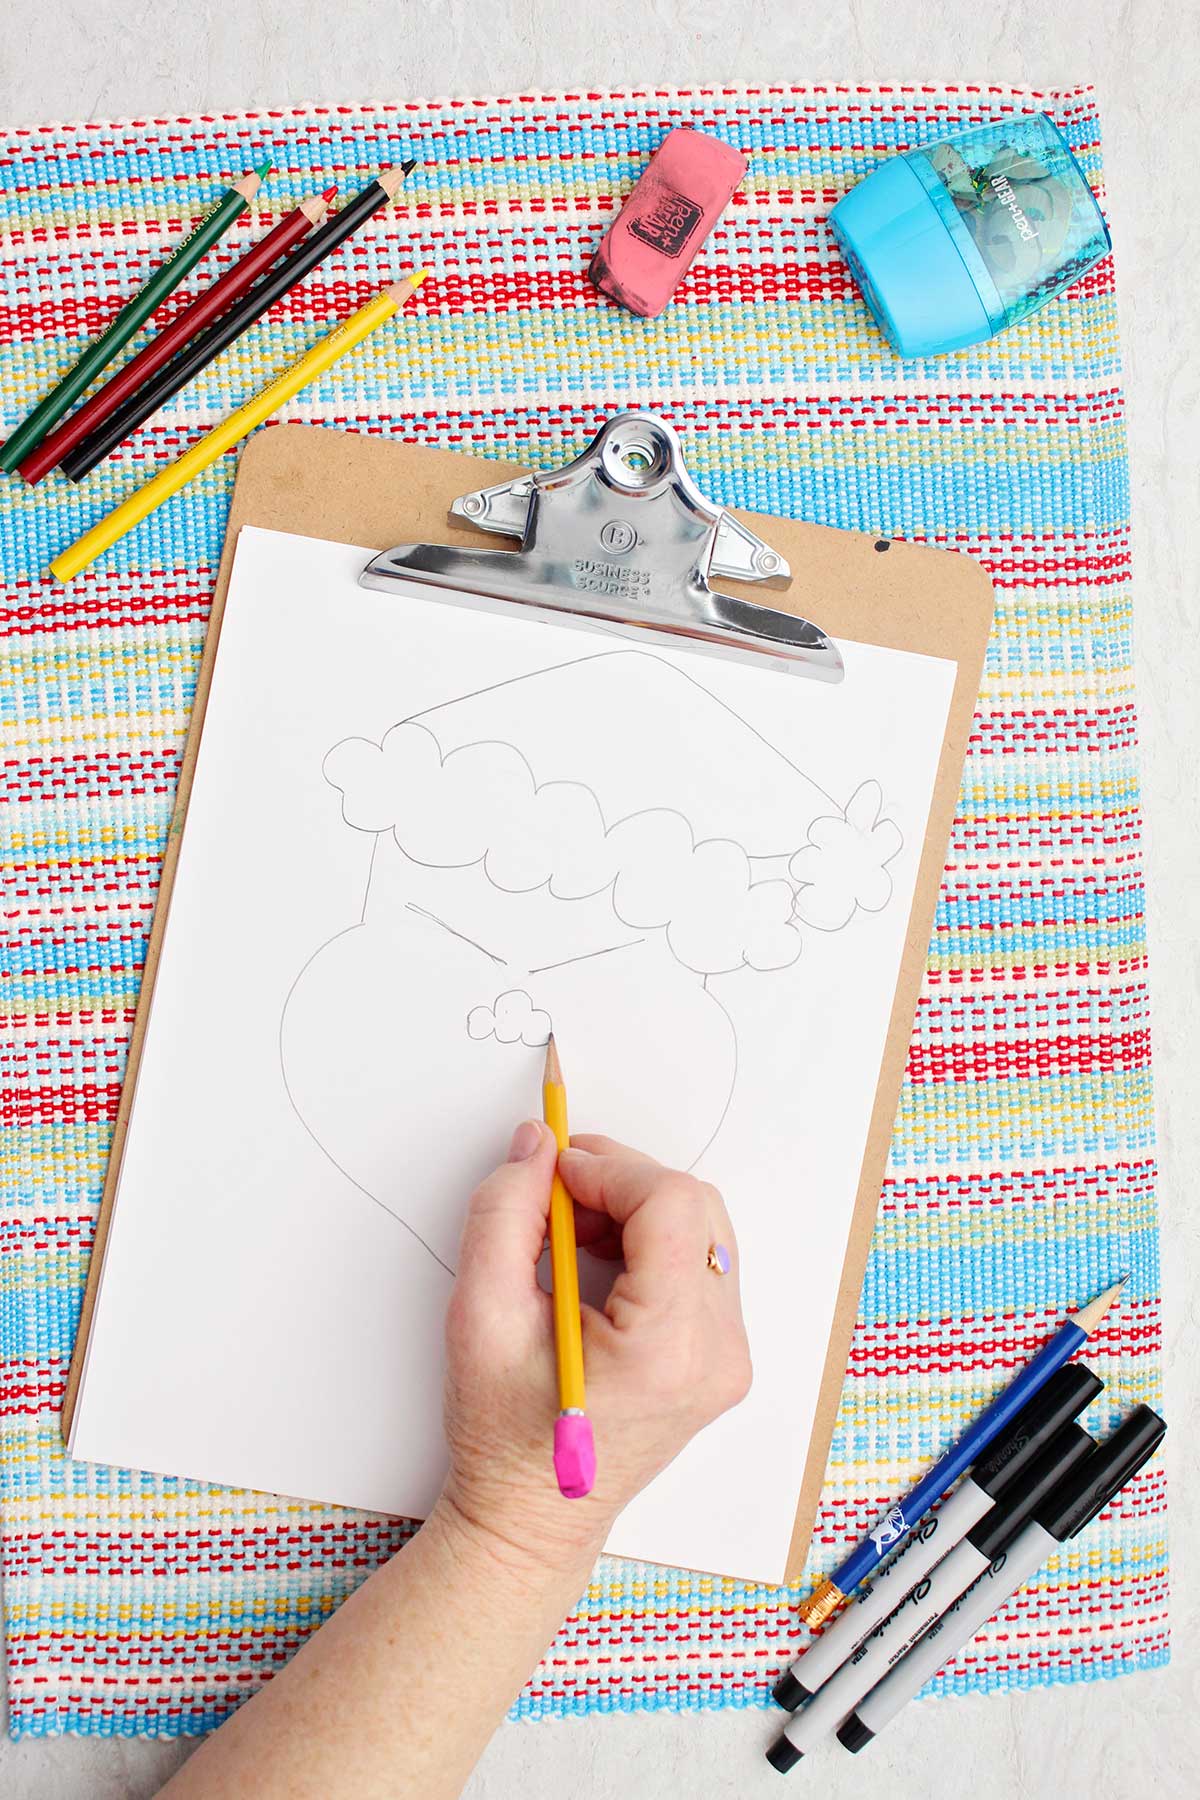
Next, we will sketch the nose, a sort of petite button nose. The base of the nose lies beneath the midpoint of the two eyebrow contours. It features three scooped “bumps,” with mine measuring approximately one inch in length overall. Then, illustrate a second line (originating from the same position as the initial line) that ascends. This line also has three bumps, but this time they elevate, and the central bump is taller than the two side bumps.
Returning to the eyes. Sketch two semi-circular lines beneath the brow contours to create the Grinch’s eyes. Add circles within to serve as pupils. Hmmm—they have a slightly mischievous appearance.
Here’s a tip to make his eyes glimmer with mischief—leave a small, uncolored dot in each pupil. This indicates a light reflection and infuses a “sparkle” into his gaze.
The Grinch’s broad smile is drawn in a manner that aligns with the lower “V” shape of the heart—except the smile line is wavy. Include two short lines at each end of the smile line to give it a more “cheerful” appearance. Conclude with a line that extents vertically in the space between the nose and the mouth, representing the subtle line we have above our lips.
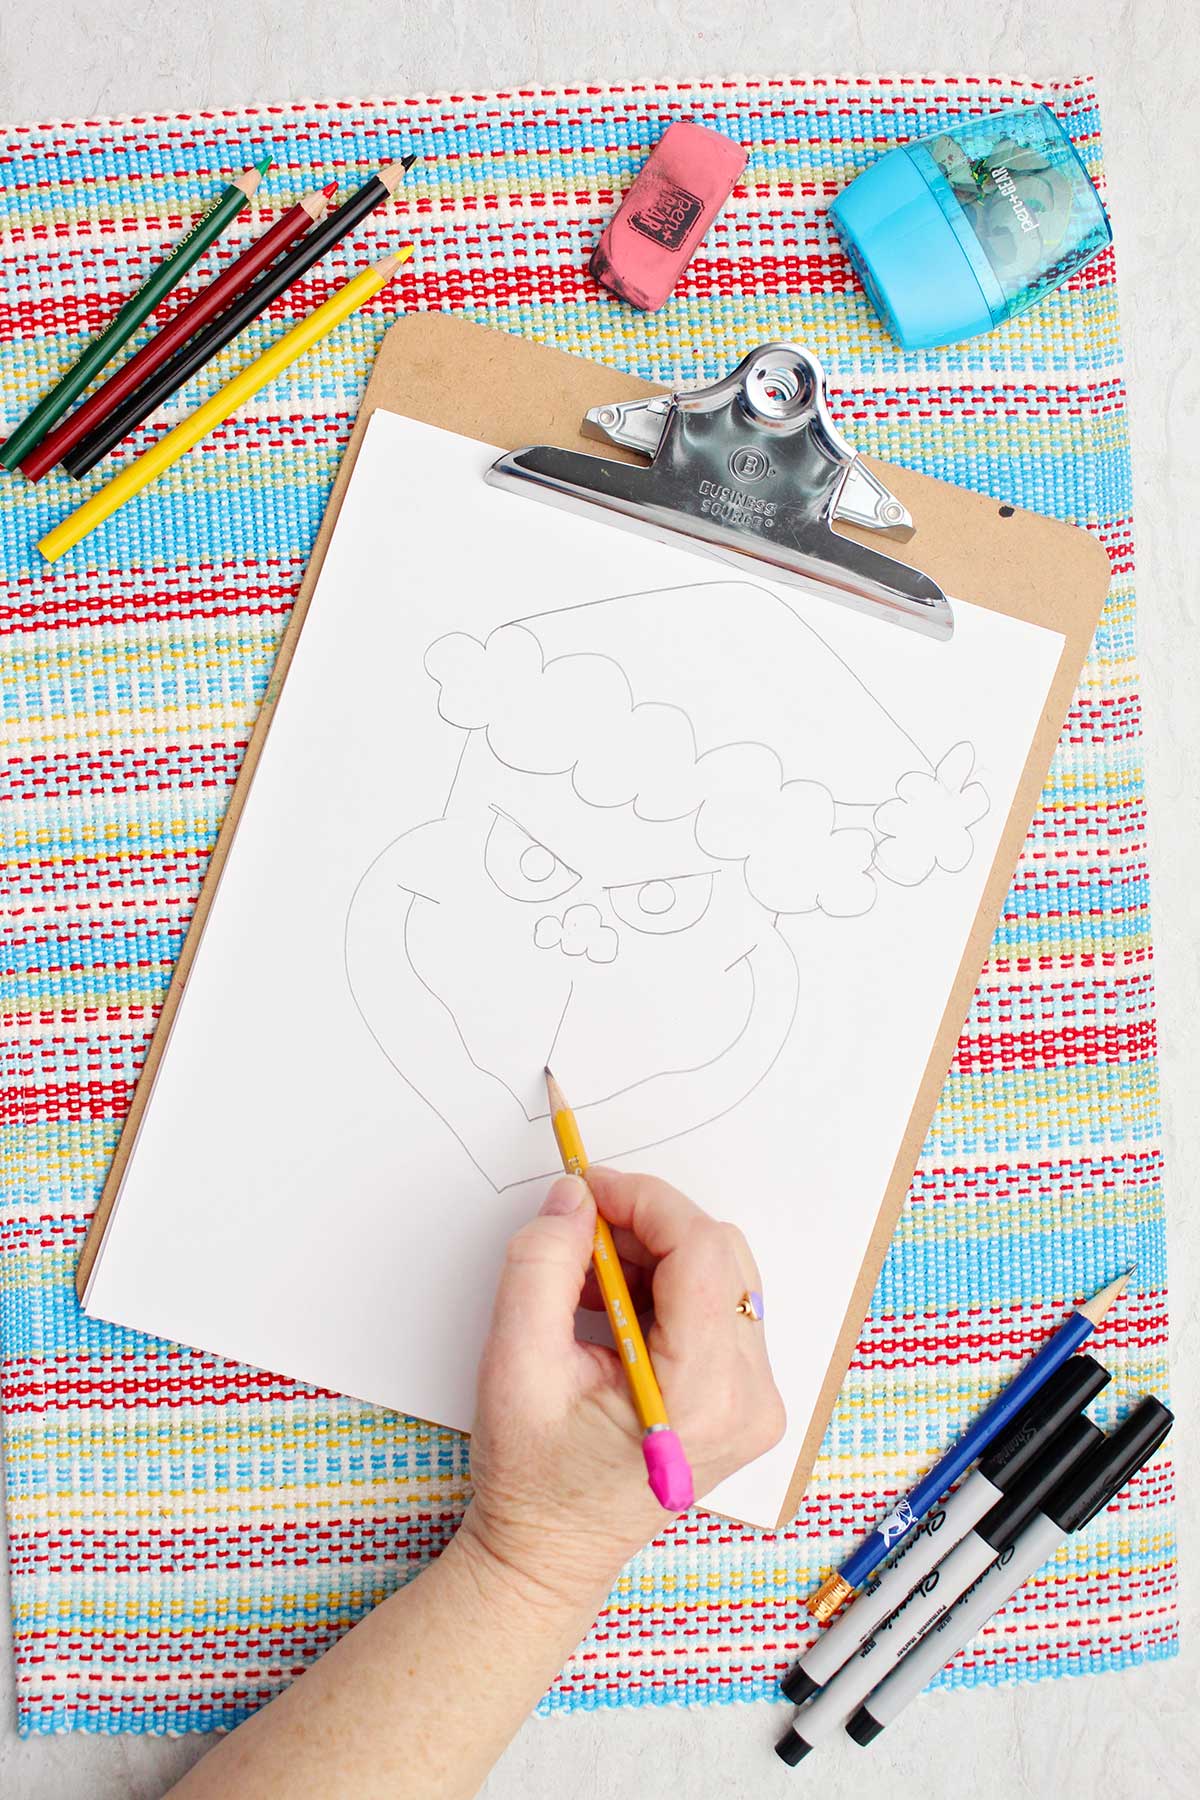
Now, let’s return to the eyebrows. Illustrate a zig-zagged, lightning-like line above each of the brow contours created earlier. They should appear thick and bushy! You may even wish to incorporate a few short, feathery lines within the brows if desired.
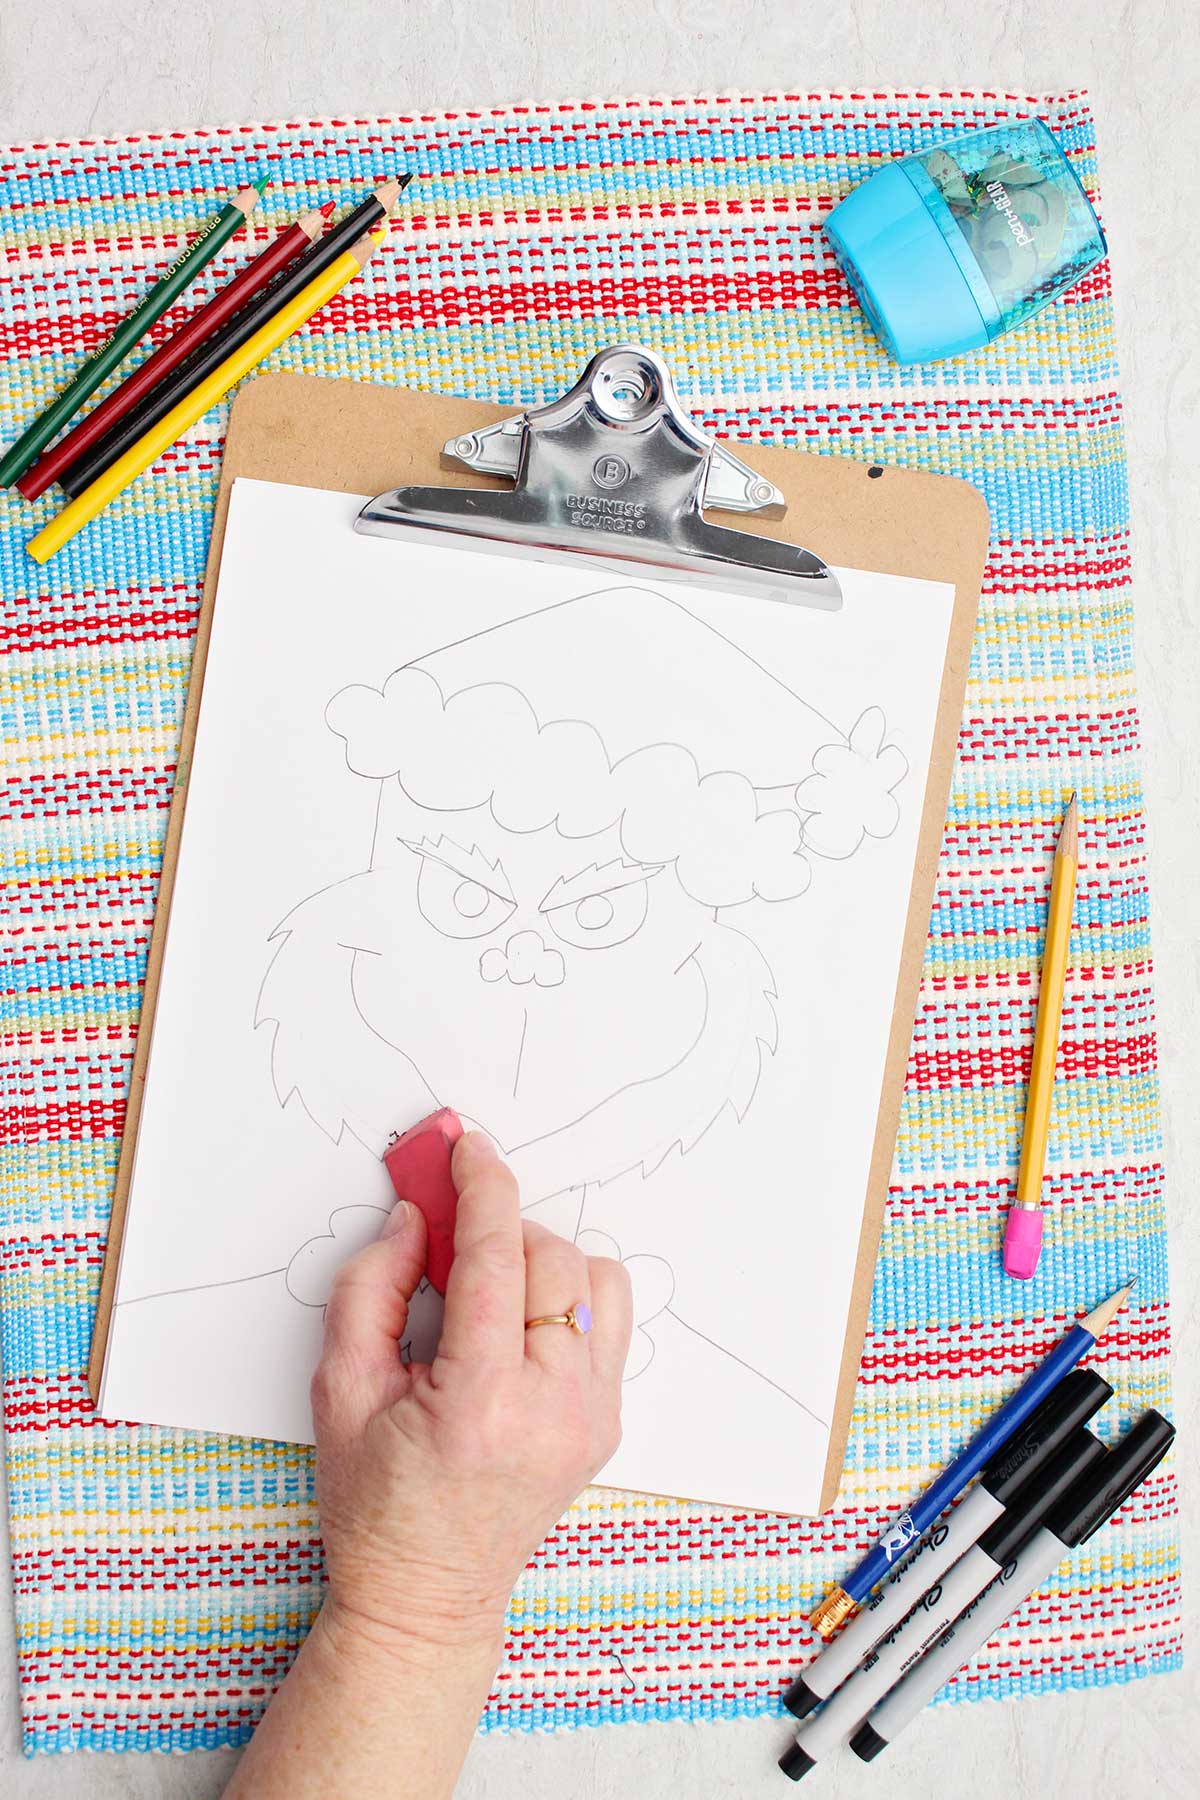
Finally, the Grinch requires some shaggy fur on the sides of his face! Let’s modify the smooth cheek contours to resemble fur lines. We will initiate with the fur on the sides of his visage. Utilize the same style of lines used for the eyebrows. Draw little zig-zag or lightning-like lines down the sides of the Grinch’s face, just outside the pre-existing lines. Then erase the original cheek lines. This instantly adds fur texture!
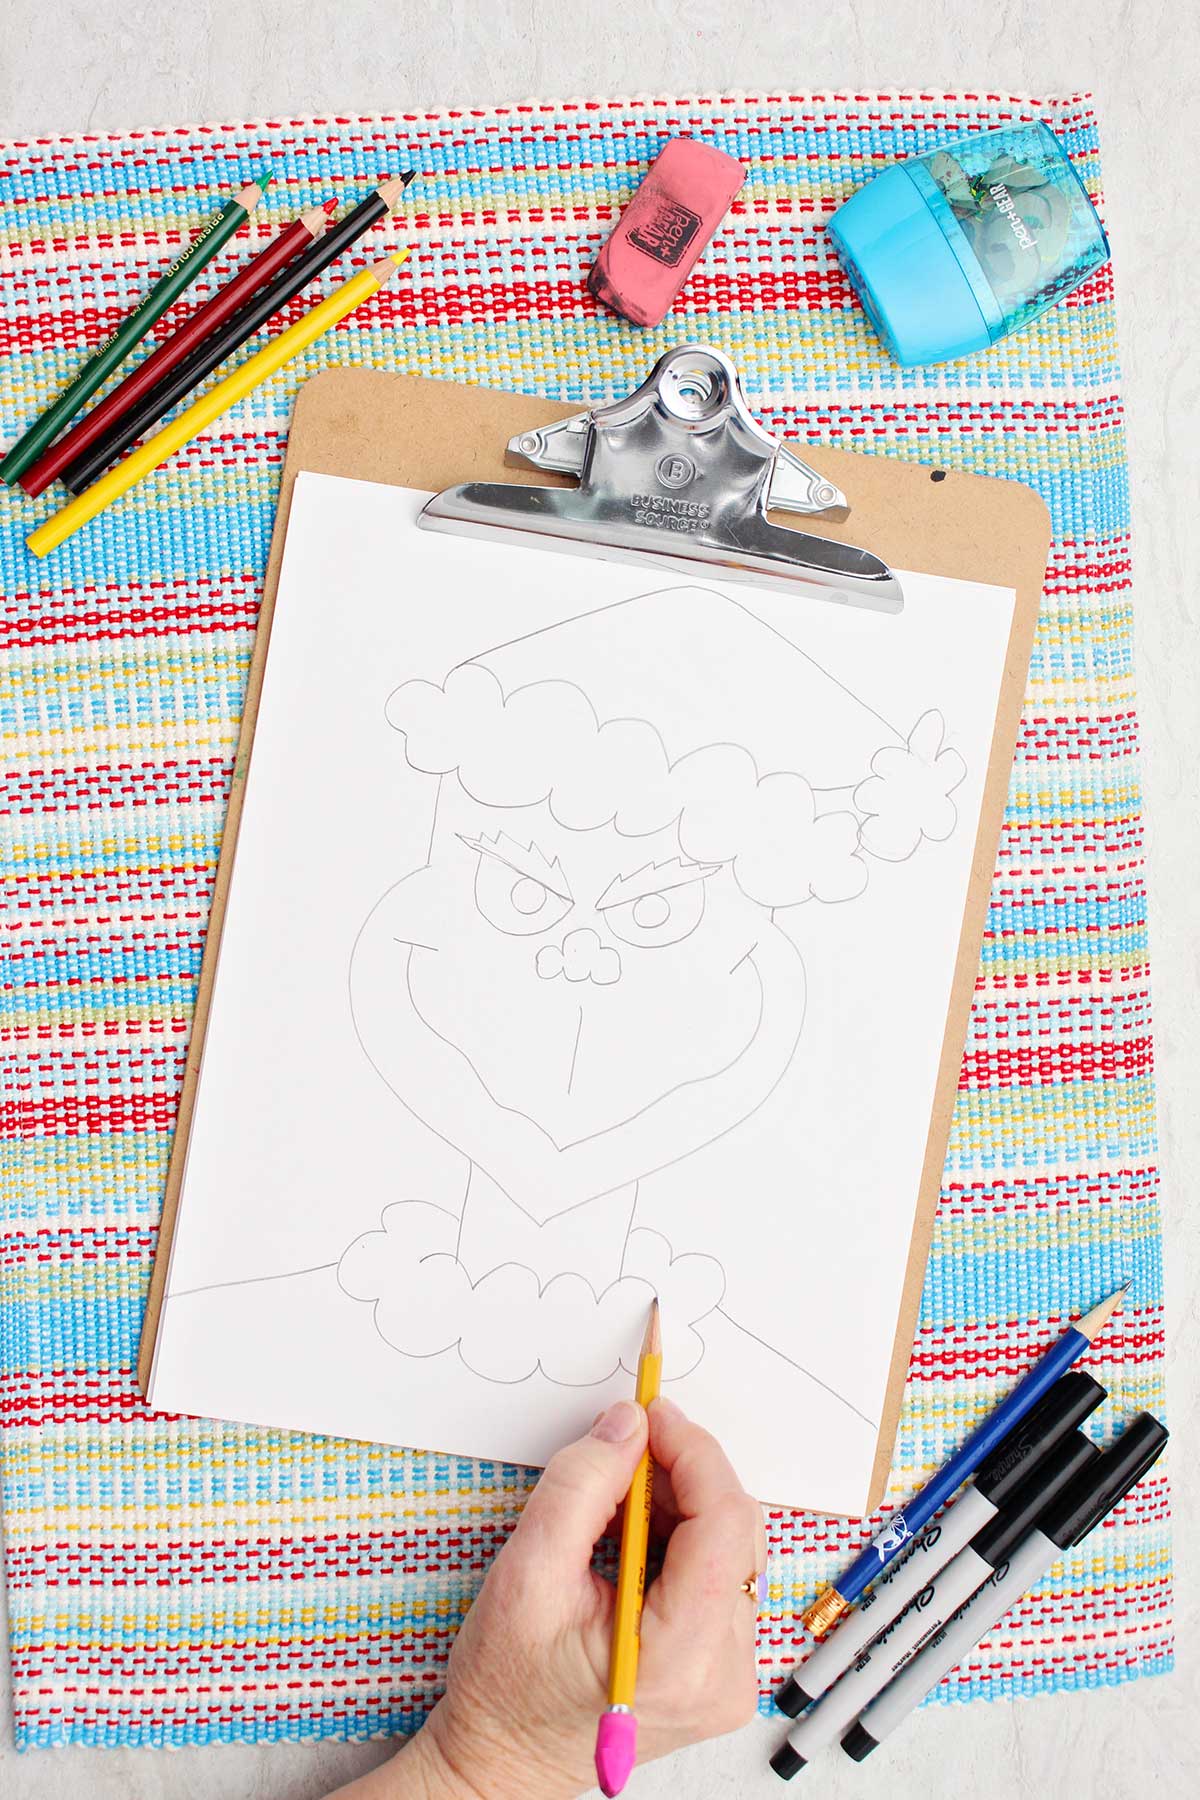
Step 4: Neck and torso
To create a neck, sketch two straight, parallel lines extending downward from his chin. Mine measured approximately 2 inches in length.
Next, let’s incorporate the fur surrounding the Santa suit’s collar. Draw another cloud-like uneven line starting from the left side of the neck, curving downward beneath the neck lines, and rising back to the right side of the neck. This represents the lower edge of the fur collar of the Santa outfit.
Then, sketch a straight cloud-like line (with the bumps directed upward) extending horizontally across the base of the previously drawn neck lines. Check out my drawing; it shows how this gives the impression that the collar wraps around his neck. Pretty neat, right?
We are not illustrating the entirety of the Grinch’s body, just his shoulders. Draw two lines, one protruding from each side of the fur collar, slanting downward to the paper’s edge. This adds completeness to the drawing instead of having the head appear to float in the center of our canvas!
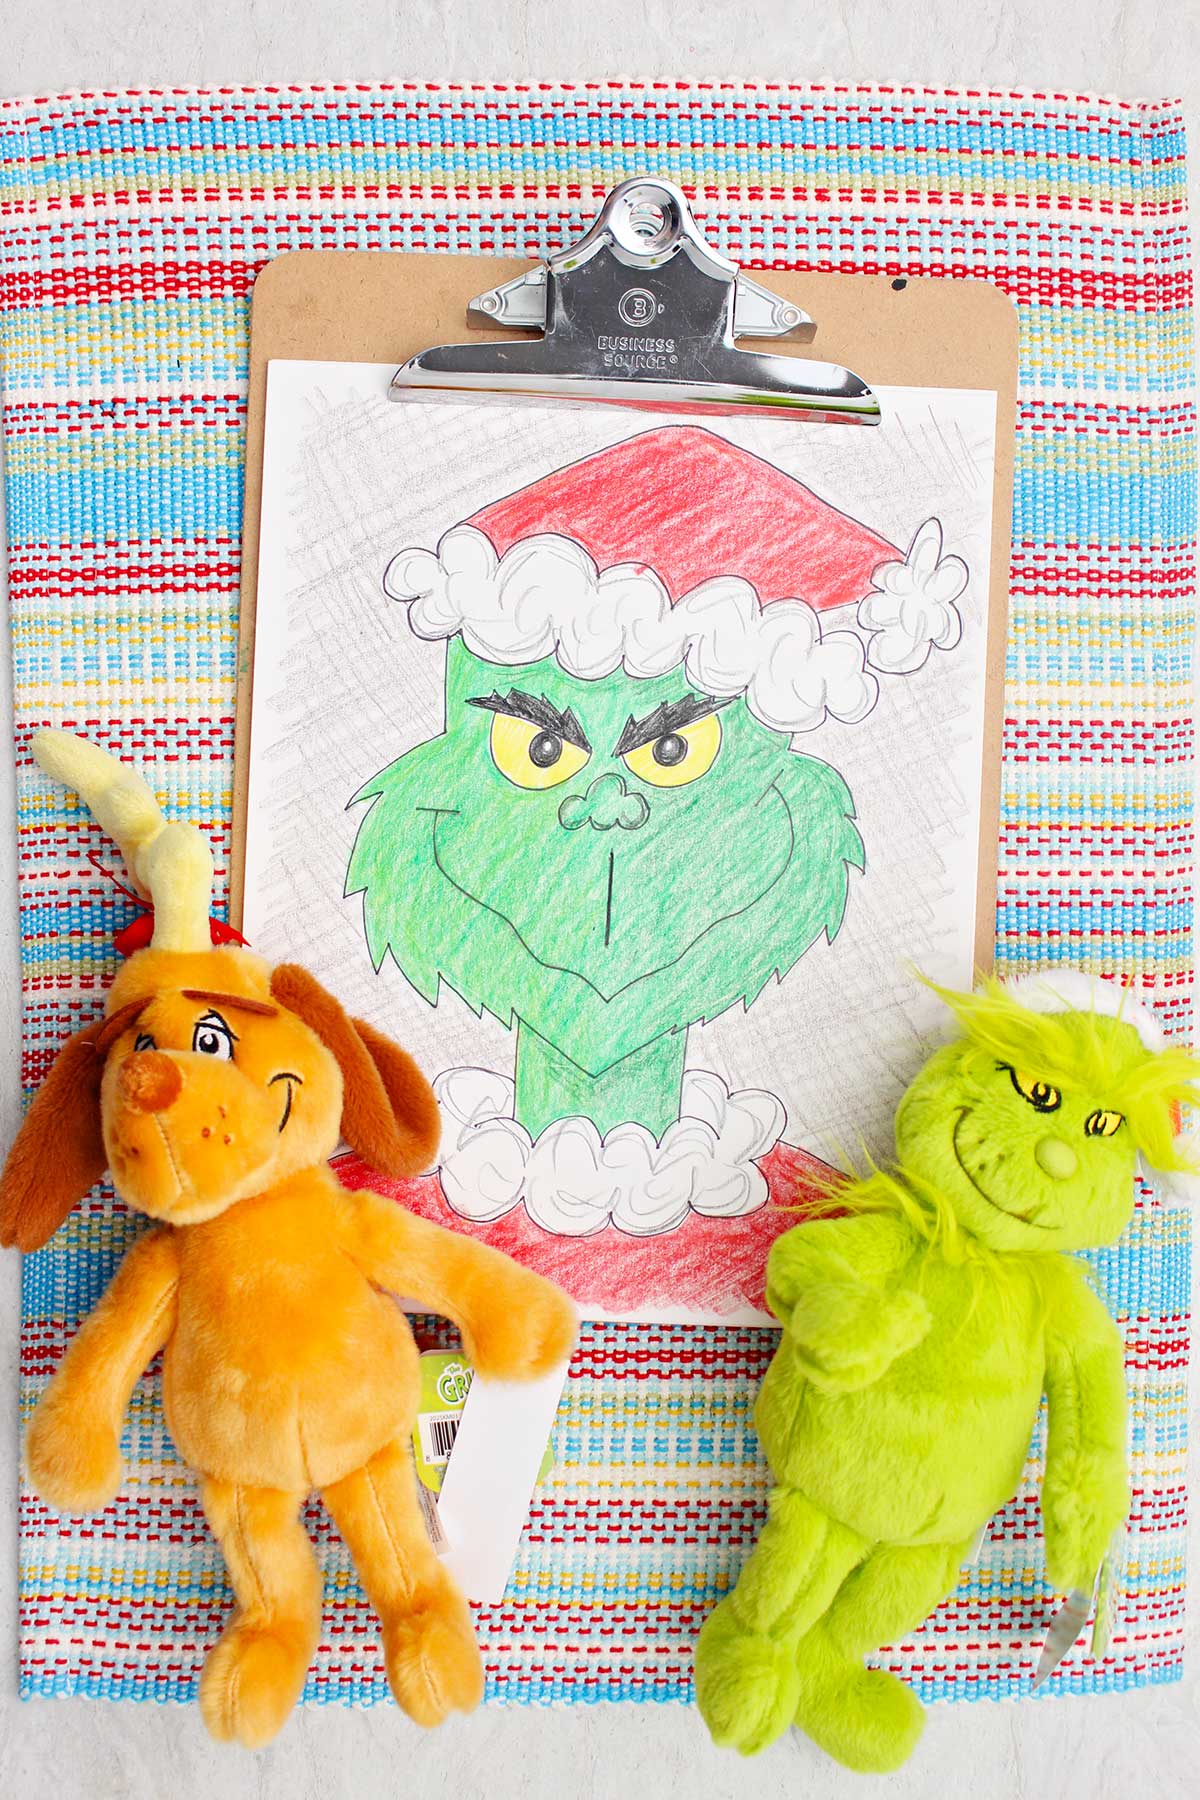
You accomplished it! Step back and take a look. You’ll spot that grumpy, sneaky Grinch character staring back at you!
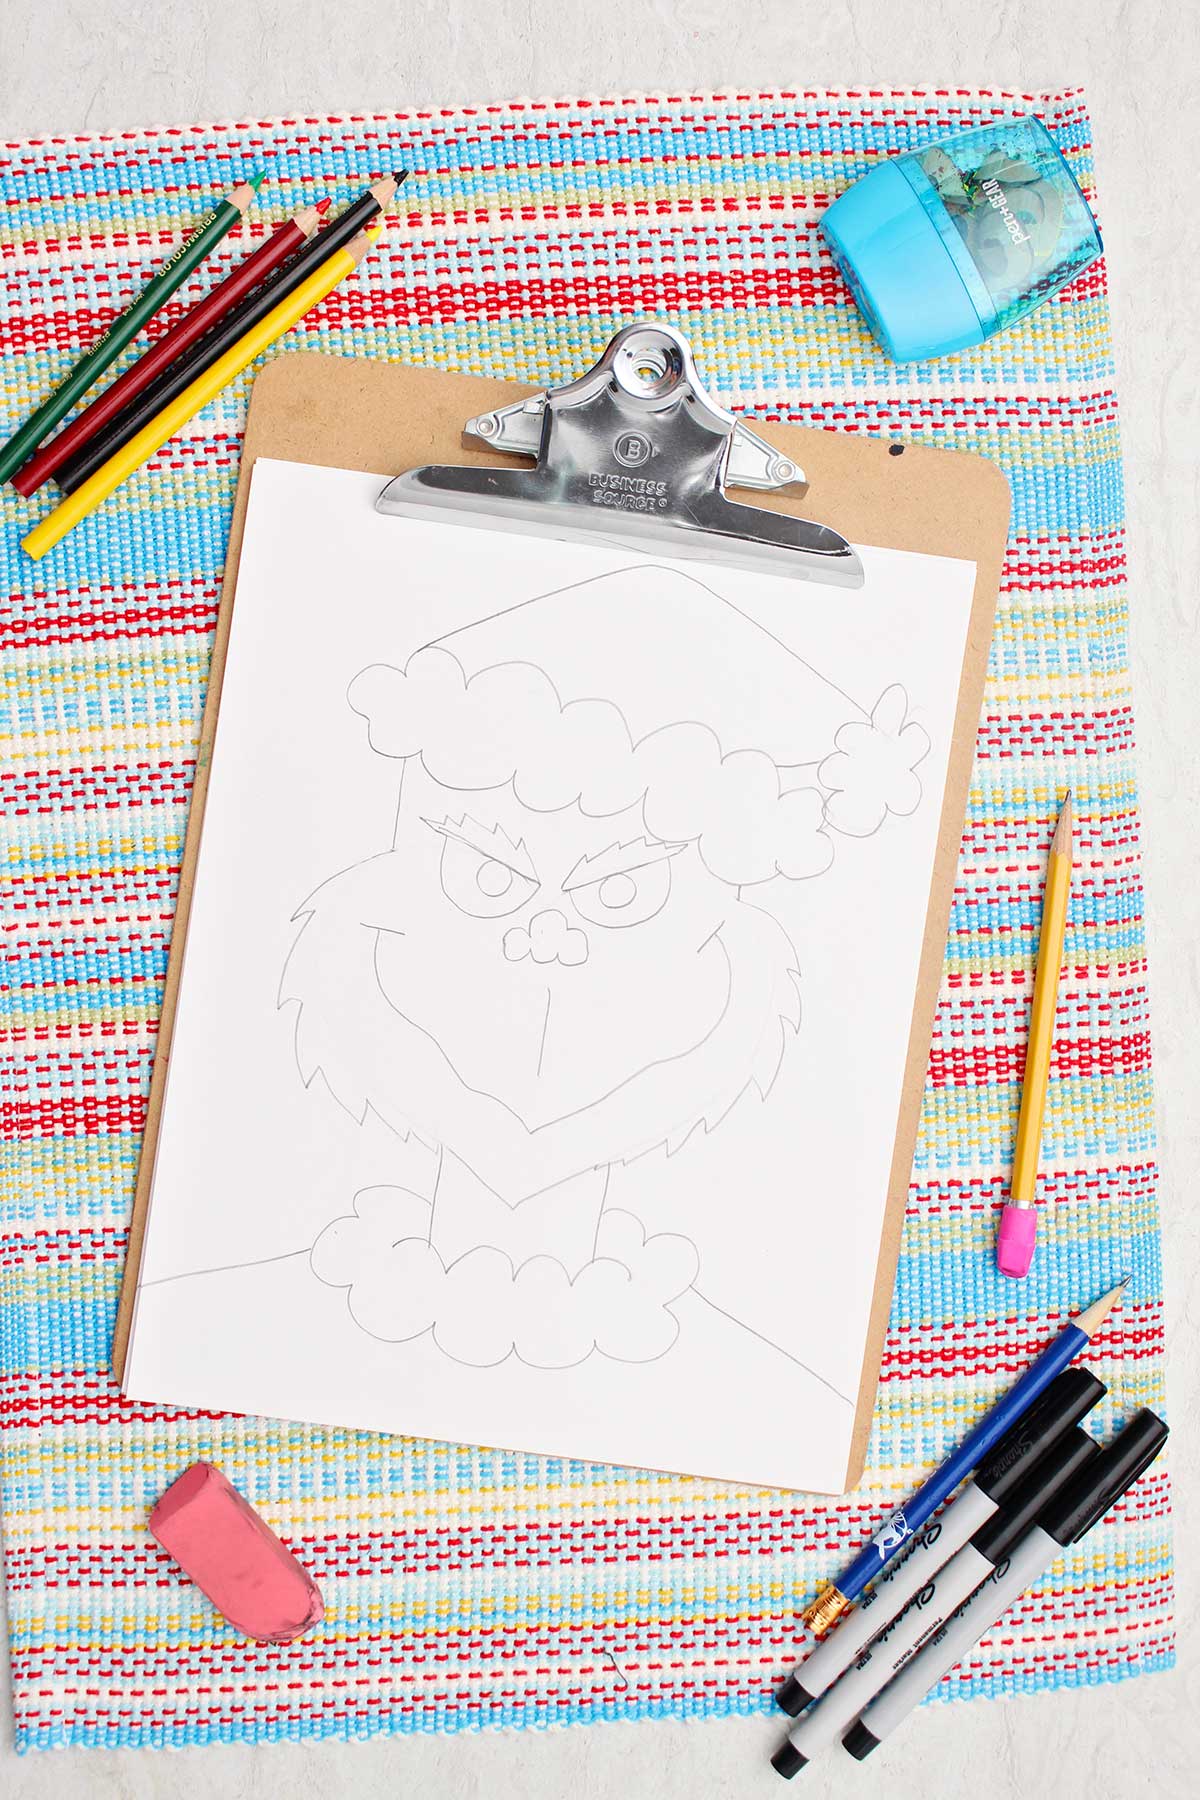
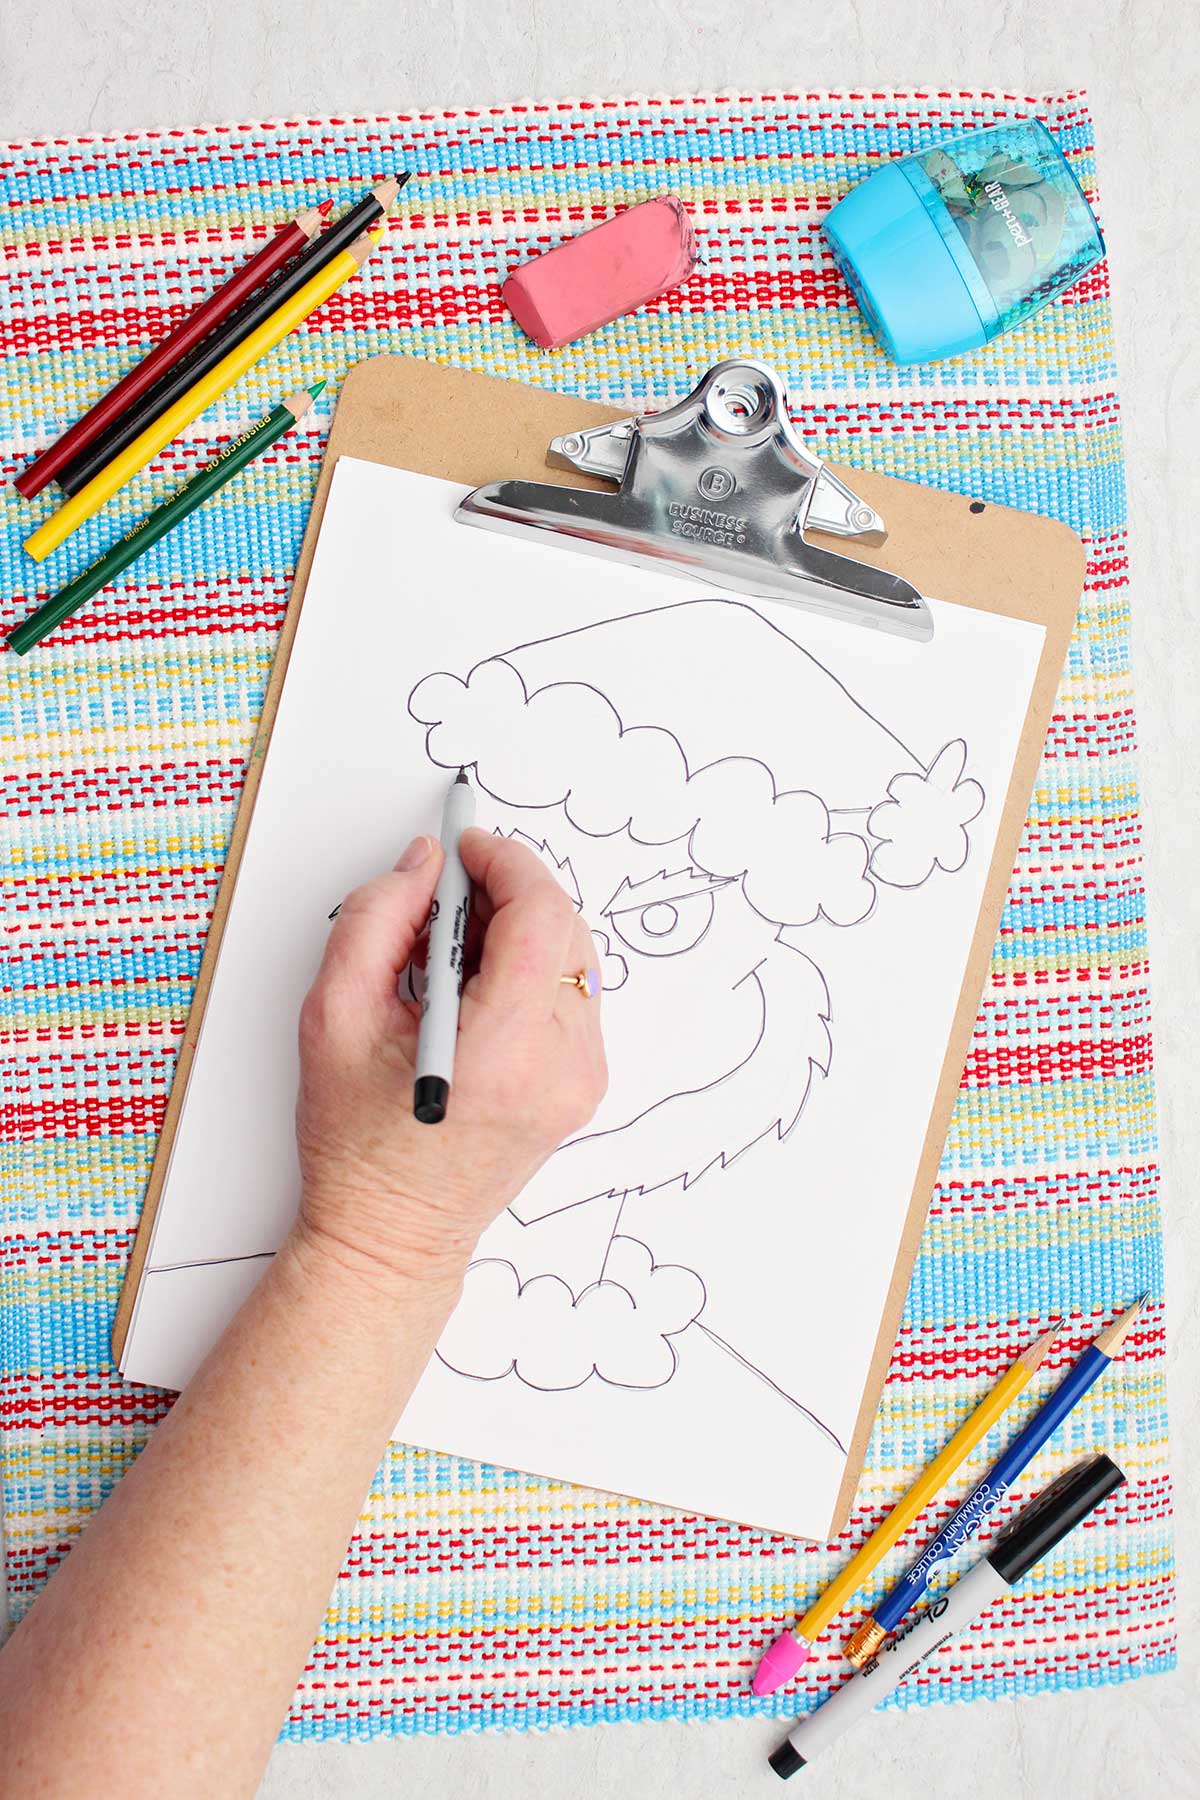
Step 5: Inking and Getting Ready to Color
Now that our pencil outline is completed, we will trace over the pencil lines to make them bold, dark, and long-lasting. I suggest utilizing a permanent black marker for this purpose. Ensure that there is something beneath the paper to shield your table in case of ink bleed through.
Carefully yet confidently, trace over the primary lines of your illustration. Take your time to achieve clean, solid outlines. Additionally, you can thicken some lines for emphasis if desired. Remember, perfection isn’t necessary; relax. The Grinch is a bit scruffy, so a few wavy lines are perfectly acceptable!
Allow the ink to dry for a few minutes to avoid smudging, and then use your eraser to remove any remaining pencil lines. This provides a neat drawing for you to color. With the black outlines, it resembles a genuine comic strip or a coloring book image, doesn’t it? Great work!
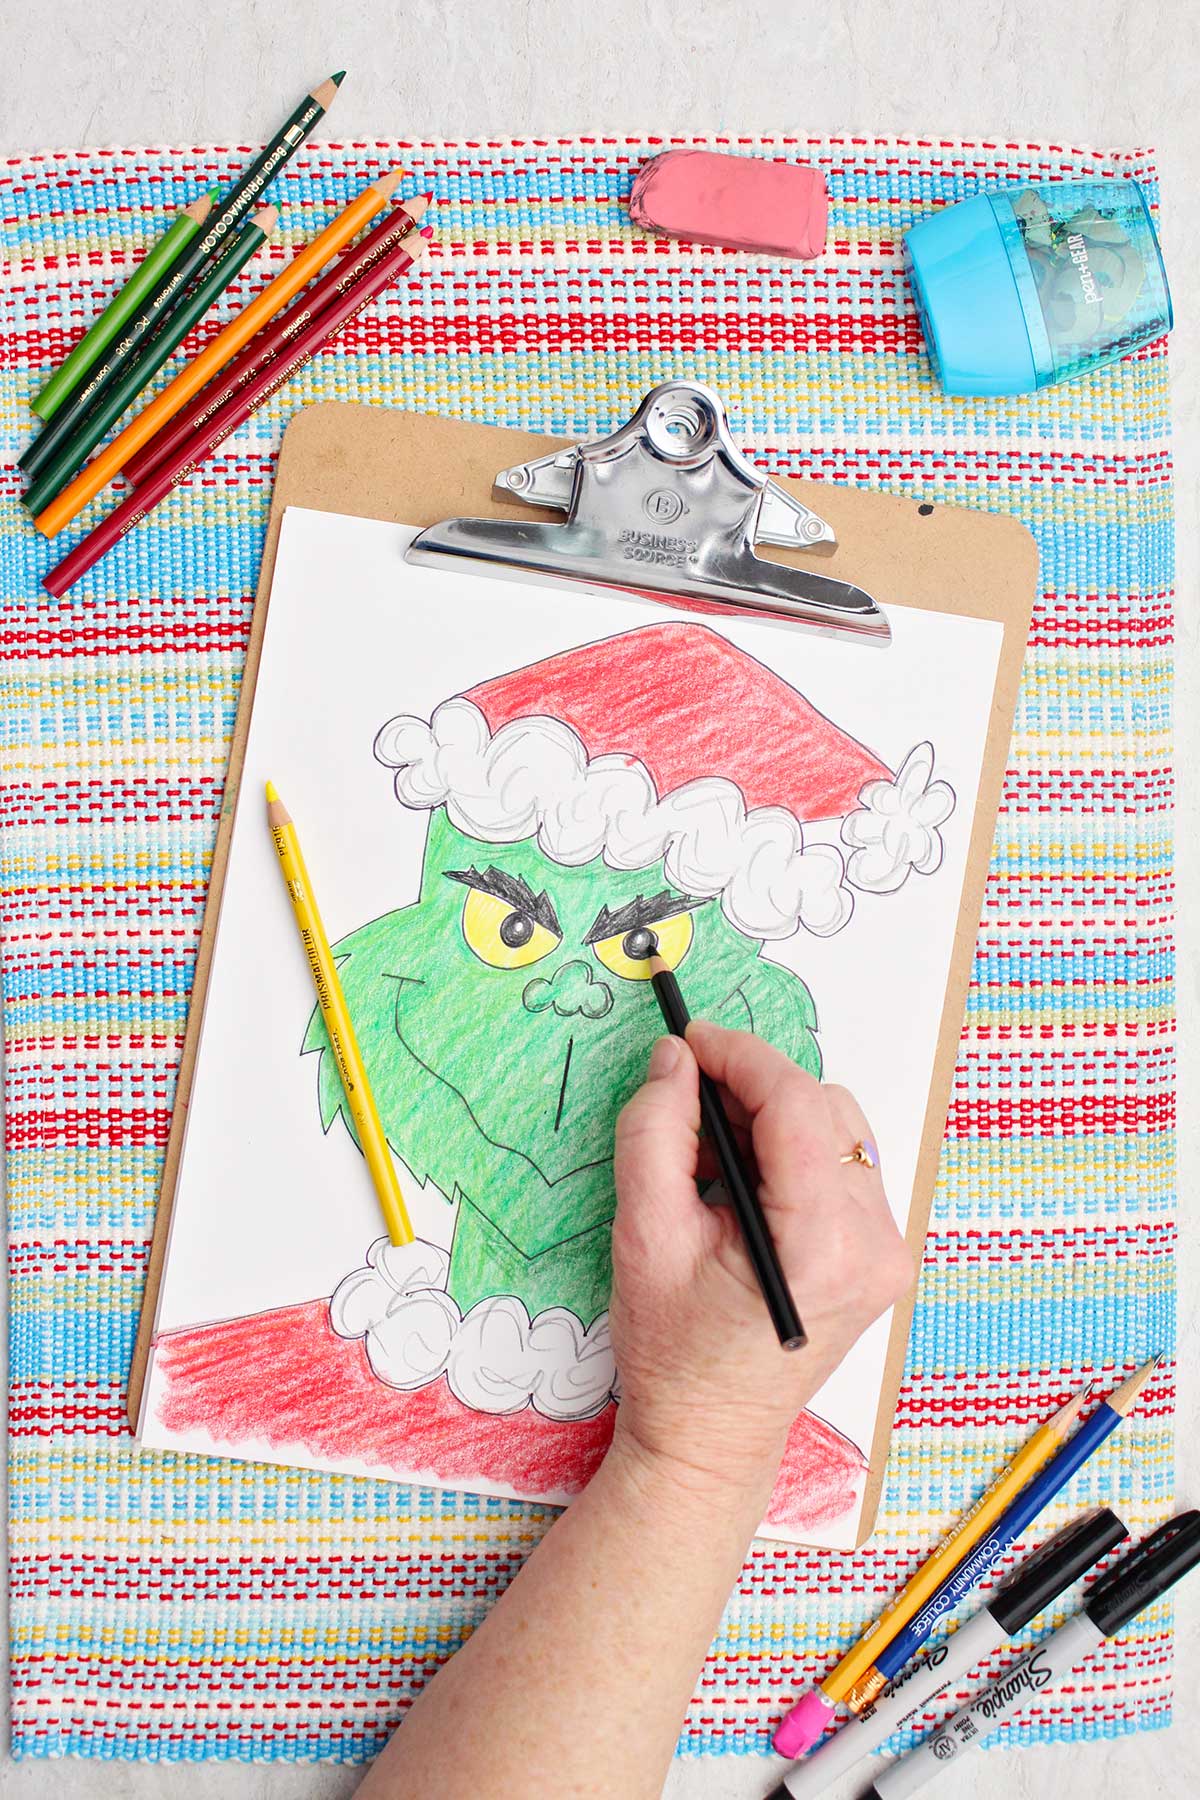
Step 6: Animating the Grinch with Color
Now it’s time for ANOTHER one of my favorite parts: introducing color! Gather the Colored Pencils or Colored Markers,
Certainly! Here’s the modified version with synonyms and altered sentence structures while retaining the HTML format:
Firstly, let’s locate our green crayon, colored pencil, or marker. You will desire a vivid green that embodies the quintessential Grinch aesthetic. Shade in his face and neck.
Then, search for a bright, cheerful red for his hat and coat. While coloring the hat, take care to avoid the white pom-pom and trim. A lively red will enhance the contrast with his green visage.
If you are utilizing colored pencils, consider adding simple shading to achieve a more three-dimensional effect. Apply some yellow on the left side of the face and hat to simulate light emanating from that area. Then use a darker shade of green to add some shadow along the left side of the face, creating depth. This slight shading gives his face a more rounded appearance.
One notable feature of the Grinch are his eyes—they’re yellow rather than white. Color the eye yellow and make the pupil black. This contrast highlights the eyes against the green backdrop.
Lastly, what about the white sections of his hat and coat? One option is to leave them untouched. Alternatively, you could sketch a few cloud-like lines in random areas to create a three-dimensional fluffy appearance. Use black or blue lightly for this effect.
These pointers can assist in making your sketching experience more manageable!
While coloring with colored pencils, employ the pencil lead’s side and draw in small circles to achieve a more uniform hue. With crayons or markers, color in one direction while maintaining consistent pressure to acquire an even tone.
Trace the perimeter of what you are coloring with your selected hue. Then fill in the area with that shade. This technique prevents straying outside the lines.
Fluffy lines on collar- To enhance the plain white region of the collar, sketch some cloud-like lines with curves and bumps. Avoid filling the entire space, just add random cloud lines. This will produce a textured appearance. Consult the video or images for clarity on what this entails.
When coloring the pupil, leave a small circle of white; this mimics light reflection in the eye.
Craft Variations for the Grinch
Want to change things a bit? Here are several methods to personalize and experiment with this illustration.
Cotton balls– Attach cotton balls to the collar for a three-dimensional fluffy effect.
Glitter glue– Apply glitter glue to select areas to add some sparkle to the picture.
Grinch Drawing Frequently Asked Questions
How do you begin a Grinch drawing?
I find it beneficial to commence a Grinch drawing with a heart outline. This provides the foundational shape for the face with a form that most individuals are already acquainted with or have drawn numerous times. Subsequently, positioning the facial features and hat becomes straightforward.
How to create the Grinch face?
The tutorial and video will guide you in crafting a Grinch face effortlessly. I believe a crucial step is initiating with the heart shape to form the Grinch’s head. With this structure serving as a foundation, the hat can take on a cloud-like shape for the fur trim and a mountain-like structure for the cap (with a pom-pom at the tip). The facial attributes are discussed in this post, illustrating how to depict the Grinch step by step: pronounced eyebrows, button nose, and a “V” shaped, zigzag mouth. Take a look!
Additional DIY Drawing Lessons for Children
Searching for more…
Feel free to let me know if you need further changes!
simple sketches to attempt? Here are several of our preferred selections:
Joyous Grinch-mas!
I would be thrilled to see your fantastic Grinch sketches! If you want to showcase them, feel free to share on social media with #WelcomeToNanas. I absolutely adore witnessing your imaginative spirit.
Did You Enjoy This Craft?
If you had a blast sketching alongside me, please think about subscribing for more detailed art tutorials and crafts. We have so many exciting characters and drawings lined up!
How to Sketch the Grinch Step by Step
Shelly
Eager to learn How to sketch the Grinch Step by Step? Follow my lead and you’ll excel at drawing the Grinch quicker than he can swipe Xmas!
Prep Duration 5 minutesmins
Cooking Duration 25 minutesmins
Overall Duration 30 minutesmins
Category Art Project, Christmas craft, coloring sheet, How to Sketch
Craft Style Craft
Instructions
Face shape: Sketch a heart in the center of the sketchbook page as symmetrically as possible. On the upper right side of the heart, extend a line upward by about an inch. Watching the video can be beneficial for this guide.
Hat: Create a cloud-like curve from the top of the line you just made, tilting down to the right. The line should be uneven, resembling the edge of a cloud. Next, draw another cloud-like curve over the first, connecting both ends.Above this line, we will outline the hat’s top. Sketch a mountain-like line from the left to the right, beginning at the left tip of the trim. This line will rise and then descend. Afterward, draw a short line from the opposite end of the trim toward the right end of the mountain line.At the terminus of these two lines, place a pom-pom at the hat’s peak. This will have the same cloud-like undulations as the trim.
Grinch face: Begin by sketching two lines on the top two peaks of the heart shape. These two lines will converge downward towards each other and will form the lower edge of the eyebrows.Next, take an eraser to remove the upper parts of the heart lines around the eyebrow lines from one side of the Grinch’s face to the other (while obviously keeping the brow lines intact).Now, let’s draw the nose, depicted as a small button nose. The base of the nose sits below the midpoint of the two eyebrow lines. It features three scooped “bumps” and mine is roughly one inch in total length. Then, sketch a second line (starting from the same point as the first line) that rises upward. This line also has three bumps, but this time they extend upwards with the center bump being taller than the two side bumps.Returning to the eyes. Draw two semi-circular lines beneath the brow lines for the Grinch’s eyes. Add circles inside to represent the pupils. Hmm—they appear rather mischievous!Here’s a trick to make his eyes glimmer with mischief: leave a tiny, uncolored dot in each pupil. This signifies a light reflection and adds a “sparkle” to his eyes.The Grinch’s broad grin is drawn along and conforms to the bottom “V” shape of the heart—except the smile line is wavy. Add two short lines at either end of the smile line to give it a “smiling” appearance. Finish with a line that goes straight up and down in the section between the nose and the mouth. This depicts the small line we have above our lips.Let’s revisit and complete his eyebrows. Trace a zig-zagged, lightning-like line above each of the brow lines created earlier. They should appear thick and bushy! You can even incorporate a few short, feathery strokes inside the brows if desired.Finally, the Grinch requires some unkempt fur on the sides of his face! Let’s transform the smooth cheek lines into fur lines. We’ll replicate the same style of lines we used for the eyebrows. Sketch small zig-zag or lightning-like lines down the sides of the Grinch’s face, just outside the existing lines. Then eliminate the original cheek lines. This instantly introduces a fur texture!
Body: For the neck, draw two straight, parallel lines downward beneath his chin. Mine measured around 2 inches in length.Next, let’s add the fur around the collar of the Santa suit. Sketch another cloud-like bumpy line that begins at the left side of the neck, curves beneath the neck lines, and rises back up to the right side of the neck. This represents the lower edge of the fur collar of the Santa suit.Then, draw a straight cloud-like line (with the bumps facing upward) running horizontally across the bottom of the two previously drawn neck lines. Take a look at the picture I created. Notice how that creates the illusion of the collar wrapping around his neck? Pretty neat, right?We are not illustrating the entire body of the Grinch, only his shoulders. Draw two lines, one emanating from each side of the fur collar, slanting down to the edge of the paper. This gives the drawing a more finished look instead of the head seeming to float in the middle of our paper!
Notes
There are suggestions and variations available on the website—find them at https://welcometonanas.com/how-to-draw-the-grinch-step-by-step/
Keyword grinch how to draw, how do you draw the grinch, how the Grinch stole Christmas, how the Grinch stole Xmas, how to draw a grinch face, how to draw grinch easy, how to draw grinch step by step, how to draw the grinch, how to draw the grinch easy, how to draw the grinch face easy, how to draw the grinch step by step
Create delightful DIY pumpkin magnets using wood, paint, and Mod Podge! A rapid, enjoyable Halloween project, ideal for embellishing or presenting as [...]
In our location, it’s a central hub for farmers’ markets, brimming with fresh produce, artisanal items, and enthusiastic sellers. However, thriving at [...]
Discover how to craft beautiful marbled stones using acrylic paint and Mod Podge! This straightforward DIY endeavor is ideal for introducing a vibrant [...]
Learn how to preserve flowers in resin with this easy DIY guide. Follow step-by-step instructions and watch the video tutorial to create stunning keep [...]
Tired of bow clutter? Learn how to make a DIY hair bow organizer that’s cute, easy, and perfect for any kid’s room. A fun, functional craft project! A [...]
Looking for a festive activity that won’t break the bank? Try one of these paper plate Christmas crafts kids will definitely enjoy! No need to spend a [...]
We use cookies on our website to give you the most relevant experience by remembering your preferences and repeat visits. By clicking “Accept”, you consent to the use of ALL the cookies.
This website uses cookies to improve your experience while you navigate through the website. Out of these, the cookies that are categorized as necessary are stored on your browser as they are essential for the working of basic functionalities of the website. We also use third-party cookies that help us analyze and understand how you use this website. These cookies will be stored in your browser only with your consent. You also have the option to opt-out of these cookies. But opting out of some of these cookies may affect your browsing experience.
Necessary cookies are absolutely essential for the website to function properly. These cookies ensure basic functionalities and security features of the website, anonymously.
Cookie
Duration
Description
cookielawinfo-checbox-analytics
11 months
This cookie is set by GDPR Cookie Consent plugin. The cookie is used to store the user consent for the cookies in the category "Analytics".
cookielawinfo-checbox-functional
11 months
The cookie is set by GDPR cookie consent to record the user consent for the cookies in the category "Functional".
cookielawinfo-checbox-others
11 months
This cookie is set by GDPR Cookie Consent plugin. The cookie is used to store the user consent for the cookies in the category "Other.
cookielawinfo-checkbox-necessary
11 months
This cookie is set by GDPR Cookie Consent plugin. The cookies is used to store the user consent for the cookies in the category "Necessary".
cookielawinfo-checkbox-performance
11 months
This cookie is set by GDPR Cookie Consent plugin. The cookie is used to store the user consent for the cookies in the category "Performance".
viewed_cookie_policy
11 months
The cookie is set by the GDPR Cookie Consent plugin and is used to store whether or not user has consented to the use of cookies. It does not store any personal data.
Functional cookies help to perform certain functionalities like sharing the content of the website on social media platforms, collect feedbacks, and other third-party features.
Performance cookies are used to understand and analyze the key performance indexes of the website which helps in delivering a better user experience for the visitors.
Analytical cookies are used to understand how visitors interact with the website. These cookies help provide information on metrics the number of visitors, bounce rate, traffic source, etc.
Advertisement cookies are used to provide visitors with relevant ads and marketing campaigns. These cookies track visitors across websites and collect information to provide customized ads.