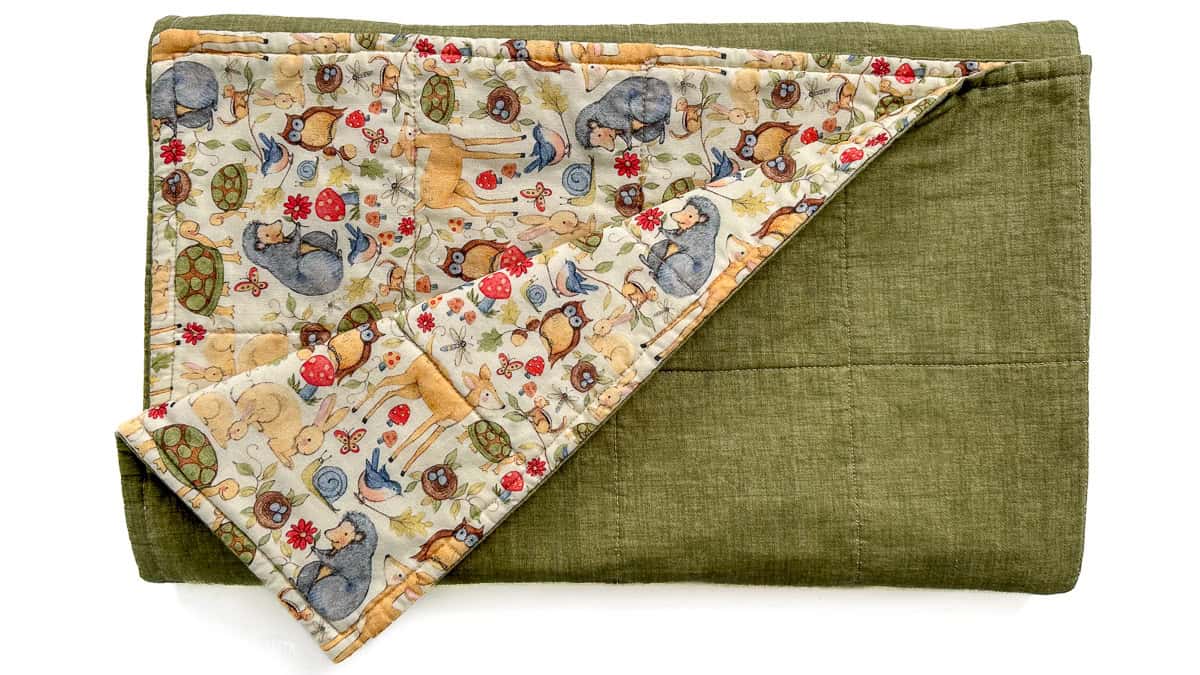
These concluding stitches serve more than a decorative purpose. Quilting secures the batting in place to prevent it from shifting, bunching, or becoming uneven over time.
Gauge your blanket to determine the spacing. Mine was approximately 40 inches square, so I opted for quilting lines every 5 inches.
Outline Your Lines
Spread the blanket out flat.
Utilize a quilting ruler to create straight lines with a water-soluble fabric pen.
Secure across the blanket with pins to avoid movement.
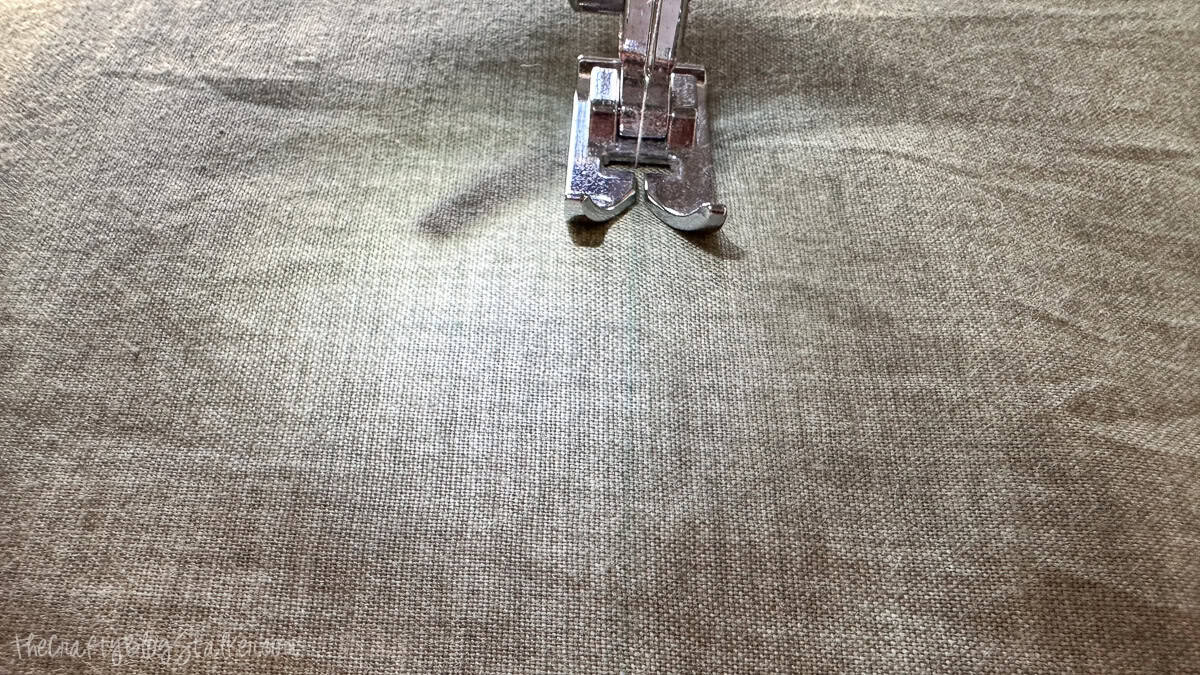
Stitch Straight Rows
Sew straight stitches directly along the drawn lines. Take your time and proceed slowly.
After all rows are sewn in one orientation, turn the blanket 90 degrees and repeat the procedure. This forms a grid pattern and uniformly quilted squares.
The overlapping stitches create the traditional quilted appearance while securing the quilt layers.
Upon completion, your blanket is entirely quilted and finished.
If you are capable of sewing reasonably straight lines, you can achieve this.
This is one of those undertakings that appears impressive yet is entirely achievable. And when that adorable baby is swaddled in something crafted with your own hands, every single stitch feels worthwhile.
If you create one, you may just find yourself contemplating the next baby blanket even before gifting the first.
Sure! Here’s a rephrased version of your content while keeping the HTML tags and format intact: Guidelines Start with two coffee filters, fold each in [...]
Discover how to create your own DIY tile coasters with this straightforward guide. Ideal for novices, utilizing Mod Podge, images, and resin for a cus [...]
Here's the text with synonyms and altered sentence structure, while maintaining the HTML tags and format: Cricut Design Space In the subsequent steps, [...]
Published: Mar 10, 2023 · Modified: Dec 3, 2025 by Shelly · This article may include affiliate links · 8 Comments Let’s commemorate the month of March [...]
Sew the Stocking Stack the stocking components, white cotton, two woven burlap pieces with right sides facing each other, followed by another layer of [...]
In our location, it’s a central hub for farmers’ markets, brimming with fresh produce, artisanal items, and enthusiastic sellers. However, thriving at [...]
We use cookies on our website to give you the most relevant experience by remembering your preferences and repeat visits. By clicking “Accept”, you consent to the use of ALL the cookies.
This website uses cookies to improve your experience while you navigate through the website. Out of these, the cookies that are categorized as necessary are stored on your browser as they are essential for the working of basic functionalities of the website. We also use third-party cookies that help us analyze and understand how you use this website. These cookies will be stored in your browser only with your consent. You also have the option to opt-out of these cookies. But opting out of some of these cookies may affect your browsing experience.
Necessary cookies are absolutely essential for the website to function properly. These cookies ensure basic functionalities and security features of the website, anonymously.
Cookie
Duration
Description
cookielawinfo-checbox-analytics
11 months
This cookie is set by GDPR Cookie Consent plugin. The cookie is used to store the user consent for the cookies in the category "Analytics".
cookielawinfo-checbox-functional
11 months
The cookie is set by GDPR cookie consent to record the user consent for the cookies in the category "Functional".
cookielawinfo-checbox-others
11 months
This cookie is set by GDPR Cookie Consent plugin. The cookie is used to store the user consent for the cookies in the category "Other.
cookielawinfo-checkbox-necessary
11 months
This cookie is set by GDPR Cookie Consent plugin. The cookies is used to store the user consent for the cookies in the category "Necessary".
cookielawinfo-checkbox-performance
11 months
This cookie is set by GDPR Cookie Consent plugin. The cookie is used to store the user consent for the cookies in the category "Performance".
viewed_cookie_policy
11 months
The cookie is set by the GDPR Cookie Consent plugin and is used to store whether or not user has consented to the use of cookies. It does not store any personal data.
Functional cookies help to perform certain functionalities like sharing the content of the website on social media platforms, collect feedbacks, and other third-party features.
Performance cookies are used to understand and analyze the key performance indexes of the website which helps in delivering a better user experience for the visitors.
Analytical cookies are used to understand how visitors interact with the website. These cookies help provide information on metrics the number of visitors, bounce rate, traffic source, etc.
Advertisement cookies are used to provide visitors with relevant ads and marketing campaigns. These cookies track visitors across websites and collect information to provide customized ads.