Children will adore crafting these DIY suncatchers utilizing tissue paper and repurposed plastic lids! A delightful, eco-friendly activity that’s vibrant and straightforward.
Skills Needed: None. Children aged 3 – 4 years and up may engage in this project, as they will be required to use scissors. The
It all began when I started gathering yogurt lids. I went through a serious obsession and was purchasing the large containers – the 32 ounce ones (Chobani, in particular).
I realized that once I was finished with the yogurt, the containers were quite sturdy . . . so being a diligent crafter, I cleaned them out and put them aside for the “perfect moment.” I was certain a craft concept would emerge.
And indeed, it did.
Are you in search of a delightful, colorful, and eco-conscious activity to keep the little ones engaged? These DIY suncatchers – crafted from repurposed plastic lids and tissue paper – are the ideal project!
Not only are they easy to create, but they also add a splash of cheerful hues to any window – and they serve as a fantastic method to teach kids about reusing materials innovatively.
We cherish activities that are simple enough for tiny fingers yet still yield something lovely, and this one ticks all the boxes.
Moreover, there’s no requirement for glass or elaborate materials. These suncatchers consist of entirely child-safe supplies, making them perfect for preschoolers or primary school-aged children who enjoy crafting.
What I truly appreciate about this activity is its adaptability. You can keep it very basic for younger children or become a bit more imaginative by cutting shapes, layering colors, or adding glitter and decorations.
It’s the type of project that promotes creativity, and it’s always enjoyable to witness how each suncatcher turns out uniquely. No two are identical!
I utilized it as a means to declutter, since I frequently have an abundance of tissue paper in various colors.
Are you set to begin? The only task you should complete before diving in is to clean the lids and let them dry. Then you’re all set.
Obtain the printable how-to card below:
Simple Suncatcher Craft
Discover how to create the simplest, most cost-effective kids craft with repurposed lids! These sun catchers will be a beloved project for spring or summer.
Active Time1 hour
hr
Dry Duration1 hourhr
Overall Time2 hourshrs
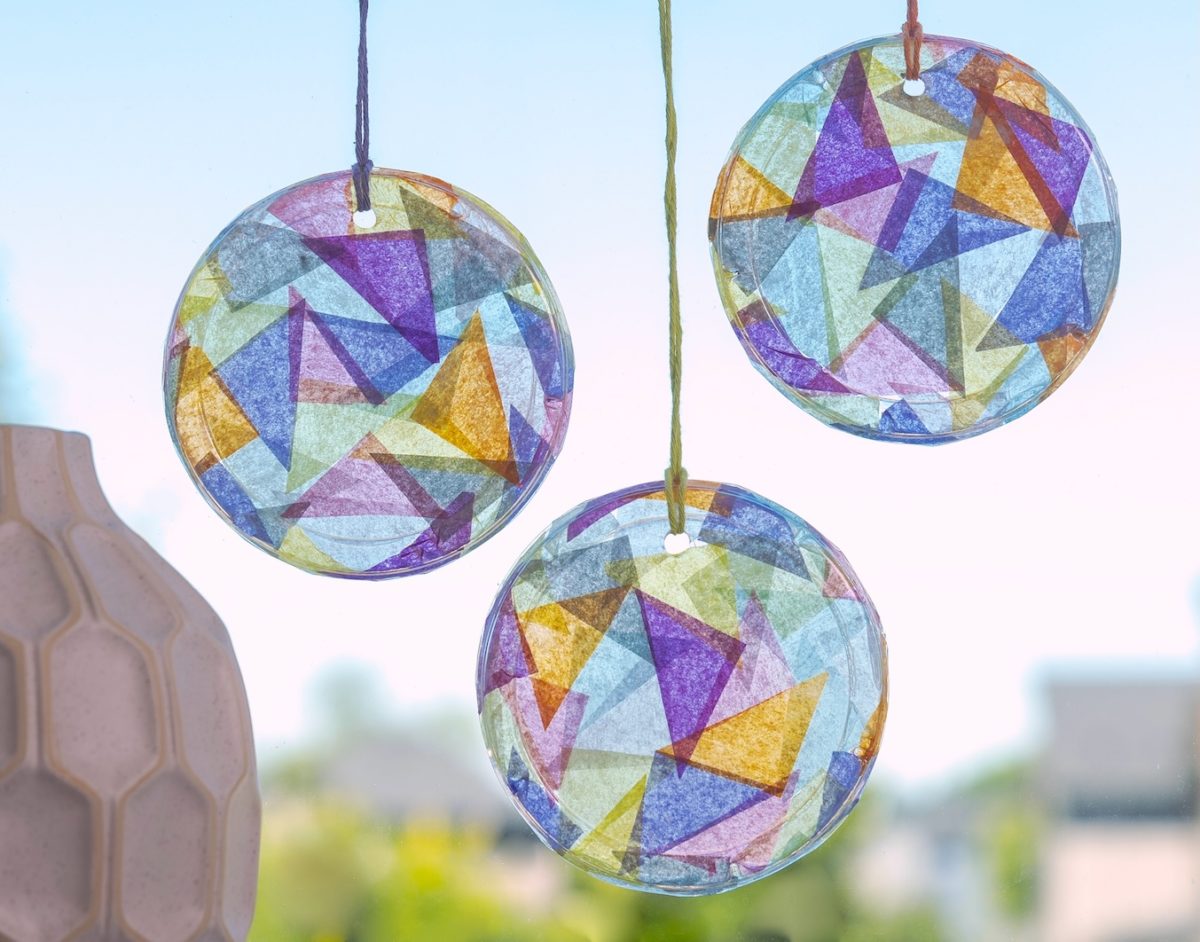
Output: 3suncatchers
Expense: $1
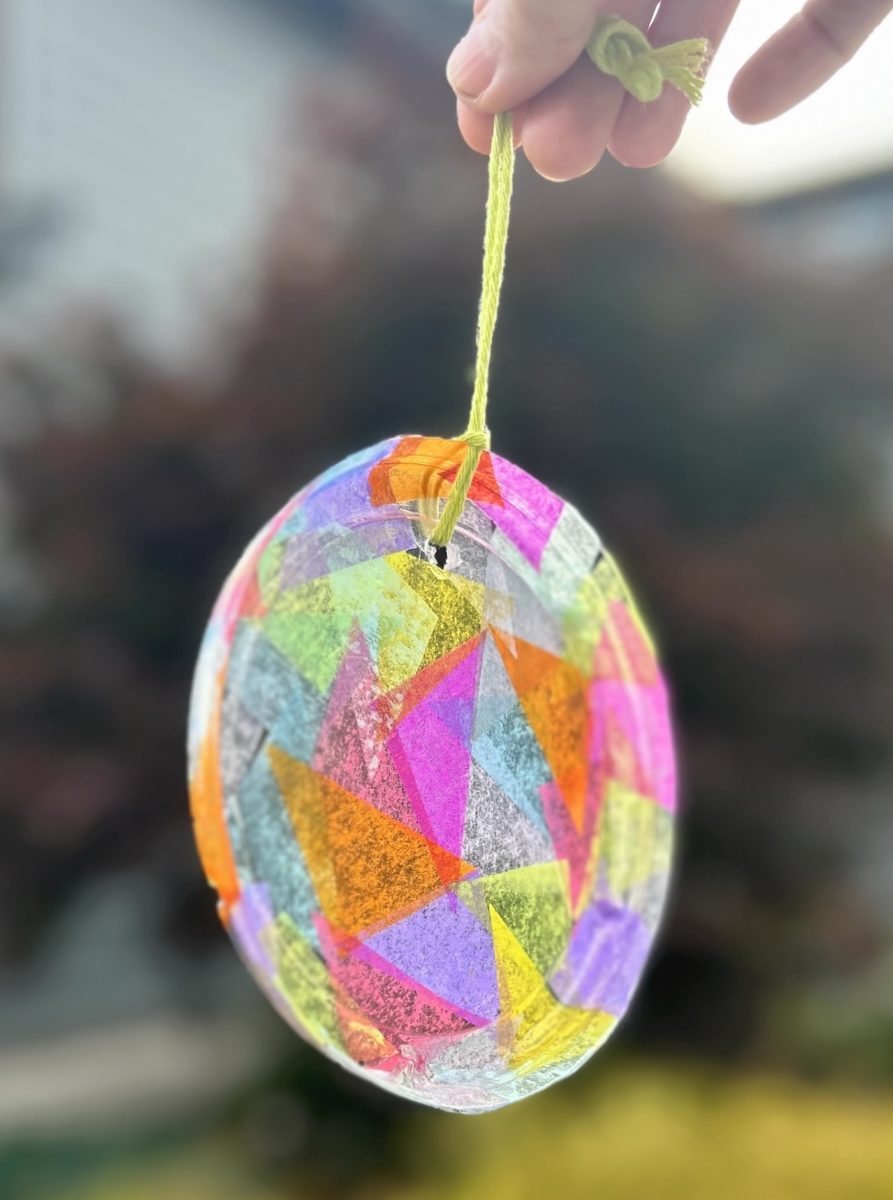
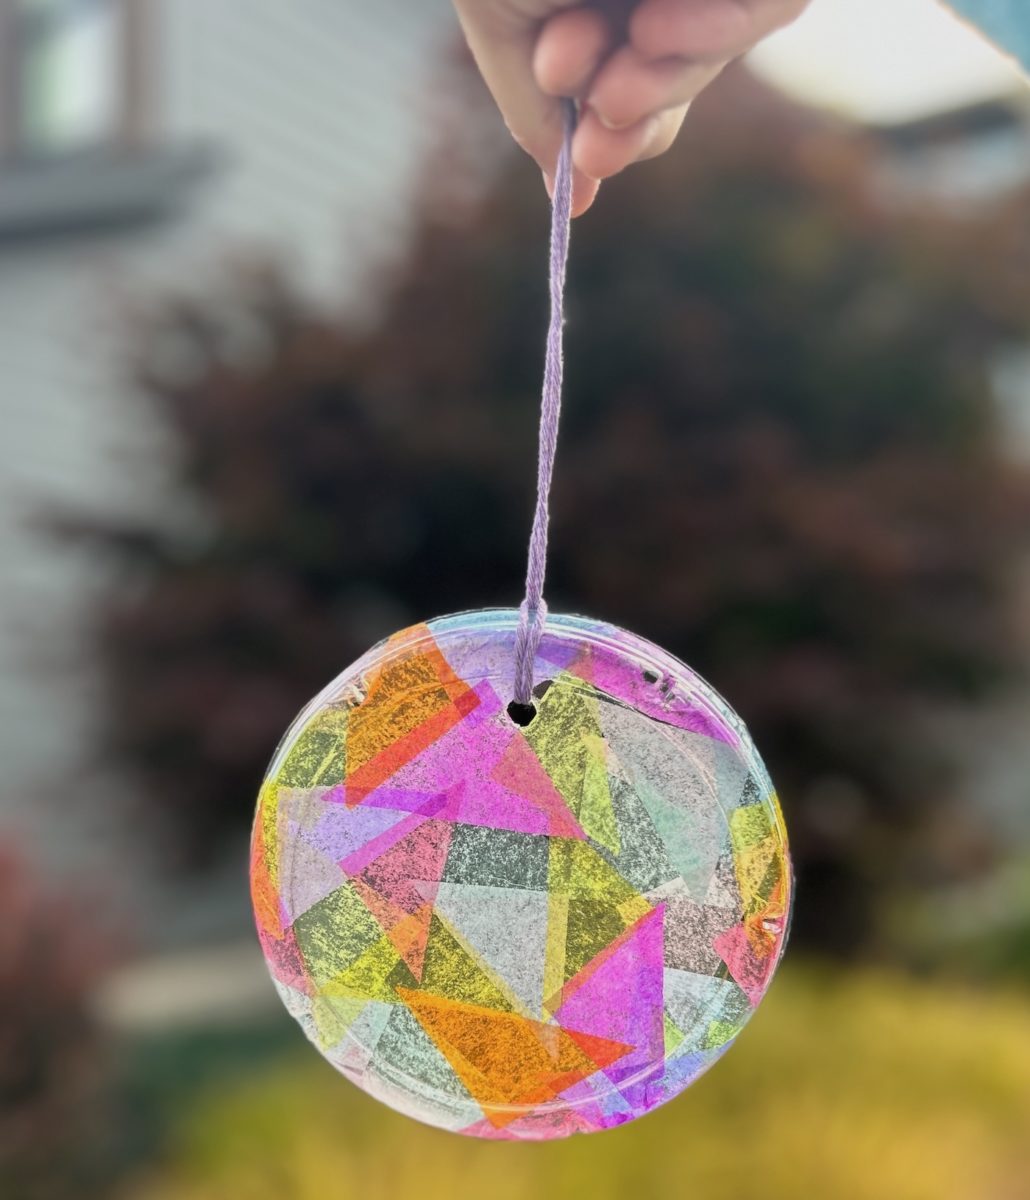
Create a hole at the top of every lid using an awl, scissors, or a nail and hammer. This task should be performed by an adult.
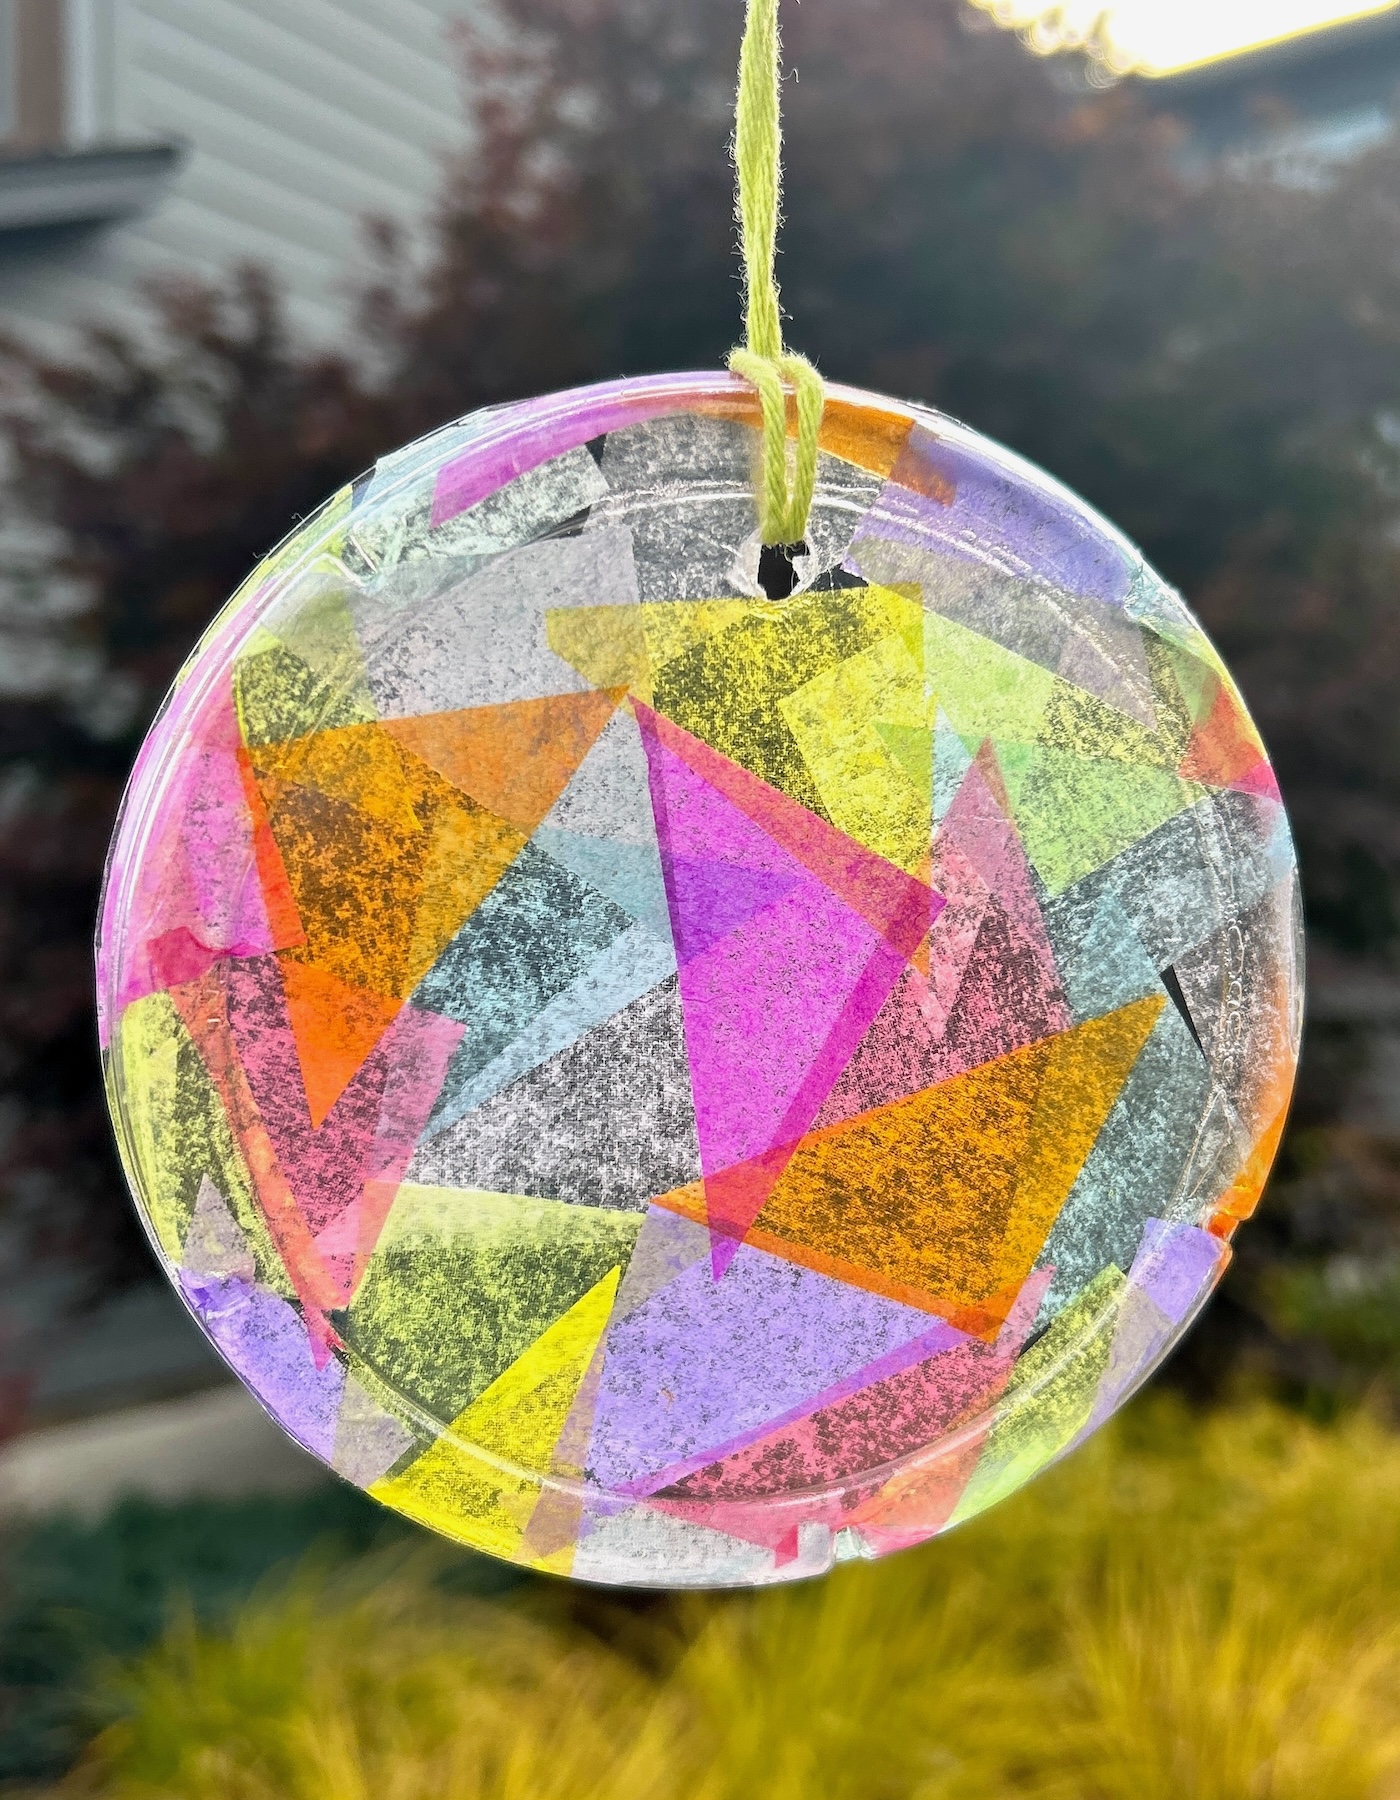
Slice the tissue paper into different sizes and forms. I utilized multiple colors and shaped them like triangles. I encourage you to try different styles!
Spread a coat of Mod Podge to the inner side of the lid in a small section.
Place several pieces of tissue paper and brush over the top.
Continue applying Mod Podge and tissue paper, layering the pieces to form various color combinations. Keep adding until the entire lid is covered.
Allow the tissue paper and lid to dry.
Trim the edges with scissors to eliminate the extra tissue.
Cut a piece of twine and thread it through the hole at the top of the lid for display purposes. Repeat with the other lids.
Step 5 – if you are using affordable tissue, be cautious about how many times you brush over it with the Mod Podge. Some tissue papers may start releasing dye if they become excessively wet with acrylic products. You want to avoid continuous brushing or all the colors will begin to blend.
Would you attempt this project? Share your thoughts in the comments! I would also appreciate it if you explore these other suggestions:
Experiment with a chicken nugget casserole featuring a cordon bleu twist, transforming nuggets, ham, and cheese into warm comfort cuisine. If you reso [...]
In our location, it’s a central hub for farmers’ markets, brimming with fresh produce, artisanal items, and enthusiastic sellers. However, thriving at [...]
Kids can craft their own simple holiday paper chain countdown using this guide! This children's advent calendar is created from construction paper, de [...]
Have you ever pondered why certain gardens flourish while others falter? The answer isn't sorcery—it lies in the earth. By enhancing garden soil prior [...]
Embellishing with pampas grass is an effortless method to infuse autumnal charm into your residence using neutral tones and a minimalist aesthetic. I’ [...]
If you're fond of salads, nothing you cultivate will be as essential as leafy greens—the foundation of every fresh, crunchy morsel. However, with supe [...]
We use cookies on our website to give you the most relevant experience by remembering your preferences and repeat visits. By clicking “Accept”, you consent to the use of ALL the cookies.
This website uses cookies to improve your experience while you navigate through the website. Out of these, the cookies that are categorized as necessary are stored on your browser as they are essential for the working of basic functionalities of the website. We also use third-party cookies that help us analyze and understand how you use this website. These cookies will be stored in your browser only with your consent. You also have the option to opt-out of these cookies. But opting out of some of these cookies may affect your browsing experience.
Necessary cookies are absolutely essential for the website to function properly. These cookies ensure basic functionalities and security features of the website, anonymously.
Cookie
Duration
Description
cookielawinfo-checbox-analytics
11 months
This cookie is set by GDPR Cookie Consent plugin. The cookie is used to store the user consent for the cookies in the category "Analytics".
cookielawinfo-checbox-functional
11 months
The cookie is set by GDPR cookie consent to record the user consent for the cookies in the category "Functional".
cookielawinfo-checbox-others
11 months
This cookie is set by GDPR Cookie Consent plugin. The cookie is used to store the user consent for the cookies in the category "Other.
cookielawinfo-checkbox-necessary
11 months
This cookie is set by GDPR Cookie Consent plugin. The cookies is used to store the user consent for the cookies in the category "Necessary".
cookielawinfo-checkbox-performance
11 months
This cookie is set by GDPR Cookie Consent plugin. The cookie is used to store the user consent for the cookies in the category "Performance".
viewed_cookie_policy
11 months
The cookie is set by the GDPR Cookie Consent plugin and is used to store whether or not user has consented to the use of cookies. It does not store any personal data.
Functional cookies help to perform certain functionalities like sharing the content of the website on social media platforms, collect feedbacks, and other third-party features.
Performance cookies are used to understand and analyze the key performance indexes of the website which helps in delivering a better user experience for the visitors.
Analytical cookies are used to understand how visitors interact with the website. These cookies help provide information on metrics the number of visitors, bounce rate, traffic source, etc.
Advertisement cookies are used to provide visitors with relevant ads and marketing campaigns. These cookies track visitors across websites and collect information to provide customized ads.