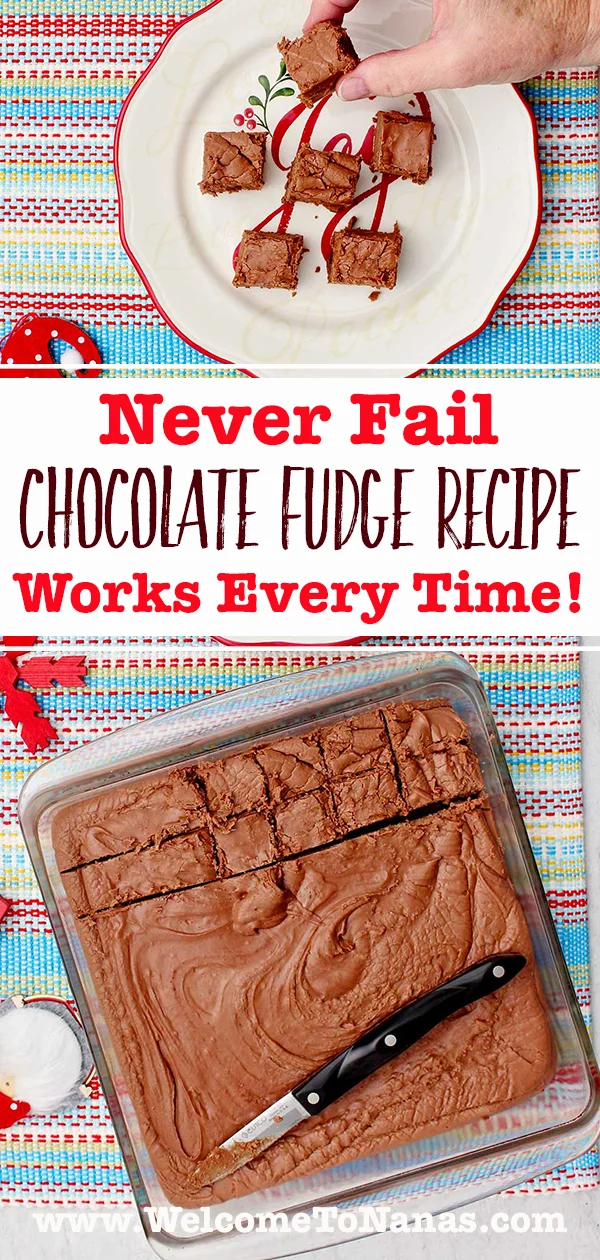
This Never Fail Chocolate Fudge Recipe provides smooth, velvety, and chocolatey fudge—every—single—time. It’s the sole fudge recipe you’ll ever require. Say goodbye to grainy, runny fudge mishaps!
Jump to:
Low Stress Easy Fudge Recipe!
Let’s face it, preparing fudge appears challenging. You adhere to a recipe meticulously, anticipating a creamy, melt-in-your-mouth chocolate delight. However, instead of fudge perfection, you end up with something grainy, overly hard, or it simply refuses to set…resulting in a chocolate disaster!
It can be overwhelming handling a boiling sugar blend, candy thermometers, and directions that feel more like a chemistry lab than a candy recipe.
Today, that all transforms. I’ll handle the scientific aspect of fudge (I’m a home economics graduate and took Food Science courses!). I’ll guide you, step-by-step, on how to create the renowned ‘Never Fail Chocolate Fudge’ that I’ve been making since I was a child.
This recipe is popular for a good reason: it’s a fail-safe method that yields three pounds of fudge that’s silky, rich, and intensely chocolatey—every—single—time. Even if you’re an absolute novice, you won’t spoil it. This is about to be the only fudge recipe you’ll ever want. The kids will adore learning how to make it!
Fantastic Fantasy Fudge Recipe
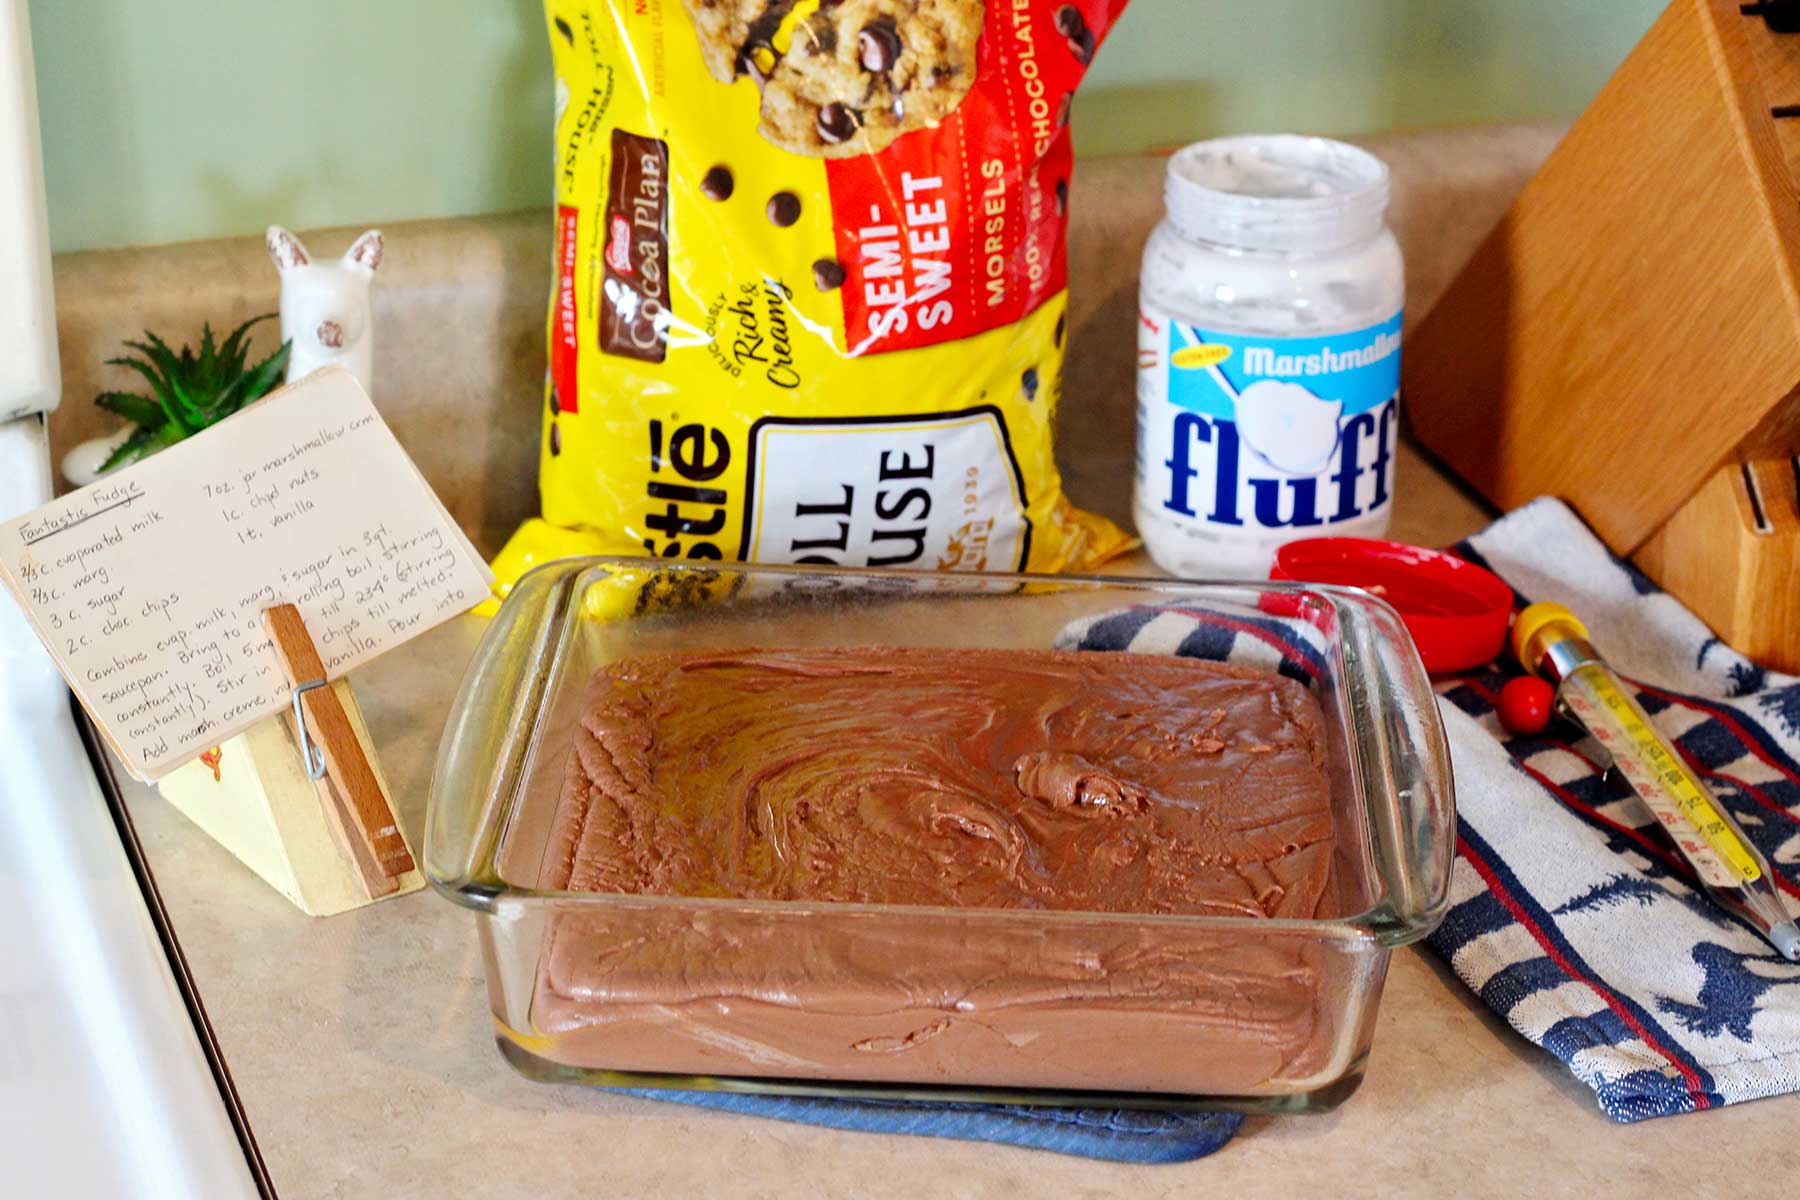
I can’t recall a time when I didn’t make fudge using the Never Fail Chocolate Fudge Recipe. We crafted fudge and other candies with Mom each Christmas. She referred to the recipe as “Fantastic Fudge.”
You’ll see that title on the recipe card I typed on her manual typewriter when I was around 11 years old. I’ve also heard it called the “fantasy fudge recipe” as it includes marshmallow creme.
The candy-making unit I taught while I was instructing Food Science in high school was a favorite among my students. There’s plenty of science behind crafting fudge that’s fascinating to understand, along with the key to achieving great results! I’ll manage that section so you can relish the process, which is surprisingly simple.
Making candy was a favorite activity for my children and remains so for my grandchildren. Yours will enjoy it as well. However, make sure to provide careful guidance and instruction as you make fudge with the older grandkids, as it’s heated to a high temperature.
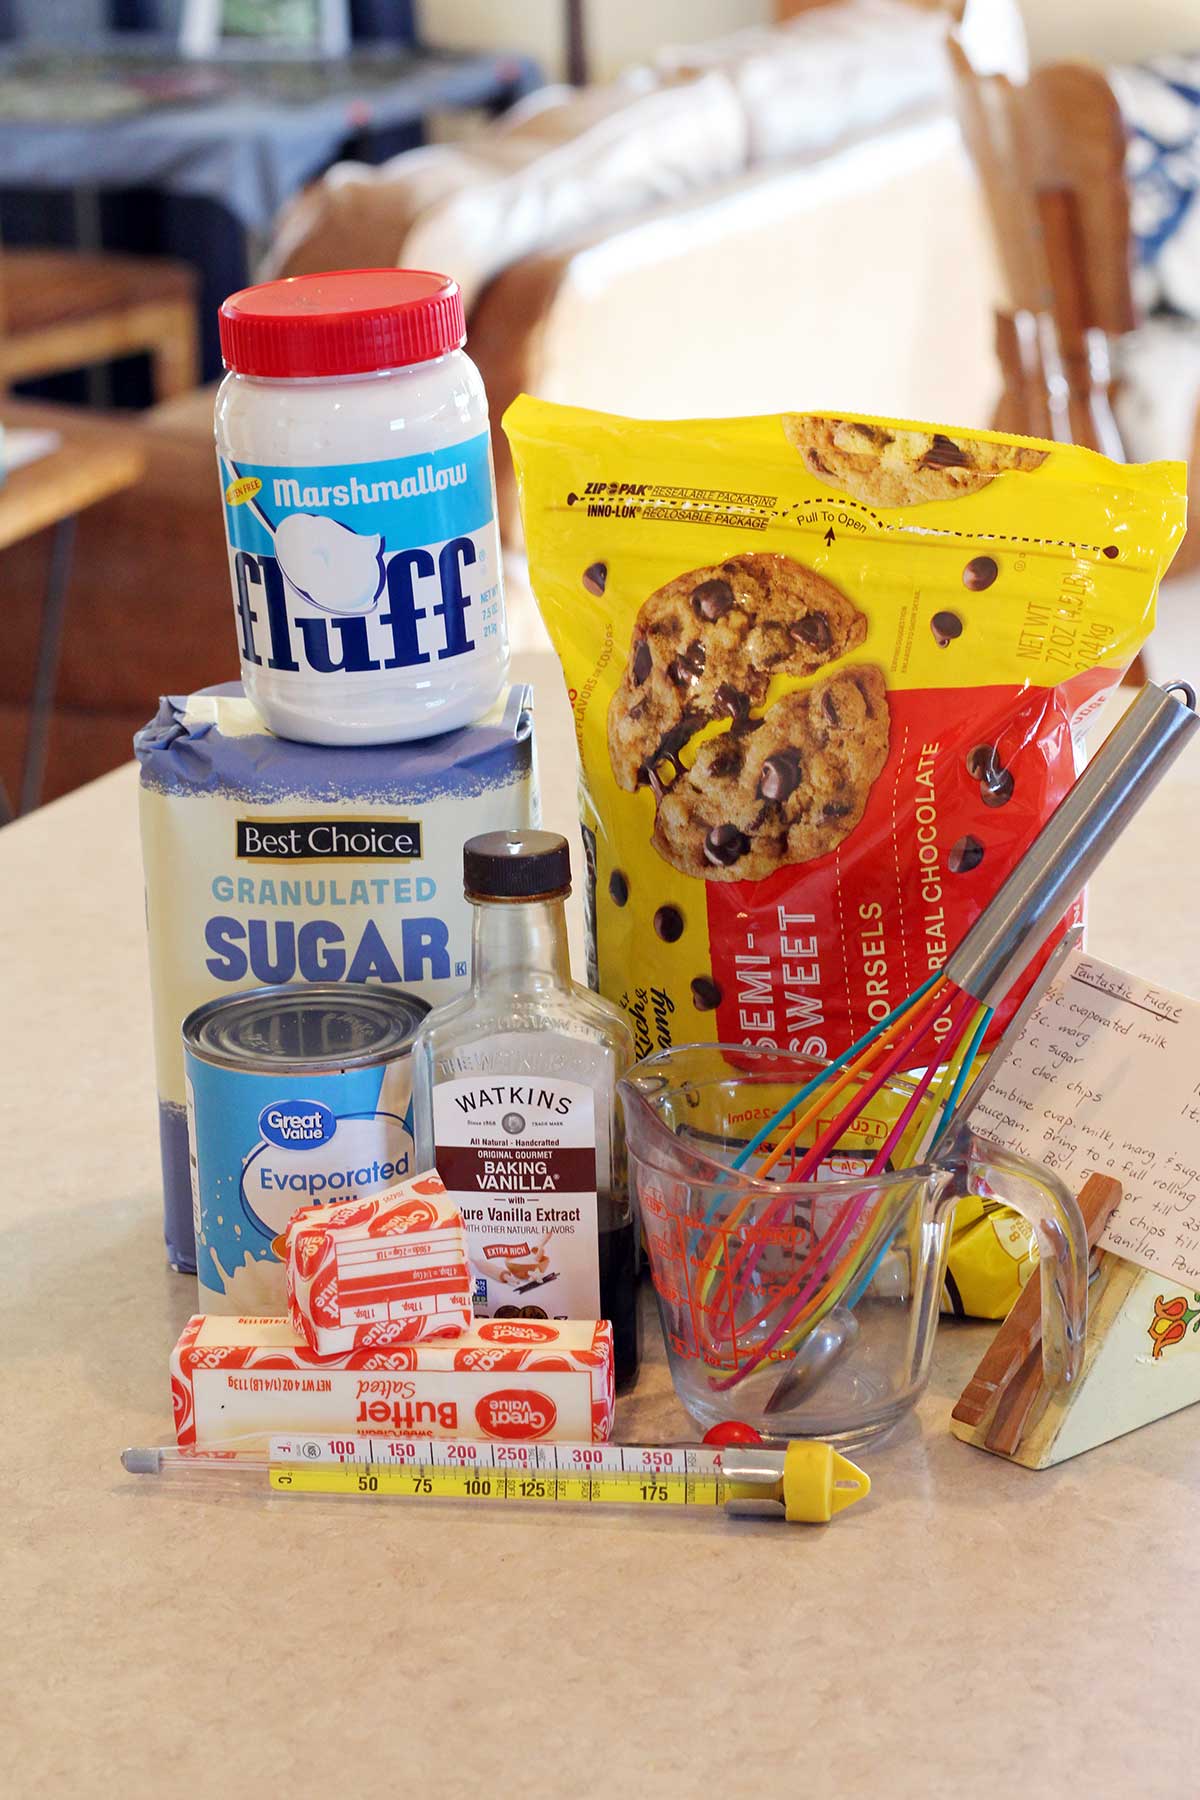
Chocolate Fudge Recipe Supplies and Equipment
Here are some brief notes regarding the materials you will require to create this uncomplicated chocolate fudge recipe!
Recipe for Making Fudge Step-By-Step
Assemble all tools and ingredients. An essential part of successful fudge preparation!
Step 1: Equipment for chocolate fudge recipe sugar blend
For this initial stage of the recipe, a few items are needed.
Heavy-bottomed 3-quart saucepan– The solid pot evenly distributes heat which aids in preventing the sugar from burning.
Wooden spoon– Wood does not get warm quickly, making it perfect for stirring.
hot as you stir the simmering candy.
Step 2: Ingredients prepared to heat sugar mixture on stove
To ensure this recipe is “foolproof,” it’s essential to have everything measured and preparedbefore commencing. Once the process begins on the stove, everything moves quickly, leaving no time to search for a measuring spoon or anything else. Review ALL the instructions thoroughly before you begin.
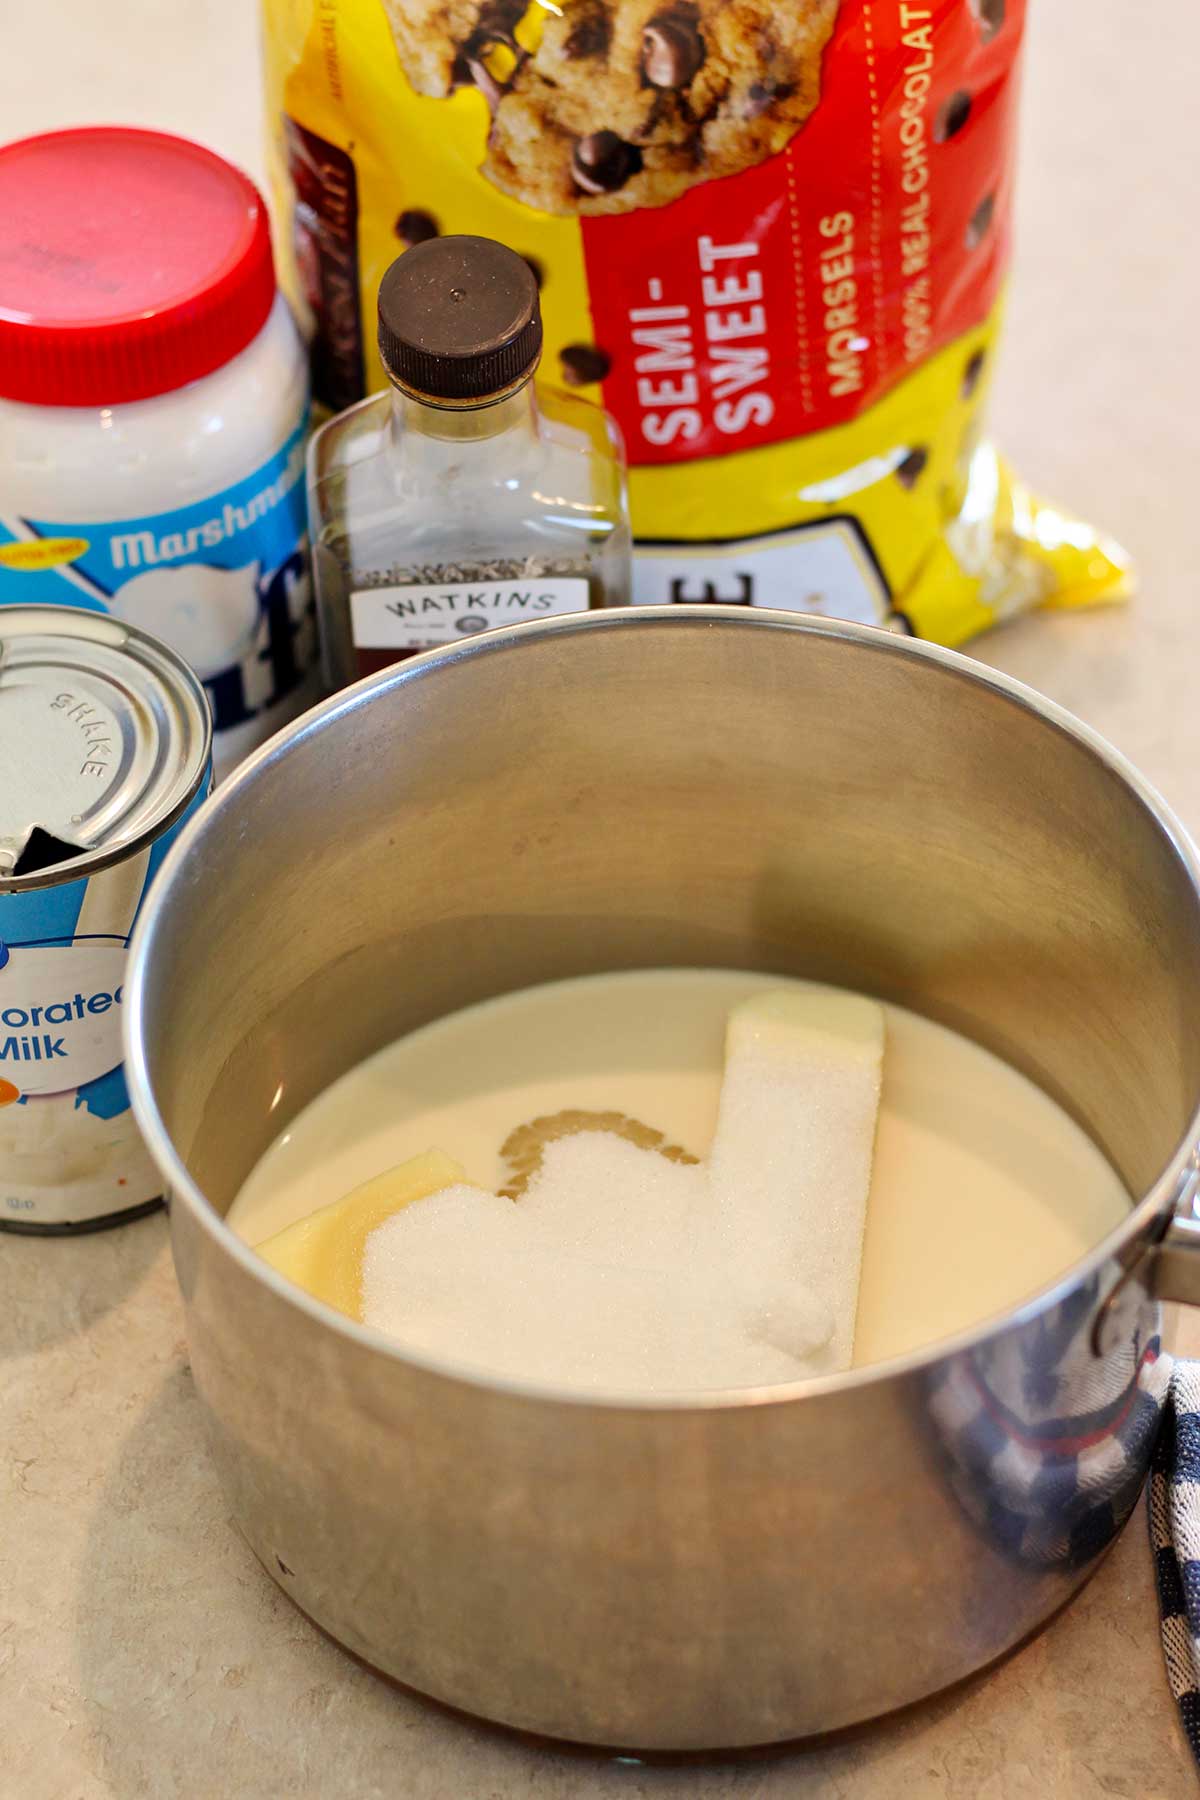
Put these initial three ingredients into the heavy bottomed 3 quart saucepan.
First, take a liquid measuring cup to pour two-thirds cup of evaporated milk. Shake the can to ensure it mixes well. I utilize a church key can opener to create two holes in the top of the can, but a standard can opener can remove the top as well (although it’s easier to spill that way).
Note: Please avoid using sweetened condensed milk! They are not equivalent to evaporated milk and cannot be substituted. Sweetened condensed milk is significantly denser and has extra sugar. Since the recipe includes three full cups of sugar, utilizing it would result in overly sweet fudge that wouldn’t set correctly.
Secondly, measure two-thirds of a cup of butter, which equals one full stick plus 2 ⅔ Tablespoons. For optimal flavor, I suggest using real butter instead of margarine.
Finally, include three cups of granulated white sugar into the saucepan. Sugar serves as the base of fudge.
Set the saucepan aside briefly while you continue with more preparations.
Step 3: Ingredient preparation for inclusion after boiling the sugar mixture
Before powering on the stove, let’s prepare ourselves for success and minimize stress. The last stages of fudge-making happen rapidly. You’ll have no time to find a thermometer or grease a pan while your fudge sets in the saucepan. Therefore, let’s be organized.
Position the next three ingredients next to the stove after measuring them.
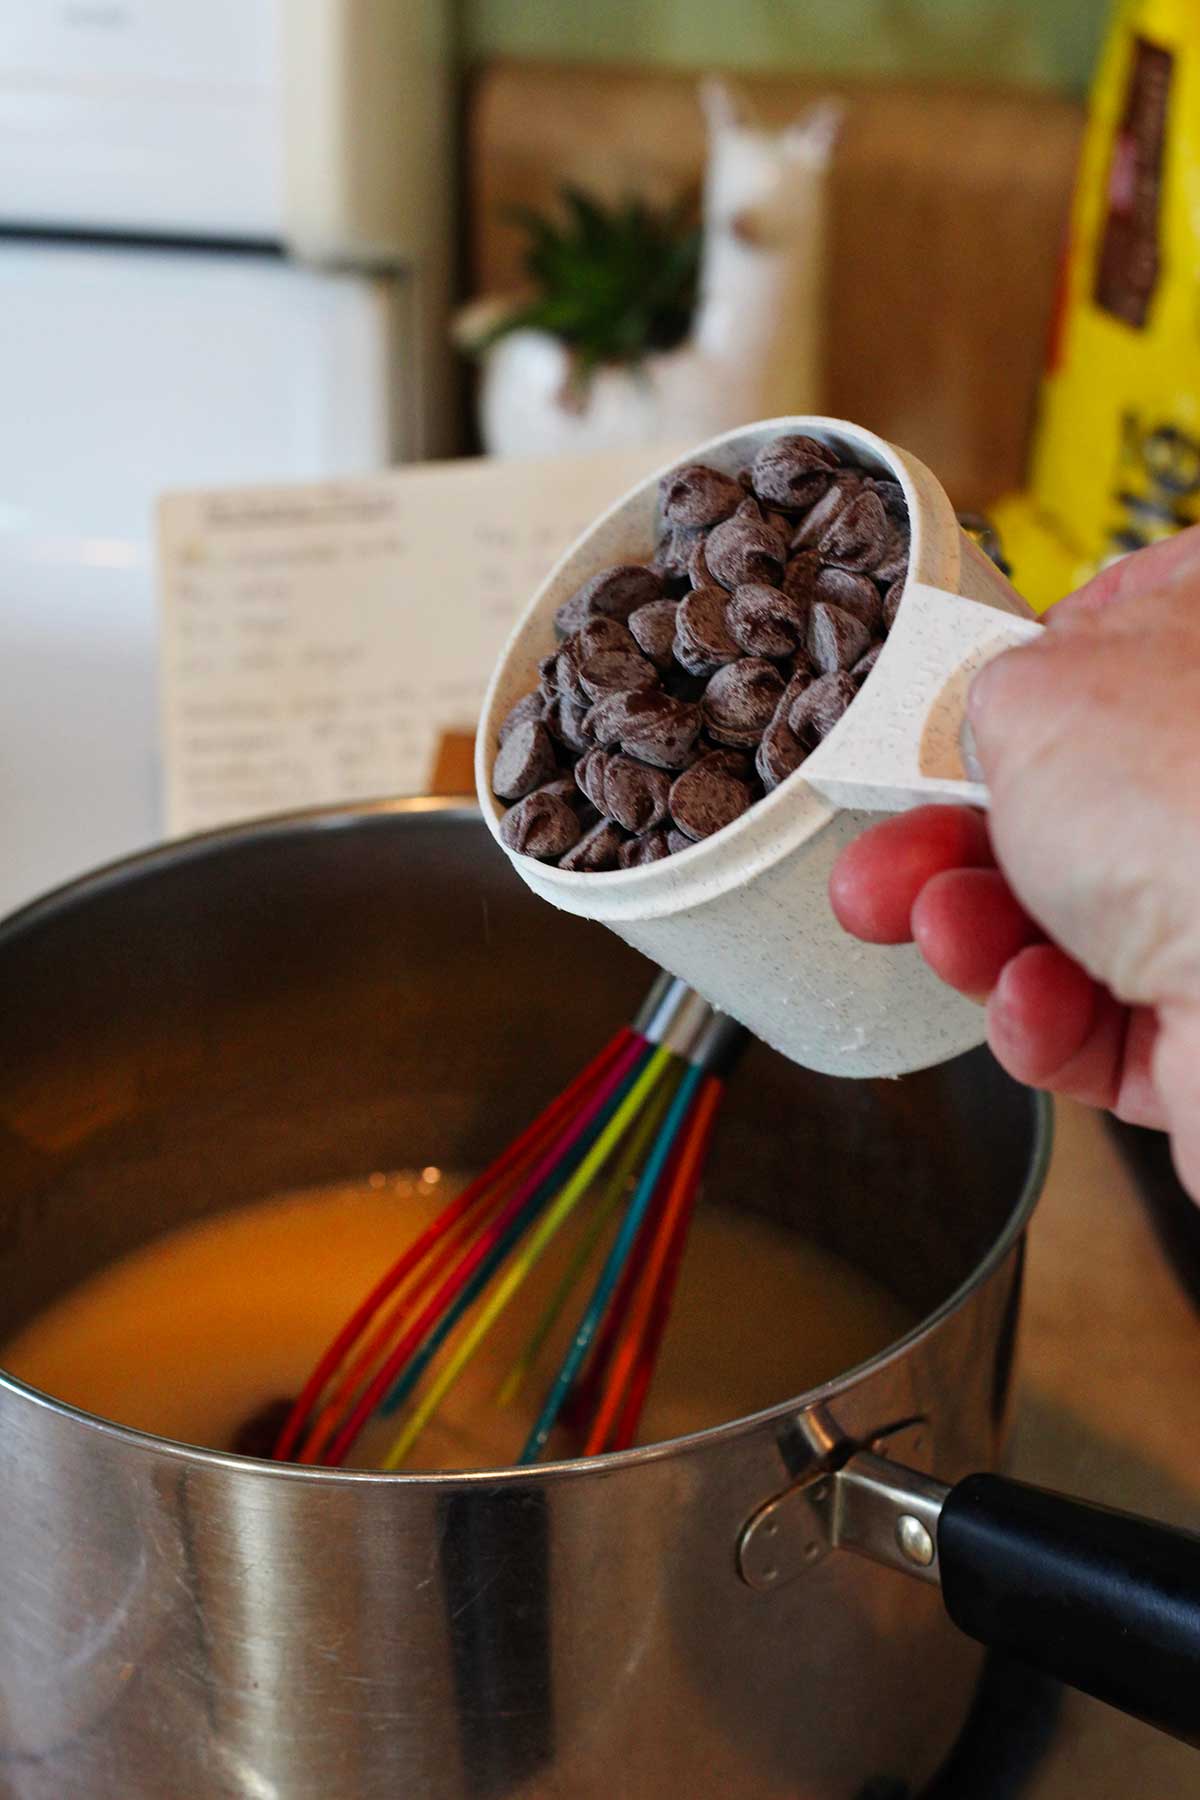
Here’s the highlight of the recipe: chocolate! You’ll need one twelve-ounce bag of semi-sweet chocolate chips. I purchase them in bulk, which amounts to roughly two cups.
Next, we have our pivotal ingredient for success: one seven-ounce jar of marshmallow creme. Open the jar of marshmallow cream and remove the foil seal. I prefer having a plastic spatula handy to scoop it out, but a wooden spoon will work as well.
Have one teaspoon of vanilla ready in a custard cup or position the vanilla along with a one-teaspoon measuring spoon adjacent to the stove.
Finally, include one cup of diced nuts, which are optional, yet quite tasty. I favor pecans, but my mother preferred walnuts when she prepared fudge. That slight crunch provides a fantastic contrast to the smooth fudge. I no longer add them to my recipe as I have several family members who are not fond of nuts.
Step 4: MORE Preparation
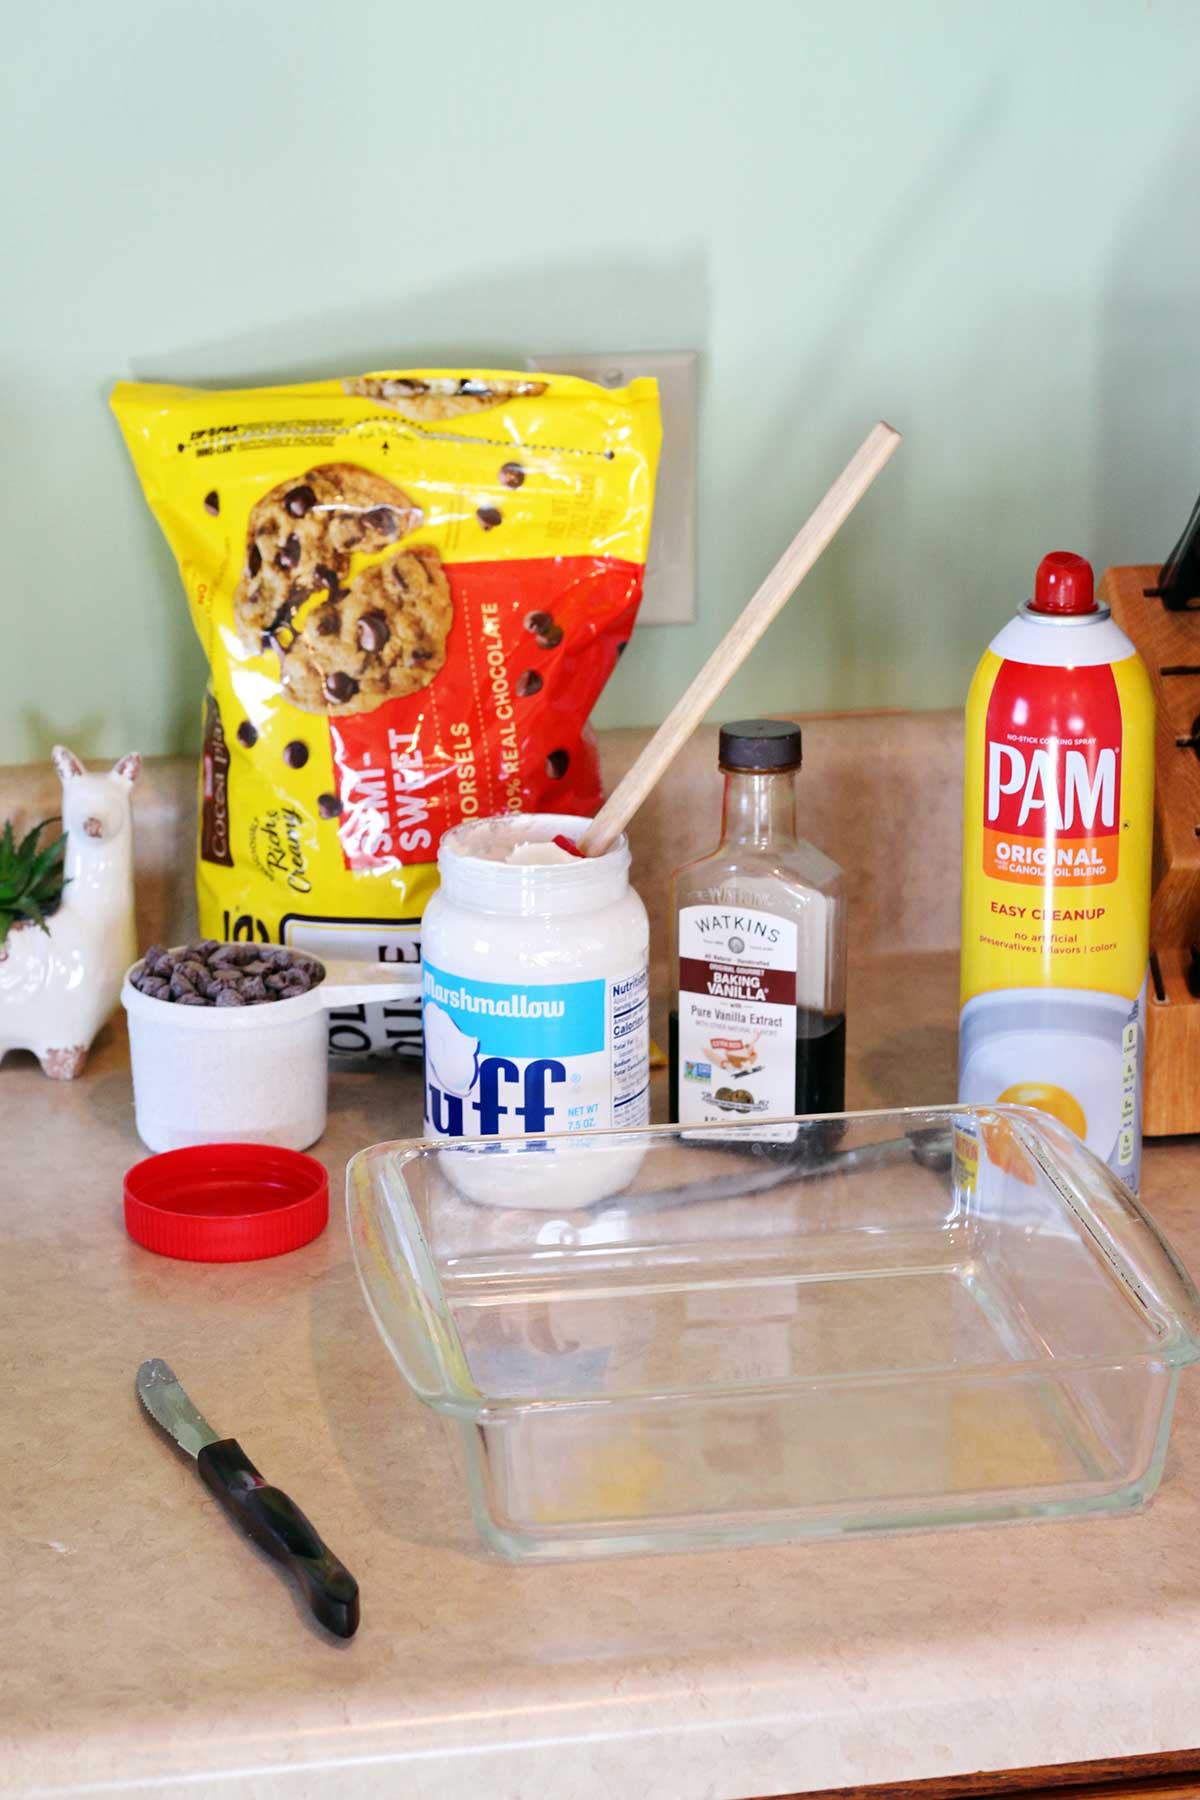
Baking pan. I’m utilizing a 9×9 inch pan, yielding thicker fudge. If you desire thinner squares, opt for a 9×13 inch pan.
Prepare your pan by lightly coating it with cooking spray. Alternatively, place parchment paper in the pan (to facilitate lifting the fudge out). Cut the paper to fit across the base of the pan and up two sides. Secure it into the corners and spray lightly with cooking spray. Keep that pan beside your stove but out of the way.
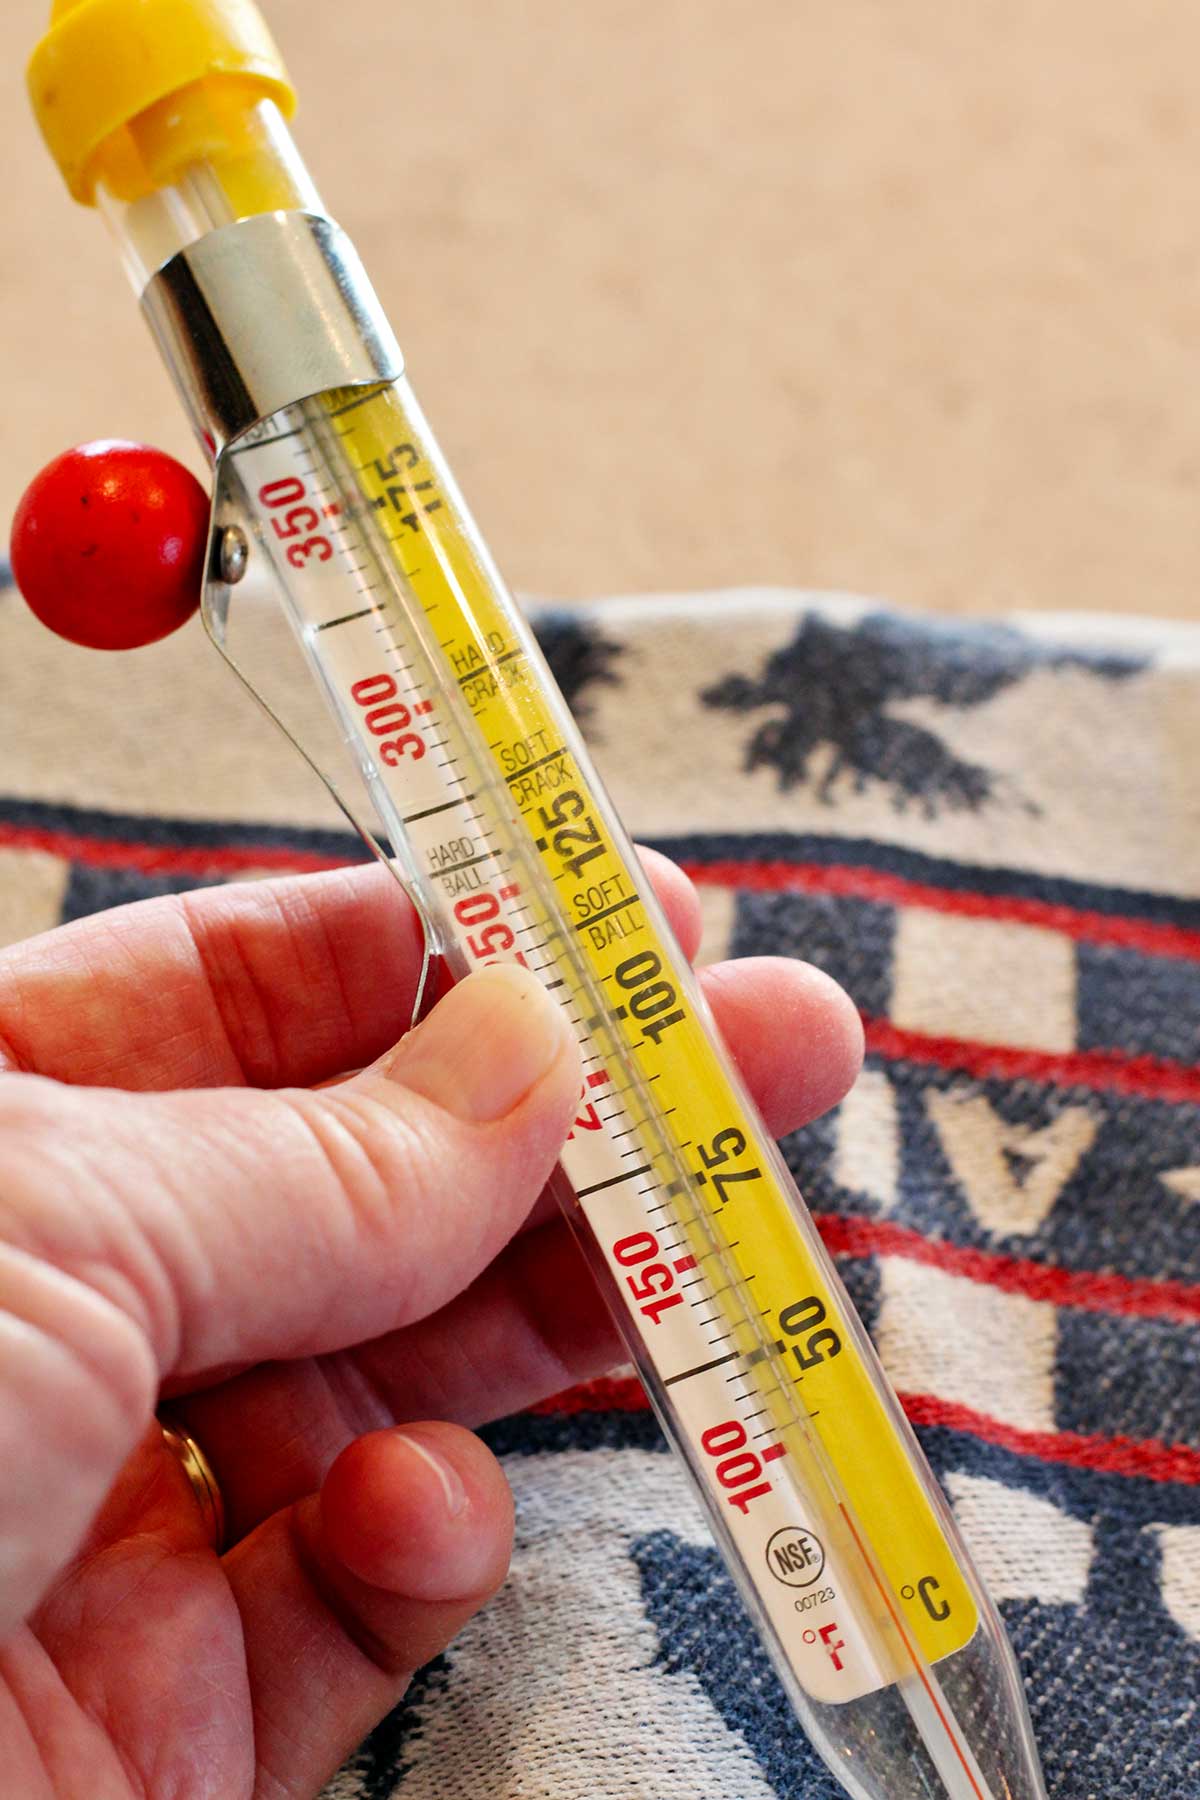
Ensure the candy thermometer is readily accessible. Although this recipe is forgiving, achieving the precise temperature remains the best way to ensure success.
Lastly, position one hot pad next to the stove to place the hot pan on while incorporating the last three ingredients. Set another hot pad underneath the prepared pan to shield the counter from heat later on.
With our pan prepared, equipment displayed, and final ingredients arranged, it’s finally the moment to ignite the stove.
Step 5: The Essential Boil
Dissolving the sugar
This is where the science of cooking truly becomes essential. But don’t fret; we will walk through it step by step. While we do, keep two words in mind: stir constantly. I utilize a whisk for this phase, although the wooden spoon also works effectively.
Set your heavy-bottomed 3 quart saucepan on the stove over medium heat. (The pan contains the sugar, butter, and evaporated milk.)
Turn the burner to medium heat. Your objective is to dissolve the sugar into the evaporated milk and melting butter while ensuring nothing sticks to the bottom of the pan. Therefore, keep stirring constantly, scraping the base and corners.
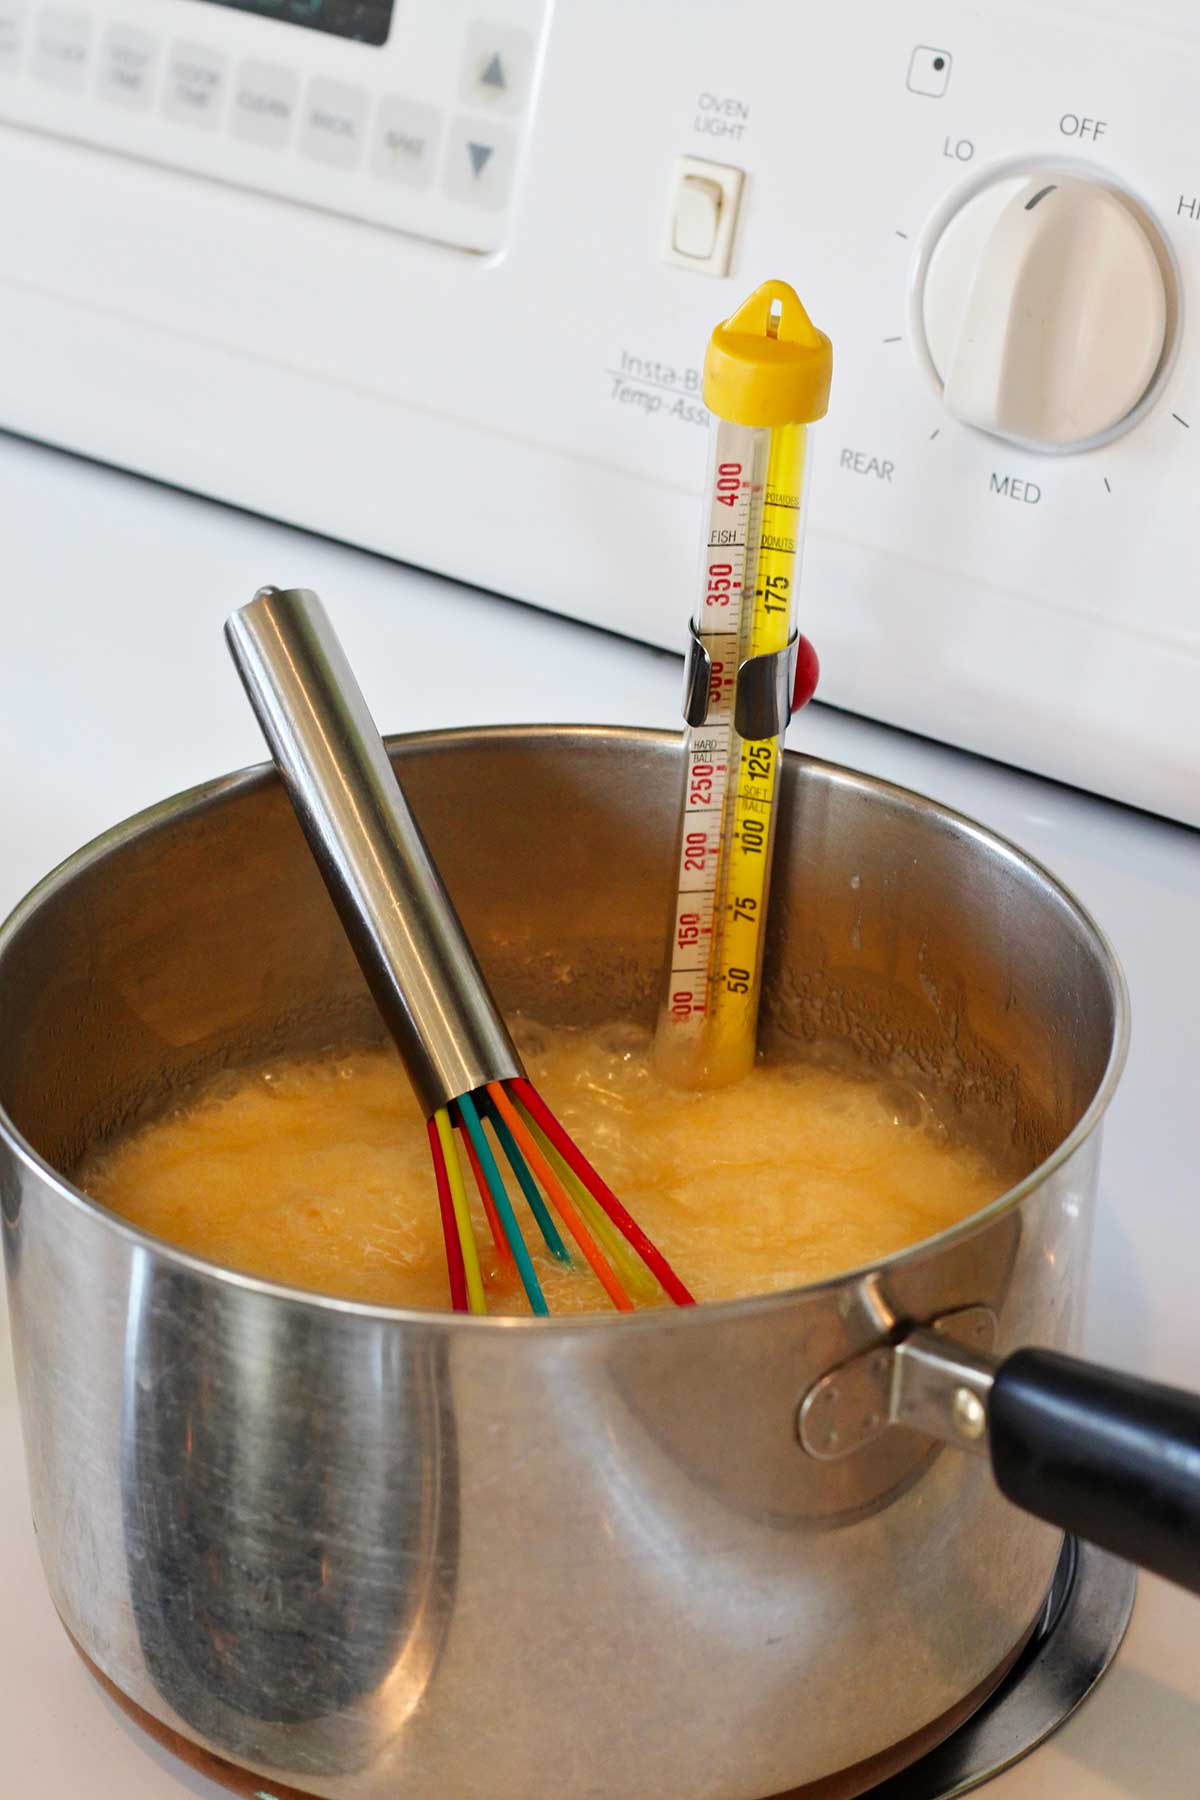
The mixture will transition from appearing thin and separated to a dense, consistent liquid. Soon, you’ll notice bubbles forming around the edges. We’re seeking a “full, rolling boil,” a boil that cannot be stirred down.
The rolling boil
As soon as you reach that rolling boil, attach the thermometer to the side of your saucepan, ensuring that the bulb-like tip is immersed in the mixture but not touching the bottom. Contact with the bottom will provide an inaccurate high-temperature reading.
Note: Numerous older recipes instruct you to boil for precisely five minutes. However, we won’t rely on time as our indicator; our guiding principle in food science is temperature. The duration varies based on your stove, the pan you are using, and even the humidity in your kitchen. A thermometer is essential for consistency.
Soft-ball stage temp of 234 degrees F is vital
We will cook this mixture until it attains 234 degrees Fahrenheit, which is approximately 112 degrees Celsius. This is referred to as the “soft-ball stage.”
Note: The cooking temperature is crucial for excellent fudge. It indicates that the right amount of water remains in the sugar syrup to provide our fudge with the ideal firm yet creamy texture. Under-cooking may lead to fudge that is too soft or fails to set. Conversely, overcooking might result in it becoming hard and crumbly.
Therefore, keep stirring and monitor the red line in the
thermometer ascent. It may appear to pause for a moment, but hang in there. As the sugar concoction simmers down, the temperature will begin to escalate more rapidly.
The instant it reaches precisely 234°F, switch off the heat and swiftly remove the pan from the burner. Gently place it on the pot holder or heat pad you prepared earlier.
Note: You might need to increase the burner heat slightly above medium to achieve a full rolling boil. However, do this in very small increments and exercise patience, or the mixture will scorch. Keep in mind, the essential factor is to continue stirring.
Section 4: The Ultimate Blend In of Ingredients
You’ve accomplished it! The most challenging phase is behind you. The sugar is flawlessly cooked. Now, we must act swiftly, as the fudge will begin to set once removed from the heat.
Dump the full bag of semi-sweet chocolate chips (2 cups) in all at once. Begin stirring immediately. The warmth from the sugar mixture is more than sufficient to dissolve them. Continue stirring and folding until every single chip melts and the mixture becomes dark, glossy, and entirely smooth.
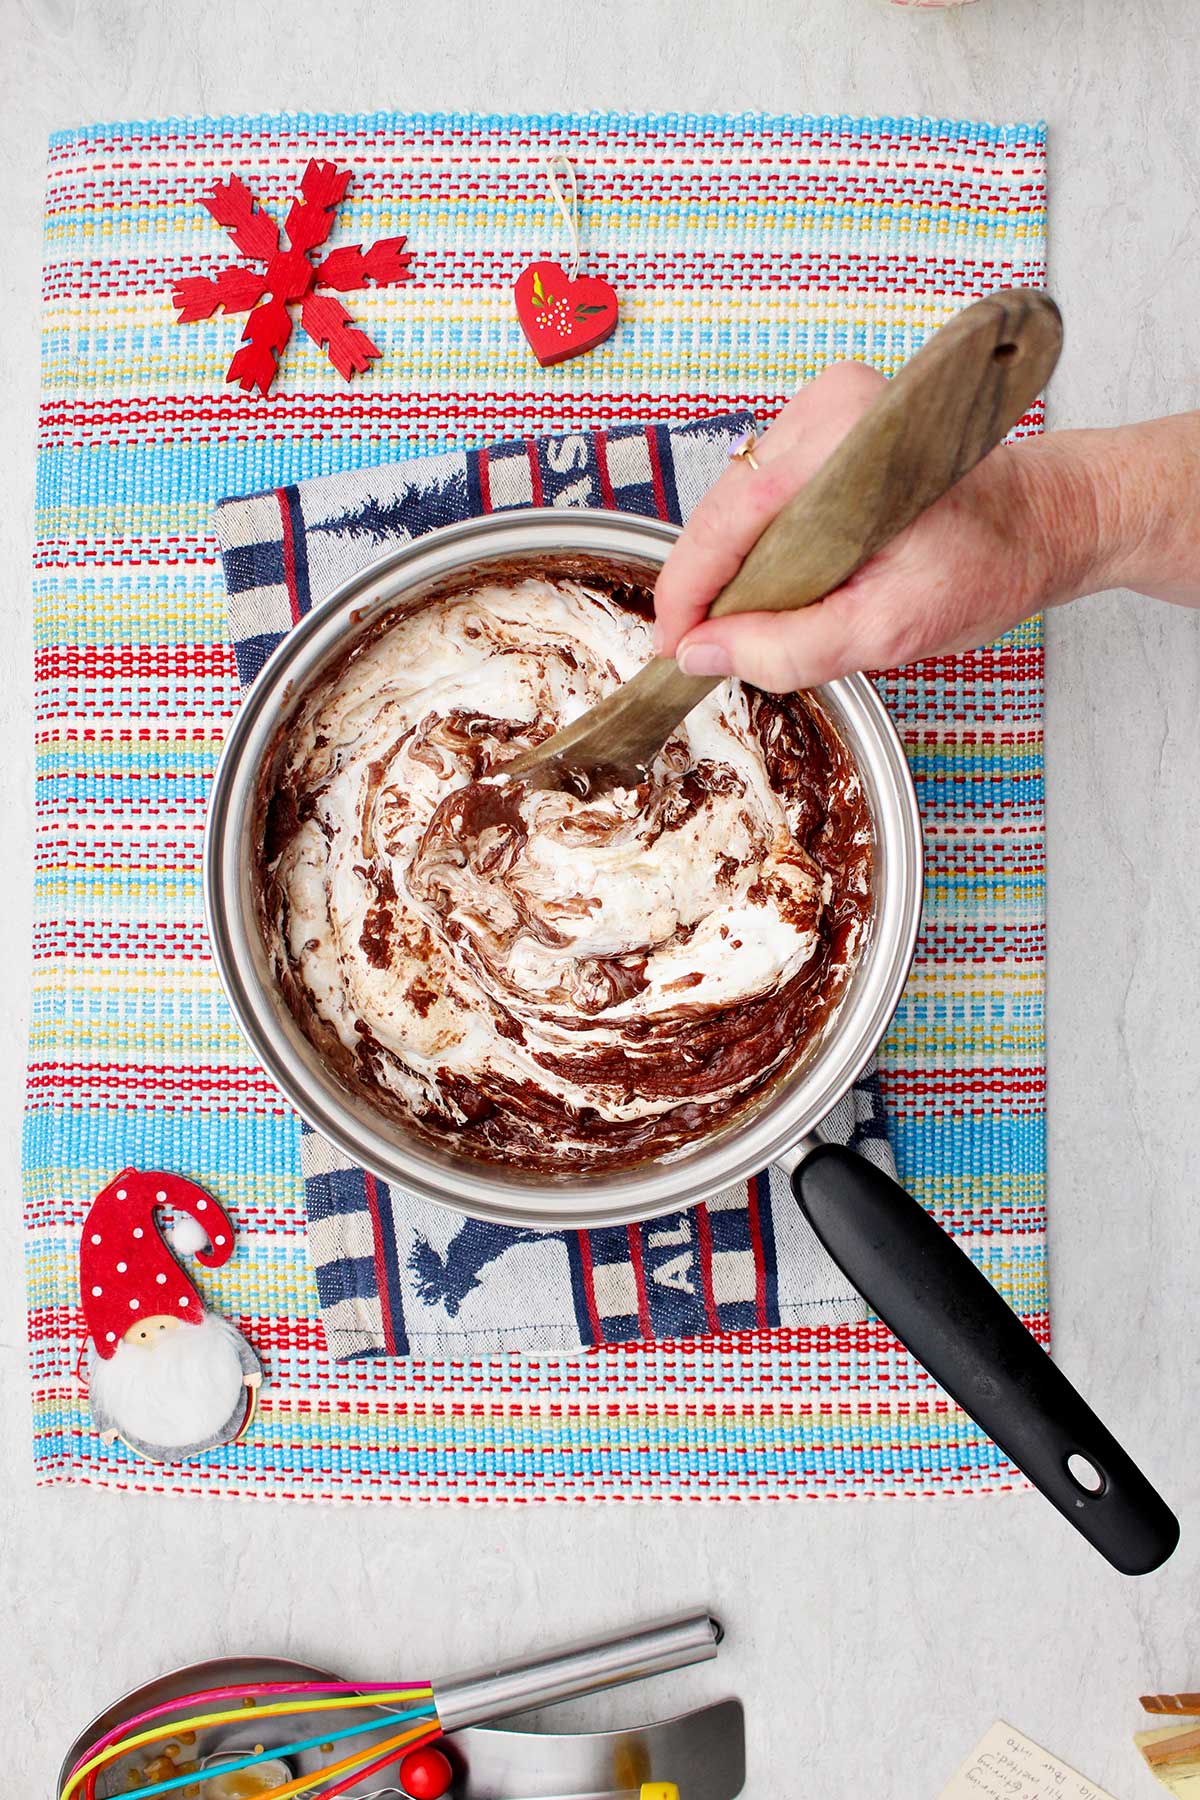
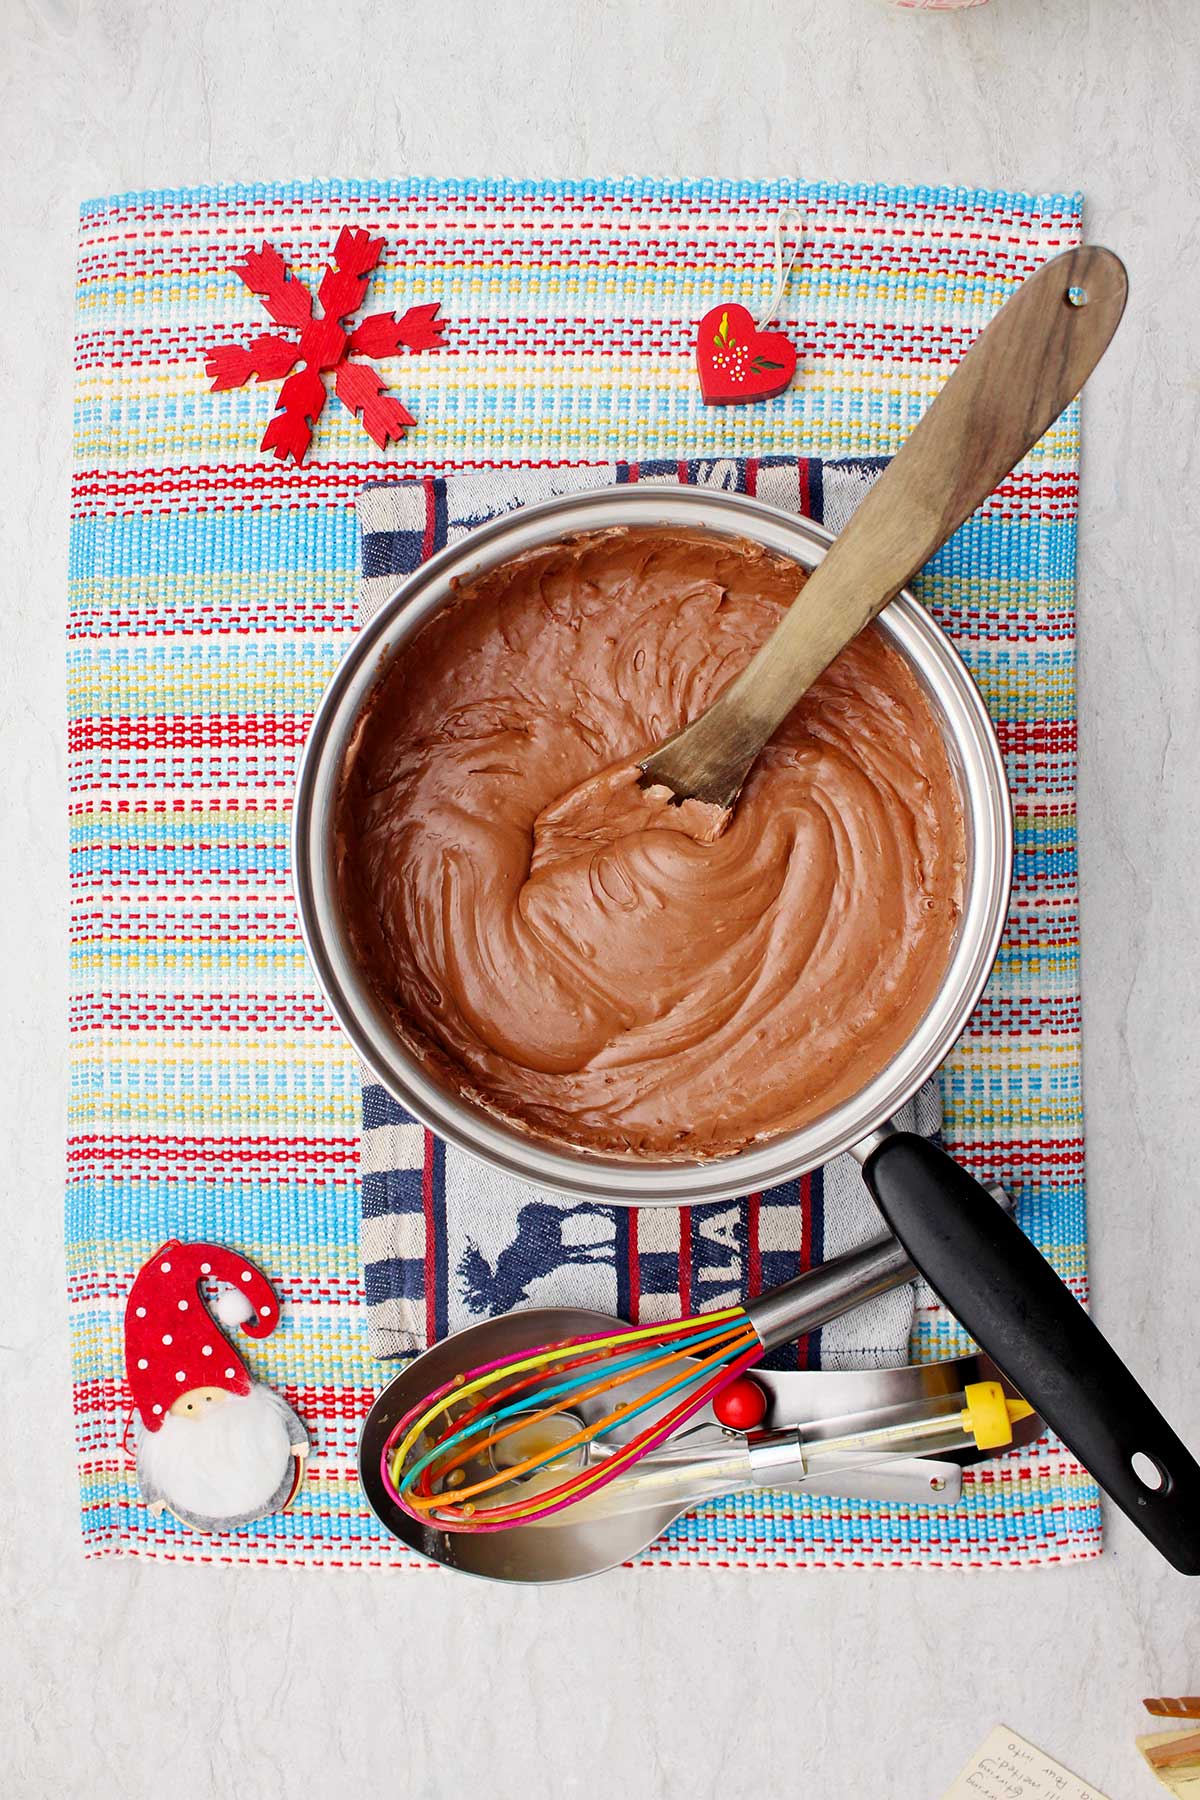
The moment the chocolate is blended in, incorporate the entire jar of marshmallow creme (I utilize a rubber spatula) along with the teaspoon of vanilla. This is where the consistency undergoes a complete transformation. As you stir, you’ll notice the fudge color brighten and the texture grow thicker and creamier. Continue stirring until no white marshmallow streaks remain.
If you’re incorporating nuts, this is the moment to mix them in. Provide the fudge a few final stirs to evenly distribute the nuts.
Ideal fudge creaminess and consistency
The moment it is thoroughly blended, cease stirring. If you overbeat the fudge as it cools, it may turn stiff or grainy. We aim to pour it into the pan while it remains glossy and pourable.
Food Science fun: What renders this recipe so much more dependable than others? It boils down to our secret ingredient: marshmallow creme.
Classic fudge recipes rely on a prolonged cooking duration or solely temperature to manage sugar crystallization. Conversely, not only are we heating to an exact temperature, but we are also employing marshmallow creme as a stabilizer. It aids in preventing large sugar crystals from forming, which is the primary reason fudge develops that grainy, gritty texture. This ensures a smooth outcome in texture, even if your technique isn’t flawlessly perfect.
Section 5: The Pour and The Awaiting Patience
Gently pour the thick, glossy fudge directly into the center of the prepared baking dish. It’s going to be thick, so utilize your spoon to scrape out every last bit from that saucepan.
Carefully spread the fudge into an even layer, ensuring it reaches the corners of the baking dish. Don’t worry about achieving a flawlessly smooth top. Those little swirls provide that delightful, homemade fudge appearance.
And now, for what is arguably the most challenging step of the entire recipe: you must wait for it to cool. However, do not place the pan in the refrigerator to expedite the process! Rapidly cooling fudge can disrupt the texture. For the richest possible fudge, allow it to cool at room temperature.
Keep the pan on your countertop, undisturbed, for a minimum of four hours. Leaving it overnight is even better. This allows the flavors to meld and aids in developing smaller sugar crystals and a creamy texture. You’ll know it’s ready when it is entirely firm and cooled. This patient wait is the final ingredient for perfect fudge.
Section 6: The Unveiling and The Perfect Slice
This is the moment we’ve all anticipated. Your fudge is fully cooled and firm.
If you utilized parchment paper, lift the whole slab of fudge straight out of the pan and onto a cutting board. Remove the paper from the edges.
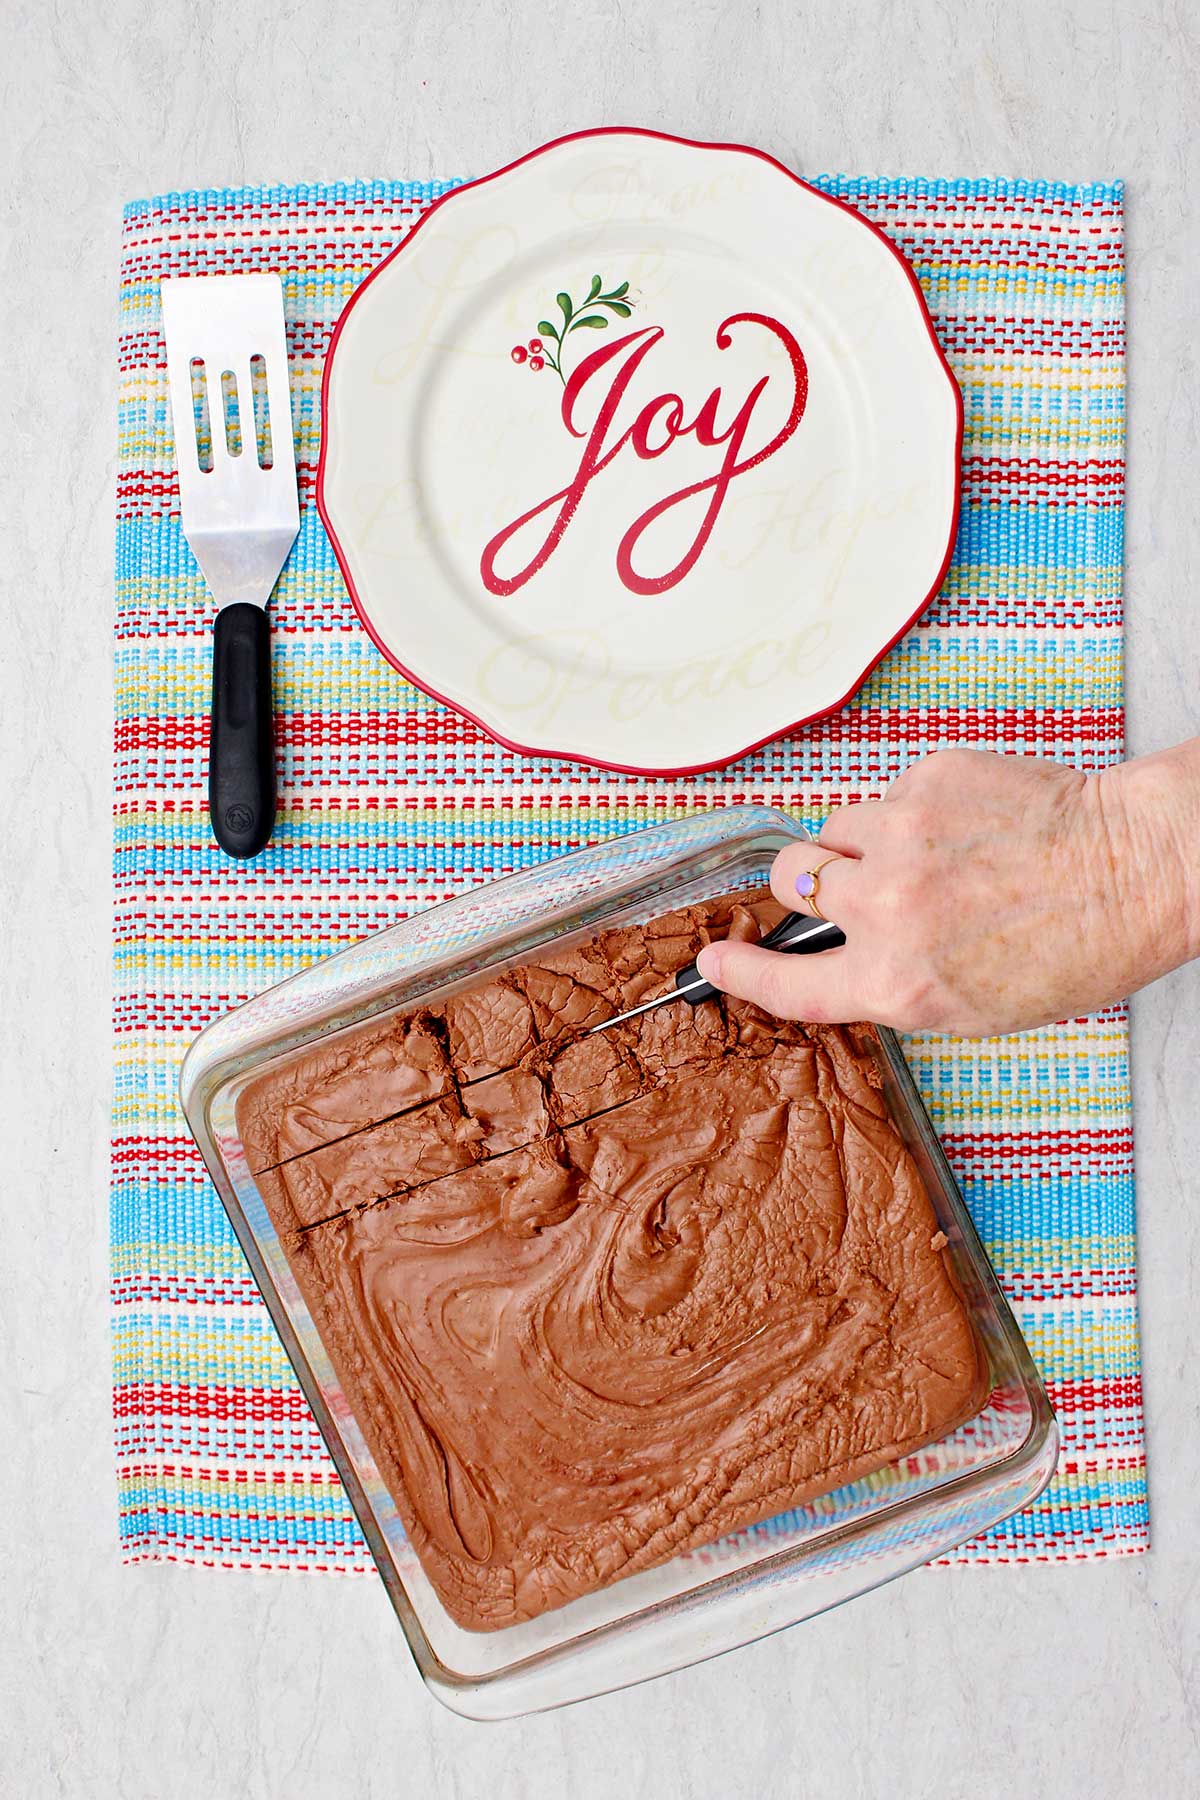
If parchment paper wasn’t used, you’ll slice the fudge directly in the pan as I did. Now for the slicing.
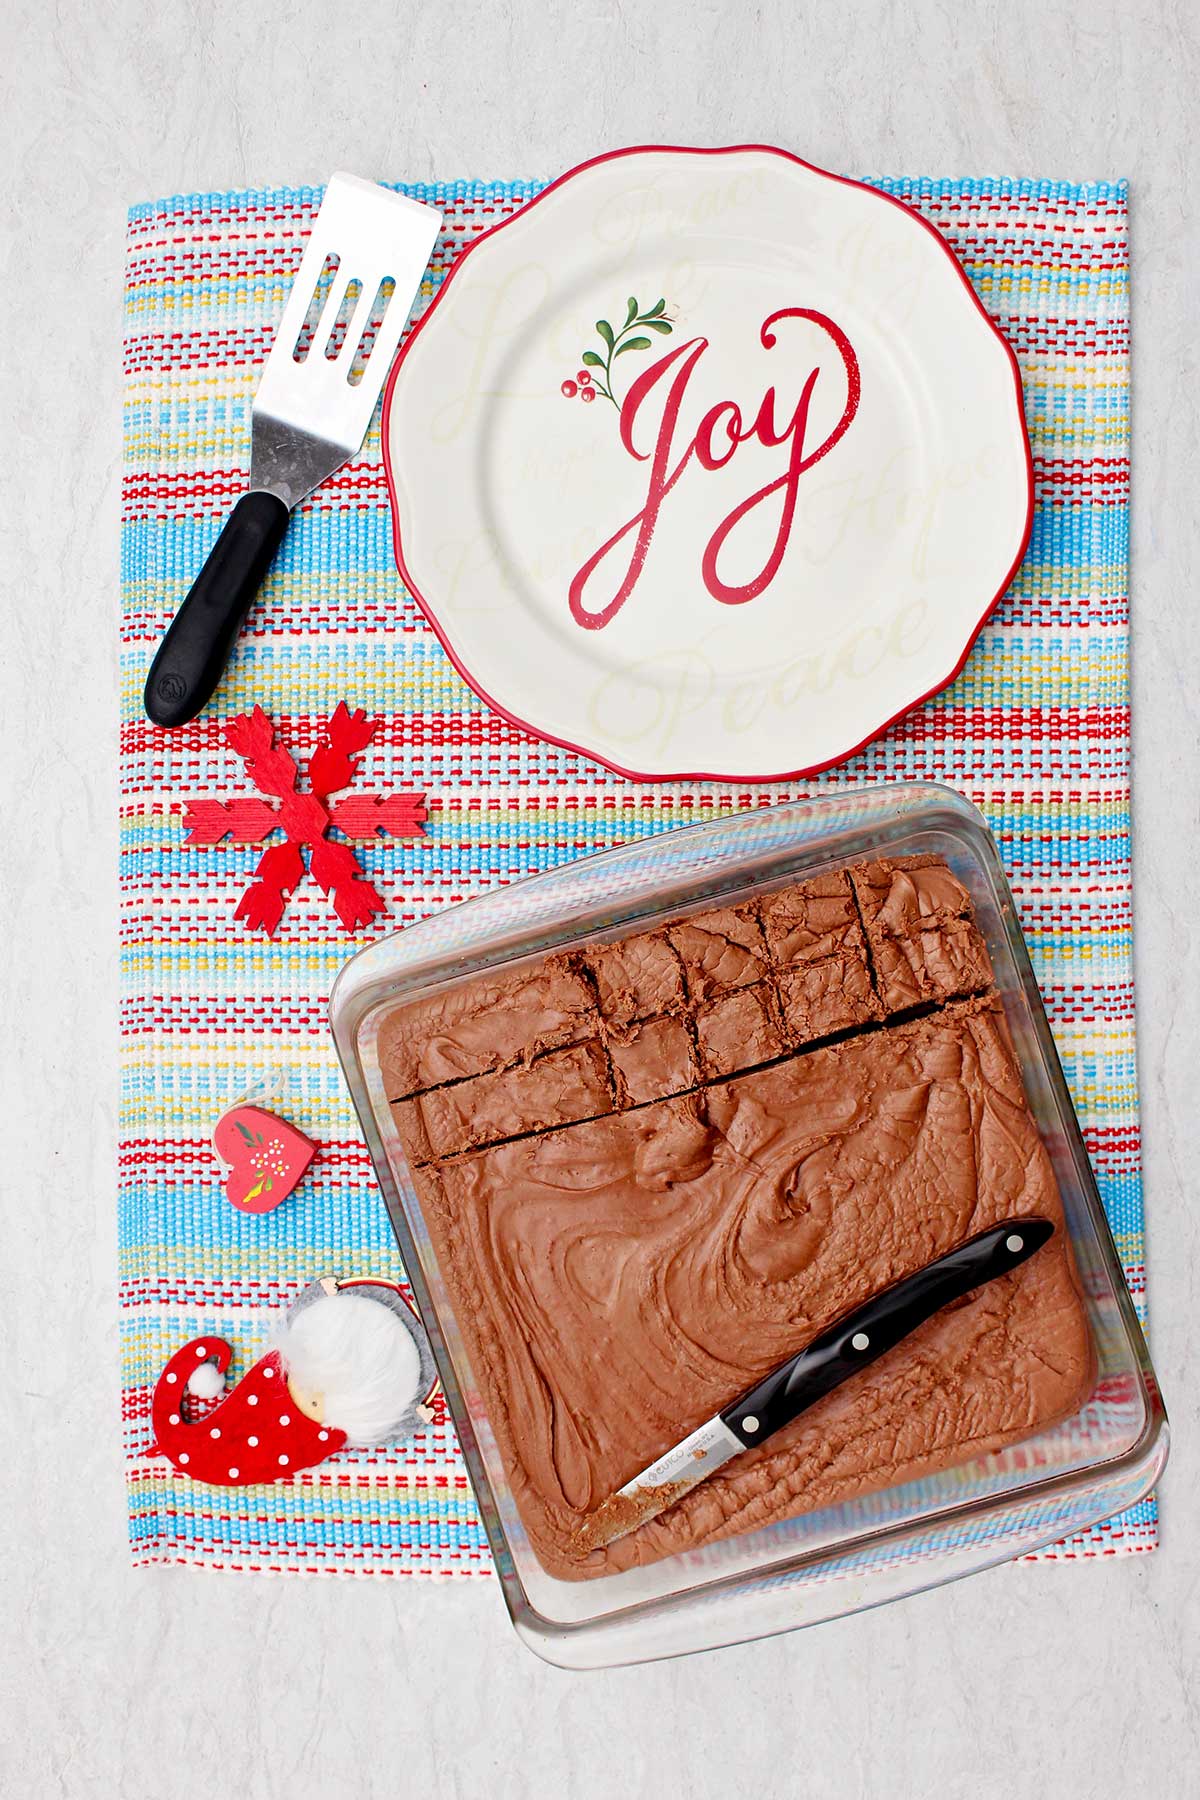
Cut the block of fudge into rows, then slice the rows in the opposite direction to form your squares.
A one-inch square is a traditional dimension (illustrated in the images) for a confection this indulgent, but ultimately it’s your choice.
Conclusion– This is the Ultimate Chocolate Fudge!
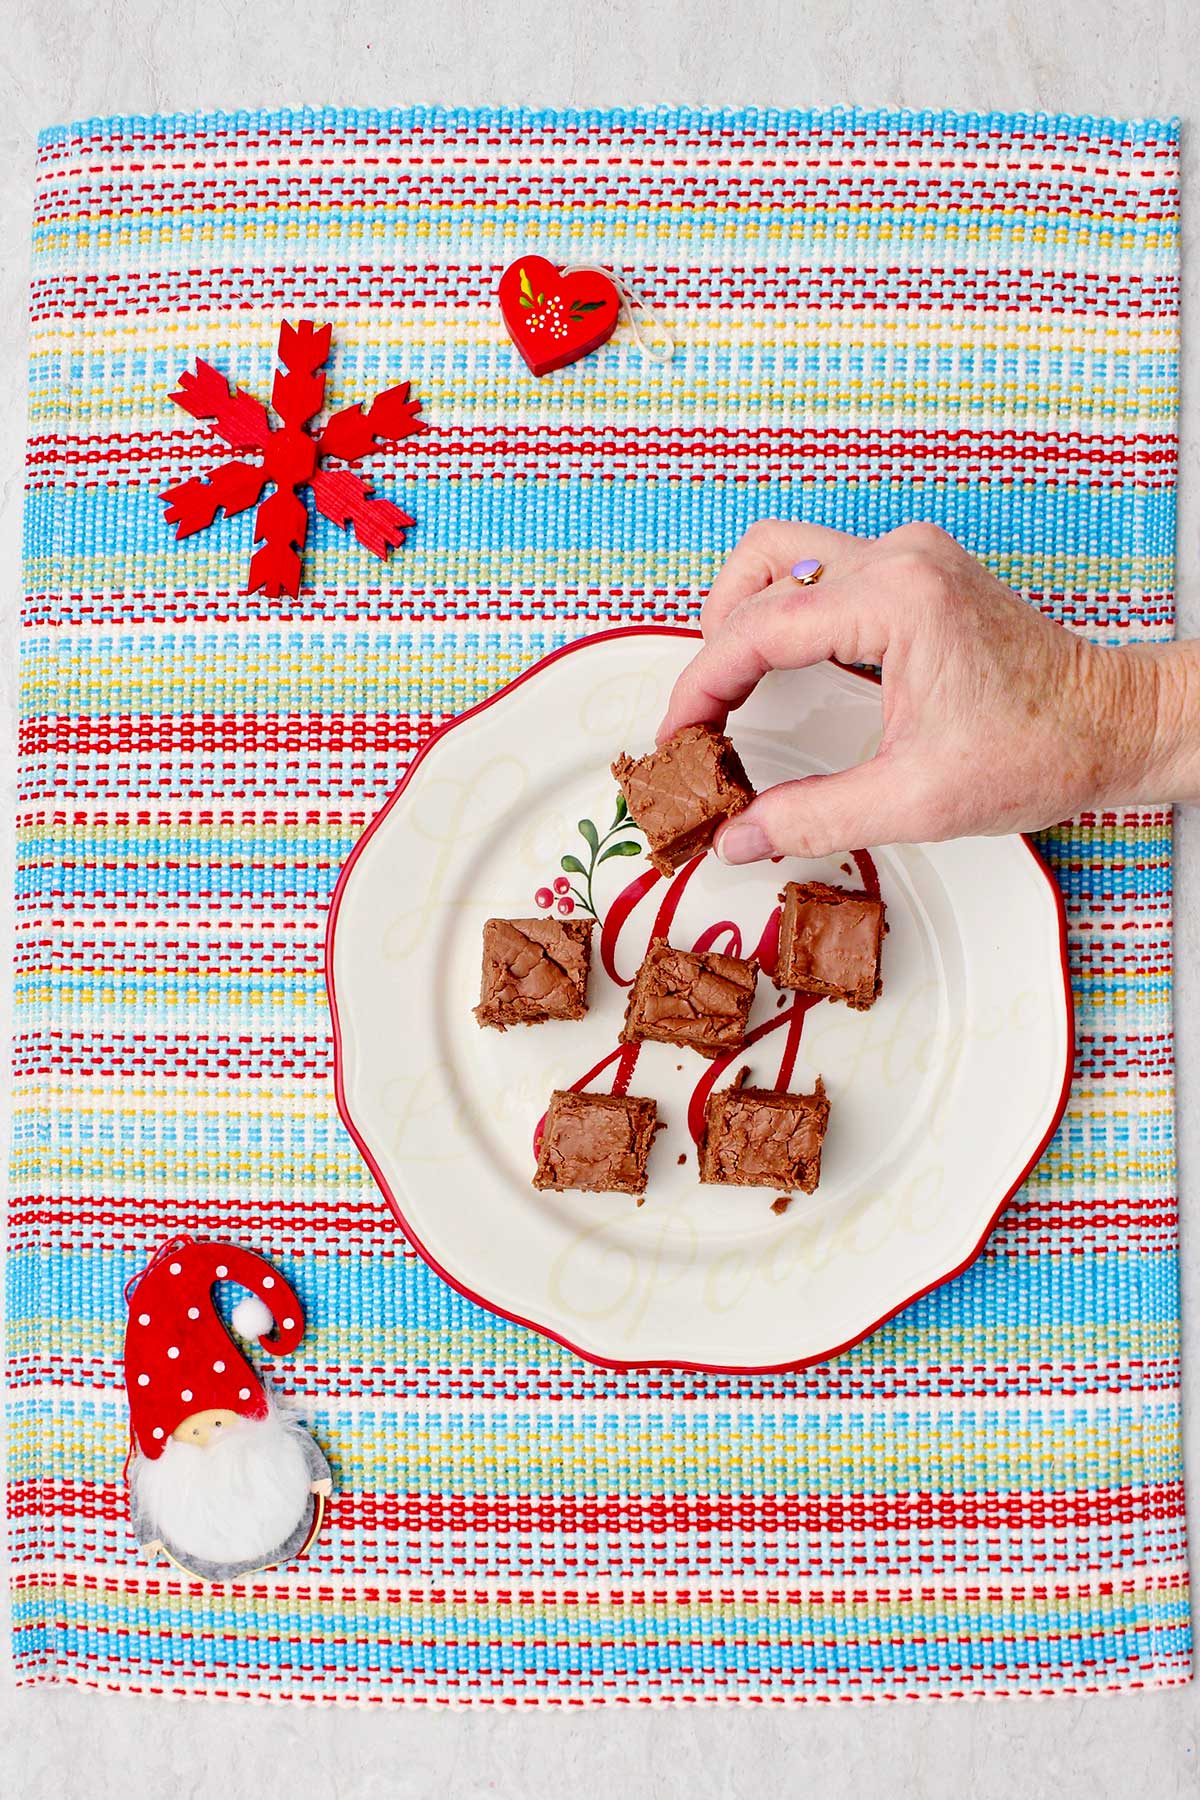
So there it is. Just look at that fudge piece. The consistency is velvety, it dissolves in your mouth, and the chocolate essence is intense and profound. Not a trace of grittiness, merely pure, luscious fudge delight.
This recipe demonstrates that you don’t have to be a candy-making expert to whip up an amazing chocolate fudge recipe at home. The recipe yields a large batch of about 3 pounds, making it ideal for festive gifts, gatherings, or simply for stowing away in a sealed container for whenever you crave a treat. It will keep for a week or two at room temperature, but it likely won’t last that long.
Additionally, I freeze my fudge and it remains scrumptious. Ensure that the container is sealed tight and place waxed paper between the layers to prevent them from sticking together.
Your Elegant Fudge Recipe Outcomes & Suggestions
I’m eager to hear your thoughts! This recipe serves as a fantastic foundation for numerous variations. If you try this, what would you incorporate? Are you a fan of classic walnuts, or would you experiment with pecans or dried cherries? Share your inventive suggestions in the comments below.
Recipe Suggestions for Effortless Fudge Making
These guidelines can facilitate the process of making fudge even more straightforward!
This is a recipe suitable for older kids to attempt, with adult supervision necessary at all times.
Thoroughly read through all the instructions and assemble all ingredients and tools before beginning. This step is crucial.
Have the chocolate chips, marshmallow creme, and vanilla alongside measuring tools and hot pads near the stove. This way, you can seamlessly stir in these elements as soon as the liquid mixture attains the correct temperature. It’s not the time to search for them or the measuring tools.
Line the baking pan with parchment paper for easy removal of the fudge.
Opt for a wooden spoon—wood doesn’t become hot while stirring as the ingredients warm.
Desire those sharp, clean, professional-looking squares? Here’s the best technique: pick up a long, sharp knife. Prior to each long slice, run the blade under very hot water for a few seconds, then swiftly wipe it dry. The hot, dry blade will slice right through the fudge, avoiding dragging or crumbling.
Allow the fudge to cool completely before cutting.
Recipe Variations for Homemade Fudge
Here are several alternatives you might want to explore with this homemade fudge recipe:
Substitute milk chocolate chips or dark chocolate chips for a different flavor and texture in the fudge.
Incorporate nuts or adorn the fudge with nuts or sprinkles for a playful touch.
Utilize a 9×13 inch baking dish for fudge that is less thick.
Cut the fudge into diamond-shaped squares by making diagonal slices instead of straight cuts.
Use cookie cutters to shape the fudge (in the 9×13 inch pan) and enjoy the leftover pieces!
FAQ On Never Fail Chocolate Fudge Recipe
What ingredients are used in fudge?
This recipe incorporates evaporated milk, butter, sugar, semi-sweet chocolate chips, marshmallow creme, and vanilla. Nuts are optional but delightfully good. The quantities are specified in the recipe.
How can I easily prepare fudge?
Make sure to collect all ingredients and tools prior to beginning. Review all the directions initially so there are no unexpected issues. This is a straightforward recipe with simple
step-by-step instructions. You can achieve it!
What is the secret to preparing fudge?
There are multiple secrets. Utilize a thermometer and heat the blend to the specified temperature for the correct texture. An additional tip is to use marshmallow creme to maintain smaller sugar crystals, resulting in a smooth texture. Avoid excessive stirring at the finish, or the fudge may become gritty. Ensure all tools and ingredients are ready beforehand to prevent interruptions during the recipe steps—this stops it from setting while you’re away.
Why does fudge not succeed?
Incorrect temperature during the heating of the sugar mixture, lack of ingredients that hinder crystal formation leading to grittiness, over-stirring at the end, or needing to pause to fetch missing ingredients. These factors can be mitigated by adhering to the step-by-step guidelines provided in this recipe post.
What are frequent fudge-making errors?
Incorrect temperature during the heating of the sugar mixture, lack of ingredients that hinder crystal formation leading to grittiness, over-stirring at the end, or needing to pause to fetch missing ingredients. These pitfalls can be sidestepped by following the step-by-step guidelines detailed in this recipe post.
Additional Christmas Recipes for Children
Searching for more simple Christmas recipes to experiment with? Here are several of our recommended choices:
Join the celebration at WTN!
If you found this foolproof recipe enjoyable, make sure to subscribe. I have numerous more easy Christmas recipes and crafts that will be sent to you in a weekly email (and a complimentary gift awaits you).
Thank you immensely for being here. Now, go and create a batch of this truly remarkable fudge. You can accomplish it!
Try this craft, leave feedback, rate it, and tag a photo with #WelcometoNanas wherever you share.
Amazing Never Fail Chocolate Fudge
Shelly
This Never Fail Chocolate Fudge Recipe produces smooth, creamy, and chocolate-flavored fudge—every—single—time. It’s the sole fudge recipe you’ll ever require. Leave behind grainy, runny fudge mishaps!
Coat a 9×9 inch square dish with cooking spray and set aside.
Mix the evaporated milk, butter, and sugar in a 3 quart saucepan.
Heat the mixture to a complete rolling boil, stirring continuously.
Insert a candy thermometer on the side of the pot with the bulb submerged in the mixture.
Boil until the temperature hits 234 degrees, stirring persistently.
Remove the pot from the stove and place it on a hot pad.
Add the chocolate morsels and mix until dissolved.
Incorporate the marshmallow fluff and vanilla essence and mix until unified.
Include the nuts (optional) and blend in.
Transfer the combination into the 9×9 inch or 9×13 inch baking dish.
Allow to cool, slice into squares and store in a sealed container.
This yields approximately 3 pounds of fudge.
Notes
There are many suggestions for creating fudge on the article found at: https://welcometonanas.com/never-fail-chocolate-fudge-recipe/ The culinary science behind the procedures in the recipe is quite fascinating and is interspersed throughout the article.
Keyword best fudge, choc fudge, choc fudge recipe, chocolate fudge recipe, easy fudge recipe, simple to make fudge, gourmet fudge recipe, fantasy fudge recipe, fudge recipe, homemade fudge, recipe for crafting fudge, straightforward fudge recipe
This Mod Podge tissue paper frame is budget friendly and only takes a few minutes to make! Kids will love this easy and colorful idea. Wandering throu [...]
Published: Feb 3, 2021 · Modified: Nov 5, 2025 by Shelly · This article may feature affiliate links · 1 Comment Baking with children doesn’t need to b [...]
Do you adore something contemporary and unique but wish to hold onto traditional Easter customs? Then we have just the perfect DIY project for you. Th [...]
What if you could discover How to Illustrate the Grinch Step by Step? I will leverage my extensive drawing background (over 50 years!) to simplify the [...]
This strawberry lemonade cookie instruction yields soft cookies with a vibrant lemon essence in each mouthful. I had not intended to create a strawber [...]
We use cookies on our website to give you the most relevant experience by remembering your preferences and repeat visits. By clicking “Accept”, you consent to the use of ALL the cookies.
This website uses cookies to improve your experience while you navigate through the website. Out of these, the cookies that are categorized as necessary are stored on your browser as they are essential for the working of basic functionalities of the website. We also use third-party cookies that help us analyze and understand how you use this website. These cookies will be stored in your browser only with your consent. You also have the option to opt-out of these cookies. But opting out of some of these cookies may affect your browsing experience.
Necessary cookies are absolutely essential for the website to function properly. These cookies ensure basic functionalities and security features of the website, anonymously.
Cookie
Duration
Description
cookielawinfo-checbox-analytics
11 months
This cookie is set by GDPR Cookie Consent plugin. The cookie is used to store the user consent for the cookies in the category "Analytics".
cookielawinfo-checbox-functional
11 months
The cookie is set by GDPR cookie consent to record the user consent for the cookies in the category "Functional".
cookielawinfo-checbox-others
11 months
This cookie is set by GDPR Cookie Consent plugin. The cookie is used to store the user consent for the cookies in the category "Other.
cookielawinfo-checkbox-necessary
11 months
This cookie is set by GDPR Cookie Consent plugin. The cookies is used to store the user consent for the cookies in the category "Necessary".
cookielawinfo-checkbox-performance
11 months
This cookie is set by GDPR Cookie Consent plugin. The cookie is used to store the user consent for the cookies in the category "Performance".
viewed_cookie_policy
11 months
The cookie is set by the GDPR Cookie Consent plugin and is used to store whether or not user has consented to the use of cookies. It does not store any personal data.
Functional cookies help to perform certain functionalities like sharing the content of the website on social media platforms, collect feedbacks, and other third-party features.
Performance cookies are used to understand and analyze the key performance indexes of the website which helps in delivering a better user experience for the visitors.
Analytical cookies are used to understand how visitors interact with the website. These cookies help provide information on metrics the number of visitors, bounce rate, traffic source, etc.
Advertisement cookies are used to provide visitors with relevant ads and marketing campaigns. These cookies track visitors across websites and collect information to provide customized ads.