In this article, I’ll demonstrate how to execute paper napkin decoupage on a wooden frame utilizing the iron-on technique! This is simple enough for novices.
Skills Required: Beginner. It’s beneficial to have some familiarity with Mod Podge to undertake this project. You’ll be applying it to a frame, followed by ironing a napkin onto it. I’ll guide you through each step.
There are numerous methods to use Mod Podge for adhering paper or fabric to surfaces. One prevalent technique involves applying it directly to a surface, placing the paper or other material down, and allowing it to dry. Following that, apply a top layer of Mod Podge and let it dry once more.
This is the method I most frequently utilize for decoupage on the blog.
However, this approach is more effective for thicker materials and fabrics—not as suitable for thinner substances like tissue paper, napkins, wrapping paper, etc.
These materials tend to crinkle when placed on damp Mod Podge. Occasionally, crafters employ plastic wrap to aid in smoothing, yet thinner items can still rip beneath the plastic wrap without careful handling.
SO, I am genuinely thrilled to introduce you to a technique commonly referred to as the “iron-on method”—in this instance, we’ll be performing paper napkin decoupage on a wooden frame.
This technique, which allows the Mod Podge to dry BEFORE applying the napkin, is a fantastic remedy when you just can’t decoupage your projects without creating wrinkles. When the materials are thinner—this becomes incredibly straightforward.
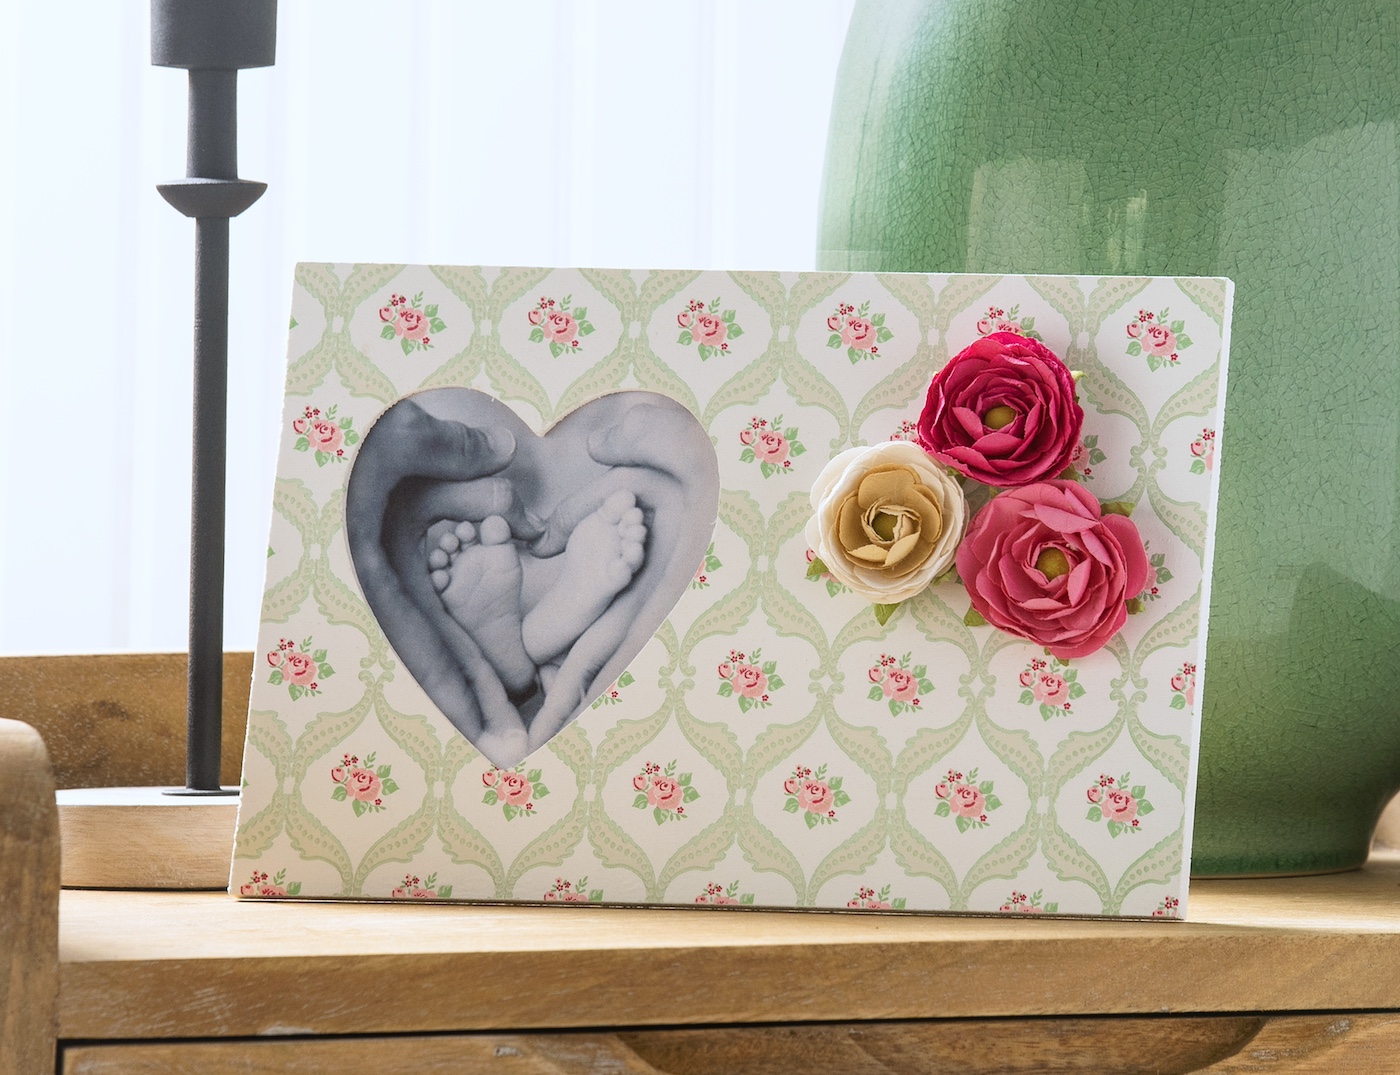
For this paper napkin decoupage, you’ll be painting the wooden frame, applying Mod Podge, and allowing it to dry. Next, you’ll iron on the napkin, activating the Mod Podge beneath. The napkin will stick to the surface.
You may need to practice this approach a couple of times to perfect it, but it’s much simpler than other techniques. Once you see how sleek the surface turns out… you’re going to become addicted.
First, here’s what you’re going to require. Then you can dive straight in and start crafting!
Collect These Materials
- Wooden frame of your preference
- White acrylic paint
- Mod Podge – any variant
- Decorative paper napkin
- Paper flowers
- Craft glue or hot glue
- Mini craft iron
- Parchment paper
- Emery board
Suggestions and Reflections for This Project
You don’t *need* to paint the frame white; however, it accentuates the colors of the napkin. It’s also simple to execute, so I always opt for it. You may use spray paint, but craft paint is more economical and just as quick with a roller.
I didn’t seal the top of the napkins with Mod Podge—it tends to create wrinkles. If you do seal with Mod Podge and the napkins wrinkle, you can place parchment paper on top and iron again.
Obtain the printable instructions for this project below:
Paper Napkin Decoupage
Discover how to decoupage a paper napkin onto a wooden frame using the iron-on technique and Mod Podge.
Prep Time
10 minutes mins
Active Duration1 hour hr
Drying Duration40 minutes mins
Overall Duration1 hour hr 50 minutes mins
Yield: 1 frame
Expense: $2
-
Coat the frame with white craft paint. Apply on one side, allow to dry, and then turn it over. Paint the opposite side and let it dry.
-
Spread a layer of Mod Podge on the wood; avoid the edges. Let it dry for 15-20 minutes and repeat the process.
-
While the Mod Podge dries, peel the napkin from its lower layers. You can use tape to assist. You only need the top layer with the pattern.
-
Place the napkin onto the frame. Cover it with a piece of parchment paper, and glide the craft iron over the top multiple times. During this process, the Mod Podge melts beneath the napkin, allowing it to stick. Continue until the napkin adheres fully, including the edges.
-
Allow the frame to cool after using the iron. Utilize an emery board to gently sand down any surplus napkin. Sanding at an angle works particularly well. Keep going until all excess napkin is gone.
-
Employ craft glue to affix the embellishments. Allow it to dry completely before inserting a photo and showcasing.
If you have any inquiries regarding this method, I’d be eager to hear in the comments! I would also appreciate it if you check out these additional posts: