Frustrated by hair bow disarray? Discover how to create an adorable DIY hair bow organizer that’s charming, straightforward, and ideal for any child’s bedroom. A delightful, practical crafting endeavor! You can also customize it in a matter of minutes.
Proficiency Needed: Advanced Beginner. Familiarity with Mod Podge, hot glue, and die-cut vinyl is essential to accomplish this project.
Let’s discuss the vortex of hair accessories.
You know the one: that enigmatic realm where bows, clips, and elastics vanish without a trace, never to return. You purchased a set of 40 sparkly barrettes last month. How can there be only three remaining—and one of them is hopelessly entwined in the carpet?
If this resonates with you, my friend, it’s time for a chic intervention.
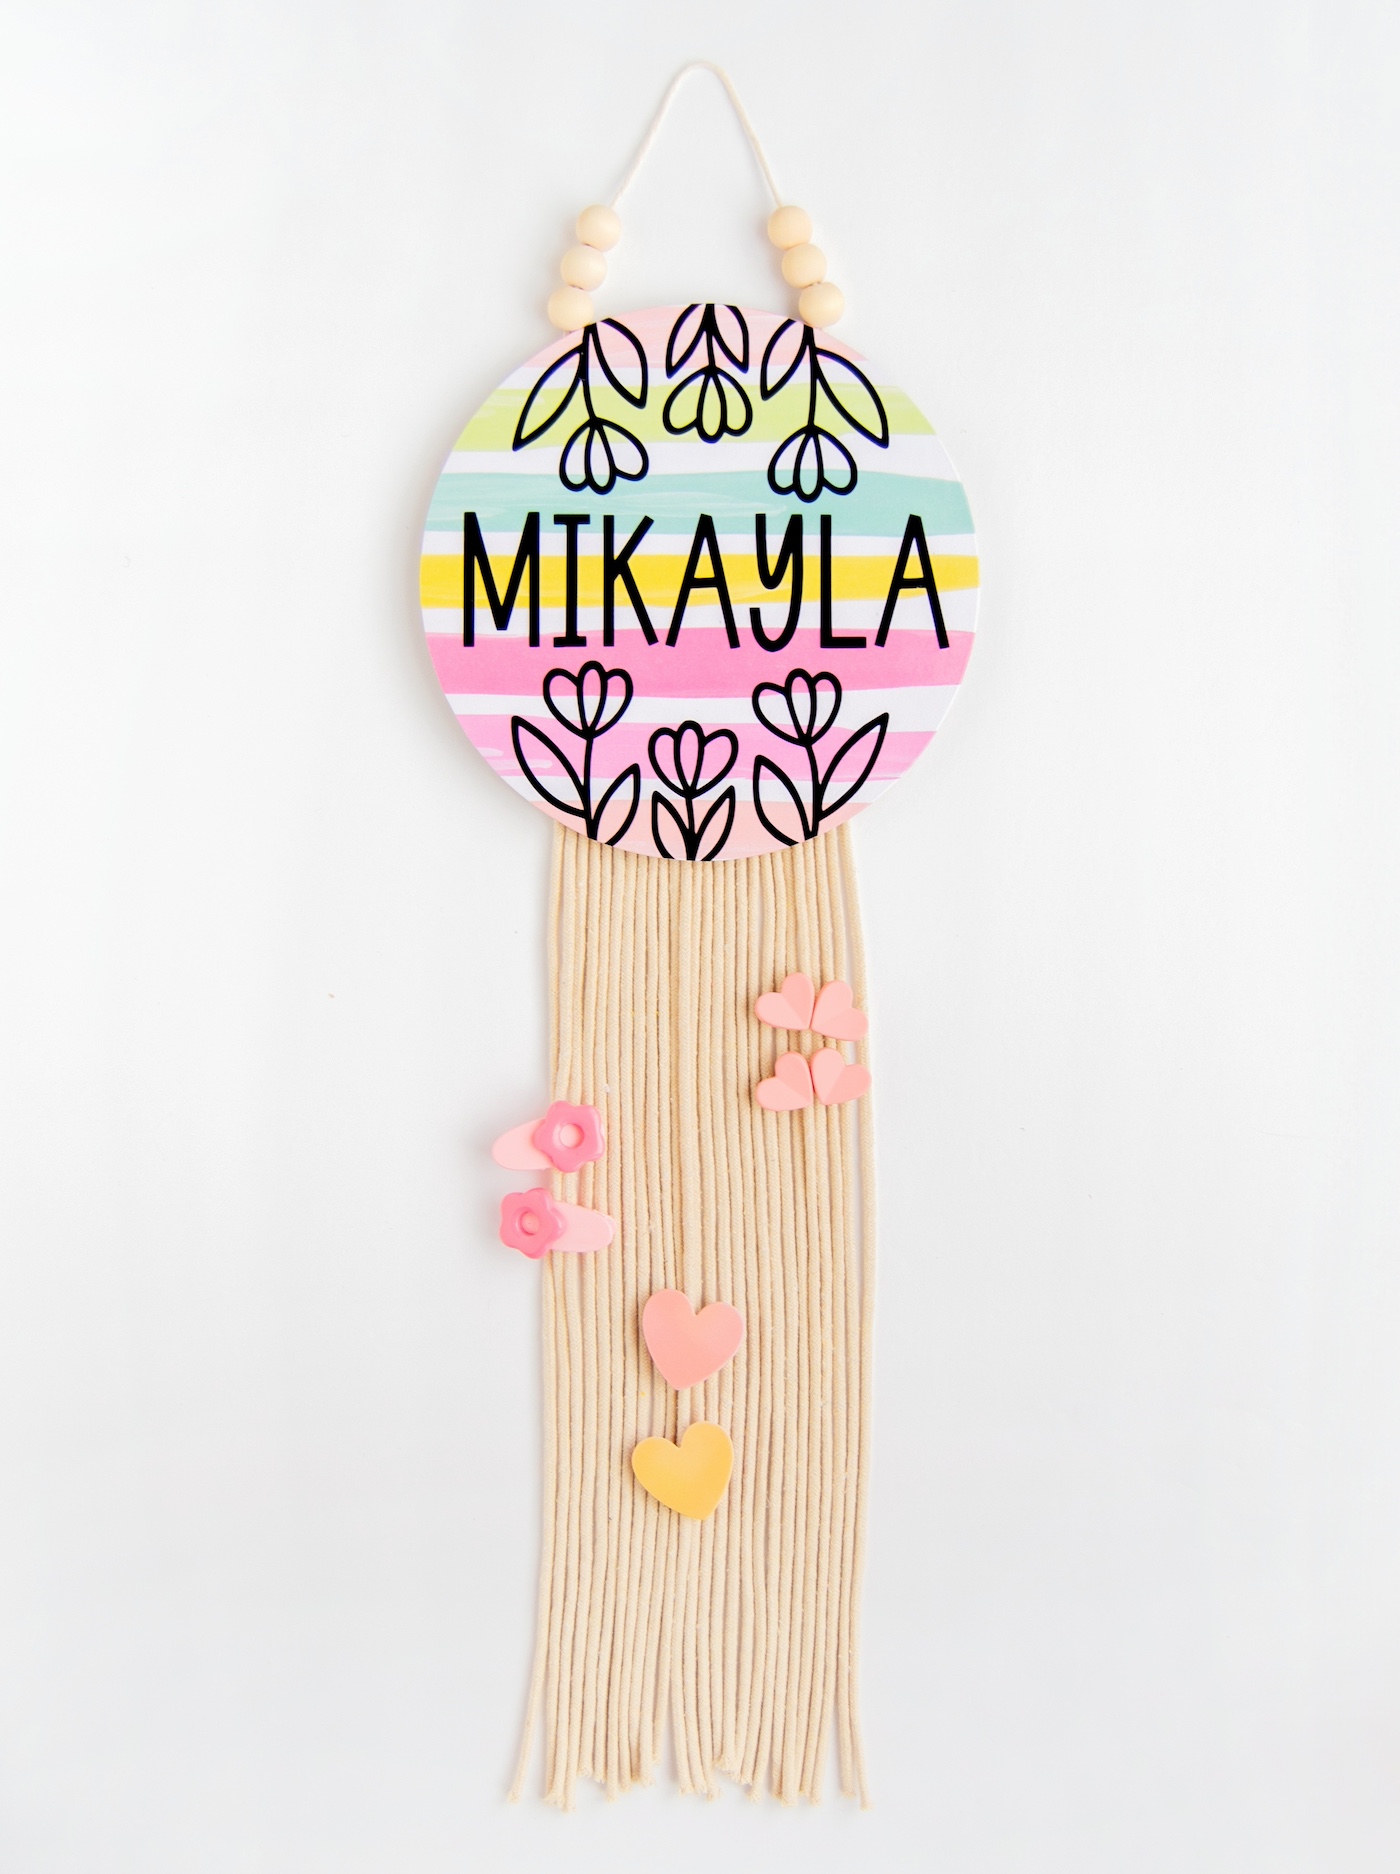
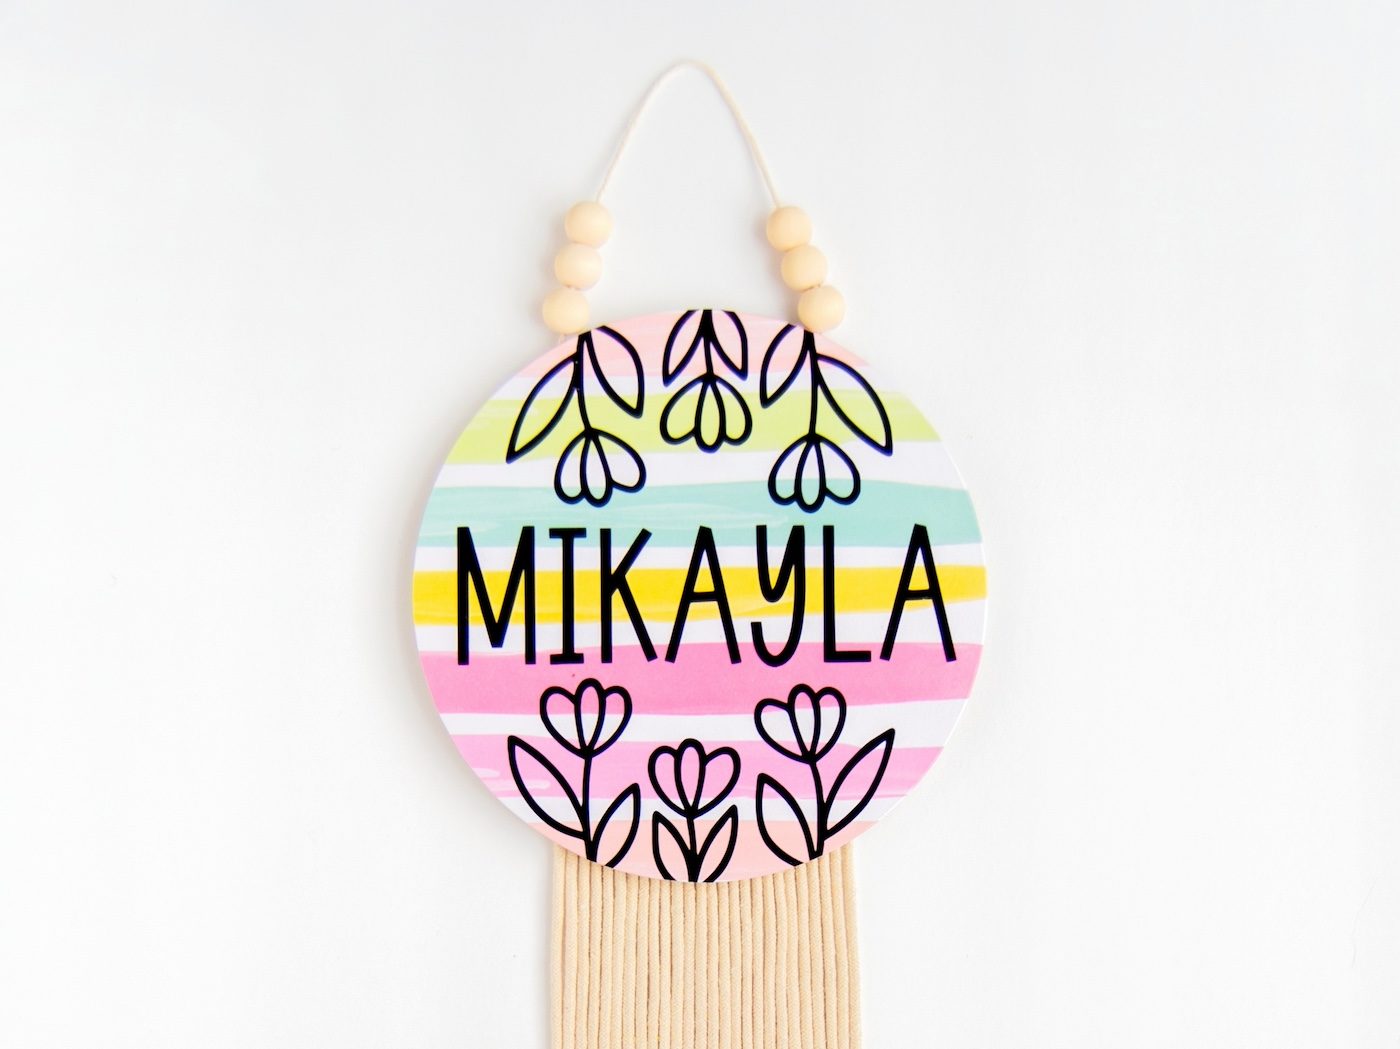
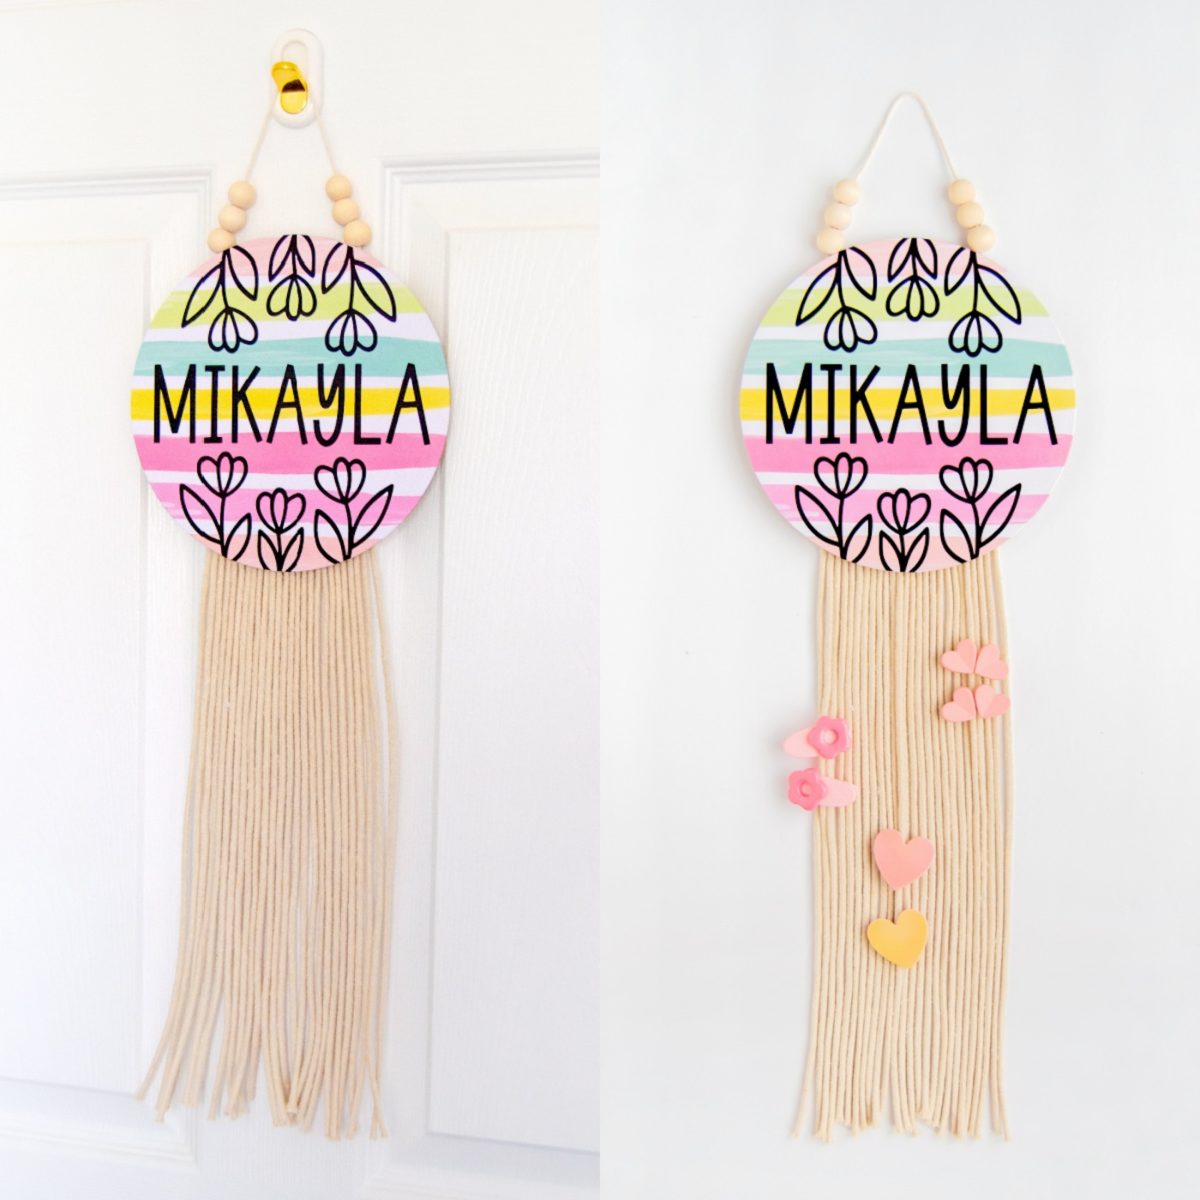
Introducing: the DIY hair bow organizer. She’s adorable, she’s practical, and she’s here to rescue your morning routine (and your peace of mind).
This wooden plaque organizer is a wall-worthy decor solution to the persistent bow disorder—and she’s completely customizable to align with your child’s bedroom, your crafting space, or even a gifting theme.
Reasons to Adore This Project:
- No elaborate equipment necessary. (Unless you consider Mod Podge as equipment, which—let’s be honest—you should.)
- It’s an excellent way to utilize that scrapbooking paper you’ve been stockpiling.
- Don’t have a die cutter? No worries. I’ve got low-tech solutions for the vinyl portion.
- Kids can join the fun—especially if you’re cool with some extra glitter on the floor. #Nostalgia
Expert Advice Before You Begin:
- Select a Mod Podge finish that matches your taste—Matte for rustic aesthetics, Gloss for vibrant and modern, or Sparkle if you think every bow deserves a hint of glitz.
- Opt for macrame cord in shades that coordinate with your child’s style—or let them choose. When they’re engaged, they’re more inclined to use it.
- Want to gift this? Customize it with a name or monogram using vinyl or alphabet stickers.
Have older kids? Teens and preteens can probably create it independently, tailoring the paper and art to be more age-appropriate.
And let’s face it: it feels incredibly gratifying to hang this on the wall and say, “Look? We’re an organized family now.” (Just avoid opening the junk drawer.)
Prepared to eliminate the drawer chaos and show those bows who’s in charge? Let’s get crafting. If you want to utilize our floral designs – the SVG and PNG are available for personal use.
Grab the printable instructions for this simple craft concept below:
DIY Bow Organizer
Discover how to create a DIY bow holder that you can customize with a name! Perfect for a nursery or young girls’ room.
Preparation Duration10 minutes mins
Active Duration50 minutes mins
Drying Duration30 minutes mins
Overall Duration1 hour hr 30 minutes mins
Yield: 1 holder
Expense: $10
- 1 Wooden plaque circular
- 1 sheet Scrapbook paper
- Mod Podge Gloss
- Vinyl
- Transparent transfer tape for vinyl
- Macrame cotton thread
- Fine cotton thread
- 2 Popsicle sticks
- Wooden beads
-
Outline the circle (or any shape of plaque you possess) onto the rear of your preferred scrapbook paper and trim to fit with scissors.
-
Spread a thin but uniform layer of Mod Podge on the surface of your plaque and attach your scrapbook paper. Utilize a squeegee tool to push excess Mod Podge towards the edges of the plaque, ensuring a consistent, smooth surface. Allow it to dry for 15 – 20 minutes.
-
Adjust the floral design and your selected name based on the size of your plaque on your cutting software, and cut. Weed (remove) the surplus vinyl and the insides of the letters along with the floral design.
-
Employ transfer tape to place your vinyl design onto the plaque, ensuring it’s affixed before carefully peeling the transfer tape away. Trim any excess vinyl that extends beyond the edge of your plaque.
-
Spread a light layer of Mod Podge over the vinyl-covered plaque to safeguard the paper and vinyl from becoming stained, scratched, or damaged. Allow to dry.
-
Cut strands of macrame cord measuring 24” long (or shorter if a smaller holder is desired). I cut 13 lengths. Fold them in half and use hot glue to attach them all to a piece of a wide popsicle stick. You may want to trim the ends of the popsicle stick if there’s excess, or if it hangs over the edges of your plaque.
-
Use hot glue to secure the bottom hanger onto the back of the plaque, ensuring it’s centered and aligned straight when viewed from the front side of the plaque.
-
Cut a length of thin cotton thread and tie a knot on each end. You can also opt to add beads for a more bohemian-modern appearance, but you can skip this if you prefer. Use hot glue to attach each end onto one side of a popsicle stick.
-
Use hot glue to affix the hanger onto the rear of the plaque, ensuring it’s centered and straight as per step 7. Allow the hot glue to cool completely before hanging.
No cutting machine? No worries – you may utilize vinyl letters, stickers, or wooden letters from the craft store to incorporate a name onto your hanger.
What are your thoughts on this bow holder? Share with me in the comments! I’d love for you to explore these other entries as well:
Cardboard Letters • Decorative Push Pins • Personalize a Memory Box • DIY Closet Dividers • DIY Photo Mat • DIY Cork Boards • Ice Cream Stick Wall Hanging • Mason Jar Night Light • Mini Plastic Animal Art • Wood Welcome Sign