Craft DIY eerie candle holders using secondhand jars, Mod Podge, and antique photographs. Rapid, simple, and ideal for festive decorations or your Halloween mantel!
Skills Needed: Beginner. You should possess some experience with decoupage if you aim to undertake this project – particularly to avoid creases in the printed images.
I can’t speak for you, but whenever Halloween festivities come to mind, I envision dim lighting. Provide me with flickering candles, eerie shadows, and just a touch of spooky illumination and I’m all in.
So when I unexpectedly found myself hosting an unplanned Halloween gathering (why do we agree to participate in these events so quickly?), I realized I required a rapid centerpiece – urgently.
That’s how these DIY eerie candle holders came into existence.
I ventured to the thrift shop without a definite strategy, ultimately snatching up a few mismatched glass vessels for under a dollar each. I wasn’t sure what I would do with them until an old technique using Mod Podge and antique images came to mind.
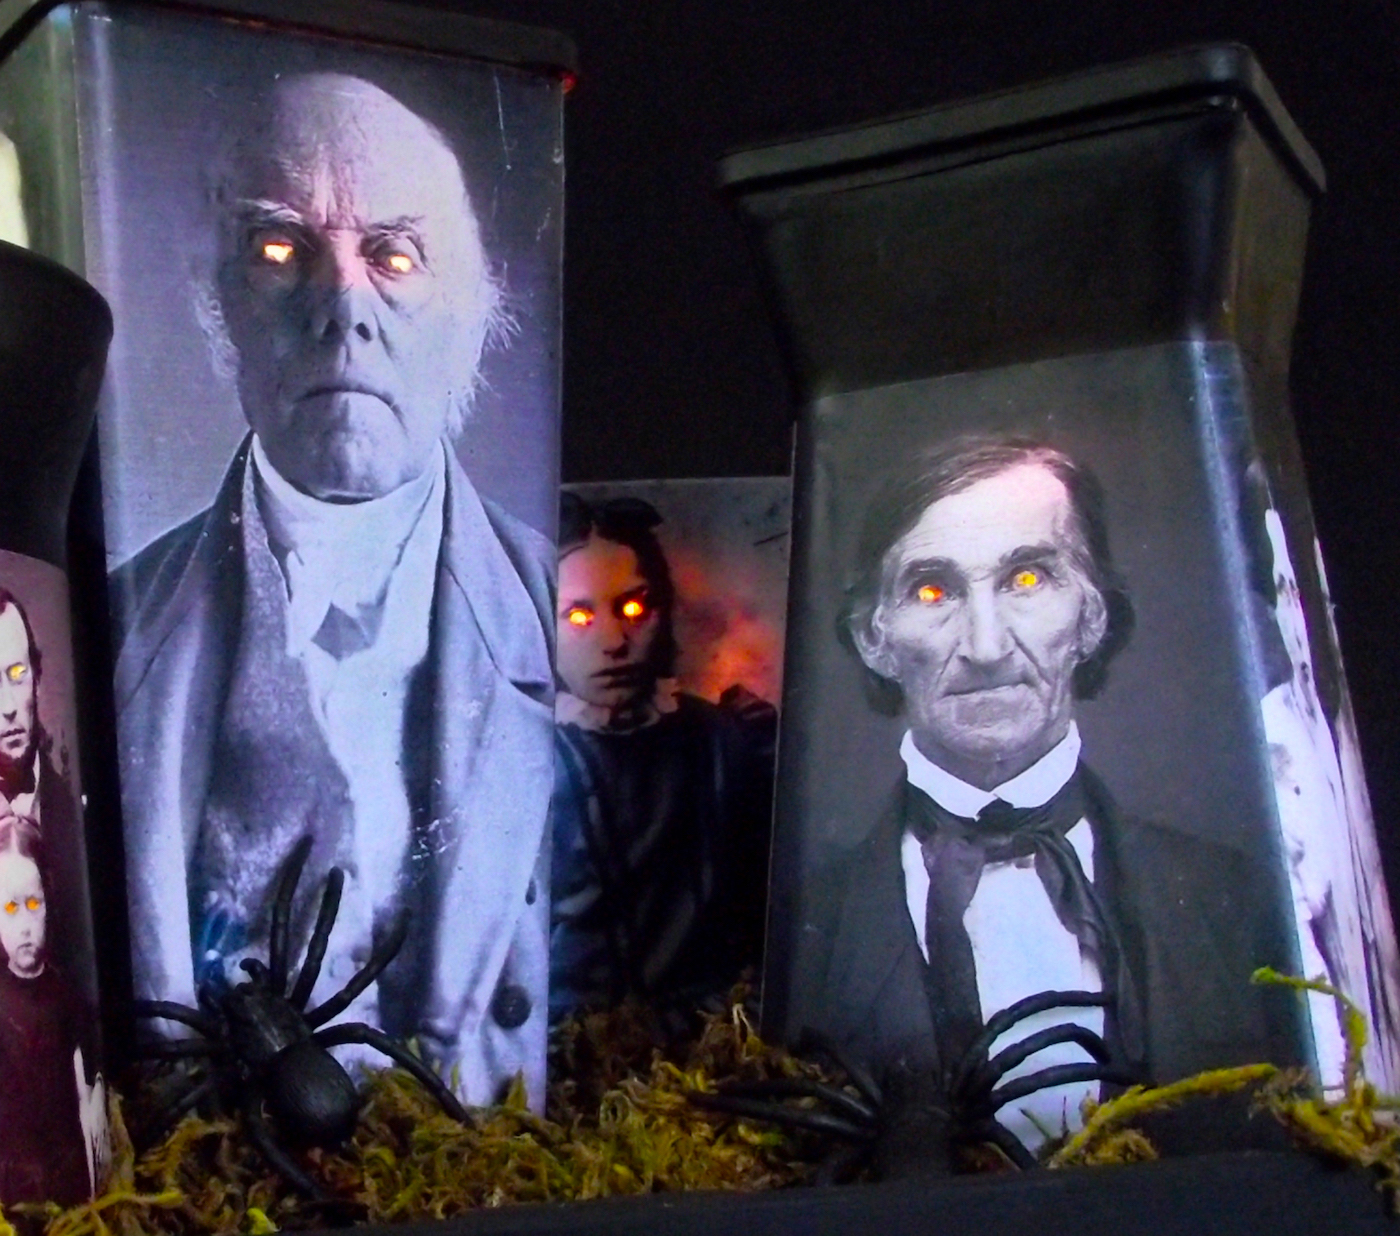
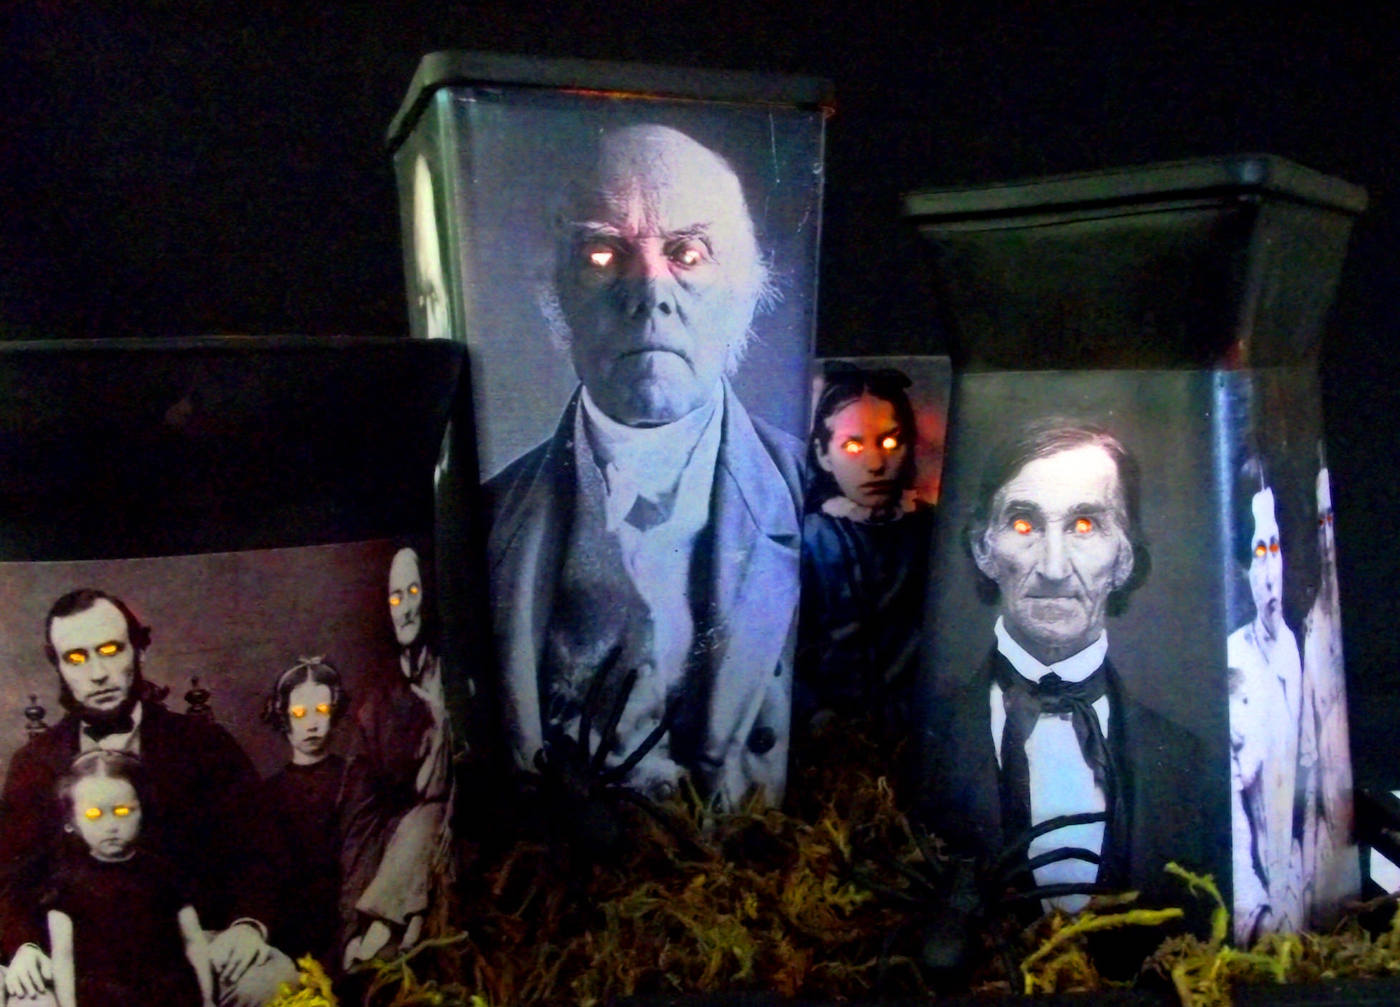
Add a touch of spray paint, drill out some creepy glimmering eyes (apologies, Victorians), and voila . . . instant haunted atmosphere.
What I appreciate about these is how effortlessly they can be customized. You can create an entire collection in one afternoon, and they appear stunning lined up on a table, a mantle, or even nestled into a bookshelf.
And since they utilize electric tealights, they are secure to leave glowing throughout the night.
If you’re seeking rapid Halloween decor with significant eerie charm, and you’re comfortable giving a few antique portraits a haunted transformation . . . this one’s made for you.
Gather These Materials
- Glass jars or vases
- Antique photographs printed on a laser printer
- An awl (I think that’s the precise term – I usually refer to it as “that pointed tool that I’m not sure why I have or where it originated”). A toothpick, craft knife, or anything sharp would suffice
- Black spray paint
- Matte Mod Podge
- Electric tea lights
- Scrap wood
- Paintbrush
- Scissors
I did find that for a few of them, I needed to raise my tealight slightly to achieve the optimal glowing eye effect – a piece of wood did the trick (painted black, naturally).
Now I simply require a few additional items, some atmospheric lighting, snacks . . . oh! and a costume. Then I’m ready to go!
Retrieve the printable how-to card for this Halloween craft suitable for adults below:
Eerie Candle Holders
Discover how to create candle holders using spooky antique photos and Mod Podge! Create these for a Halloween mantle.
Preparation Duration45 minutes
mins
Active Duration2 hours hrs 45 minutes mins
Dry Duration2 hours hrs
Overall Duration5 hours hrs 30 minutes mins
Yield: 4 holders
Expense: $15
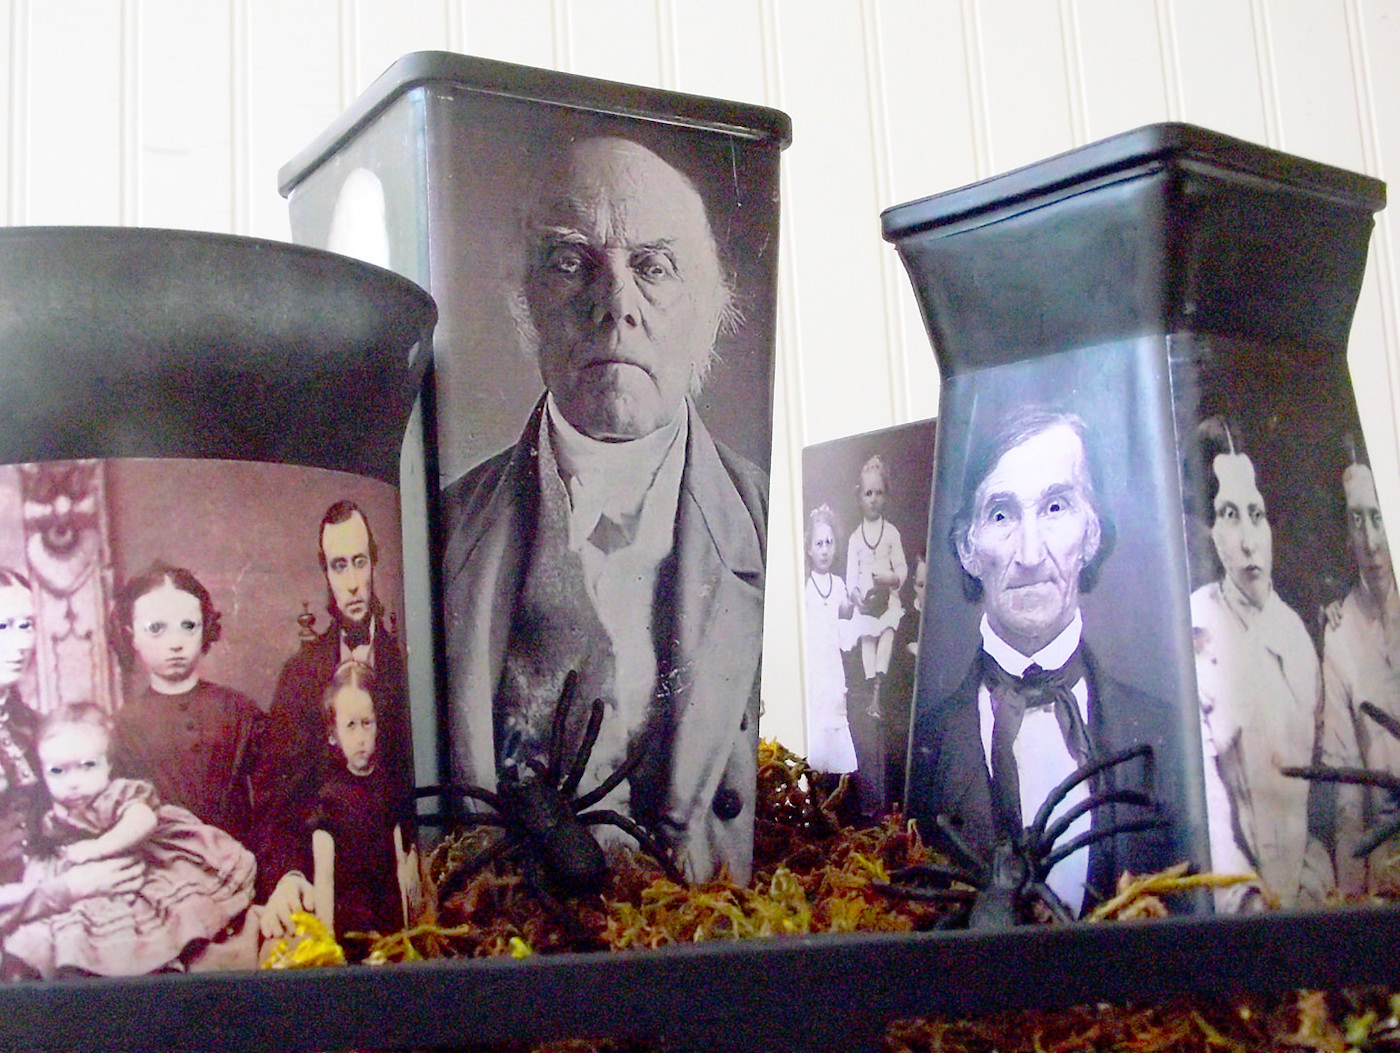
Select four jars of different sizes and designs. Clean with gentle soap and water or rubbing alcohol, then allow them to air dry.
Apply a layer of black spray paint on each glass jar and let it dry.
Find vintage images suitable for the jars and adjust their size accordingly. Print them out and trim using scissors to fit the containers.
Prior to affixing the images to the jars, utilize an awl to puncture the eyes.
Utilize Mod Podge to secure the photographs to the candle holders. Apply Mod Podge on the jar, a thin layer on the back of the image, and press them together smoothly. Repeat until all holders are covered and allow to dry.
Use the awl to tidy up the eye sockets of each picture, simultaneously scraping off the paint underneath so that the light can pass through.
Coat each container with Mod Podge and allow to dry thoroughly before usage.
Step 3: A quick search on Google for “spooky Victorian images” quickly yielded numerous options. I downloaded a decent range and resized them to fit my jars.
I then printed them with a laser printer to prevent bleeding when applying Mod Podge. This involved some measuring and trimming, but it was a swift task.
Step 4: My sincerest apologies to the Victorian individuals in these pictures for poking out their eyes. I’m sure you were delightful people and it’s merely the lengthy exposure periods and a significant lack of moisturizer that results in your rather intimidating appearance today.
Step 5: To maintain a smooth process, I focused on one side of each jar at a time. By the time I finished the fourth jar, the first one was sufficiently dry to work on another side without risking damage to the previously completed part.
-
- If you’re pressed for time, opt for straight-sided jars. I personally appreciate the tapered shapes I selected, but shaping them to fit did slow me down a bit.
- Glass jars are convenient because of the variety in sizes and designs, but you can also use PVC pipes, cardboard tubes – virtually anything.
- I believe electric lights are essential for this project. Not because of any fire risk or heat danger, but simply because you won’t have to worry about them as the night progresses.
- For the best glowing eye effect, try to ensure all the eyes are aligned at roughly the same height for each jar. I got fortunate and accomplished this by accident. If you have some images with the eyes lower and some with them higher, they won’t gleam evenly.
Wishing everyone a fantastic Halloween! Please share your thoughts on this concept in the comments. I’d also appreciate it if you checked out these other posts:
BOO Letters • Button Art • Cheesecloth Ghost • Coffin Tray • Decorating Wood Cutouts • Decorative Blocks • DIY Wreath • Dollar Tree Wood Pumpkin • Door Hangers • Mason Jar Lanterns • Mummy Luminaries • Paper Cones • Potion Bottles • Spooky Pumpkins • Wall Decor • Window Art • Witch Hat Garland